The first few seconds may render in low quality. Please give them a few seconds to render.
The Basics
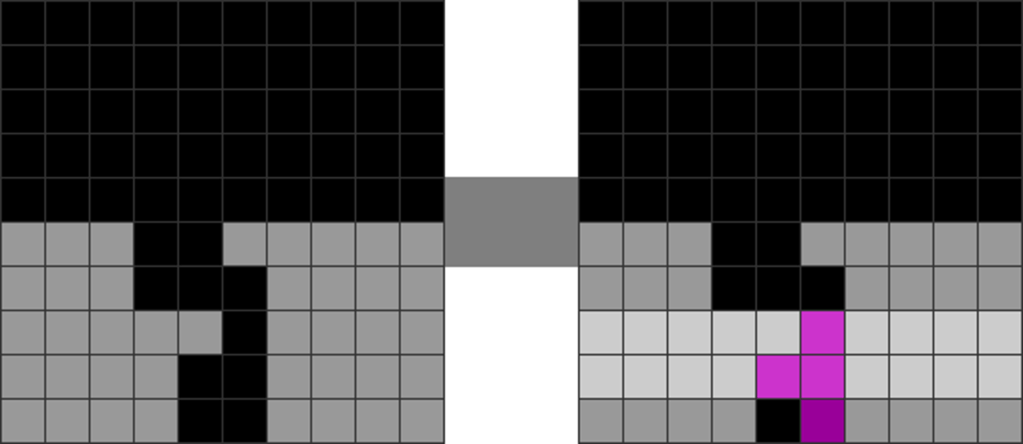
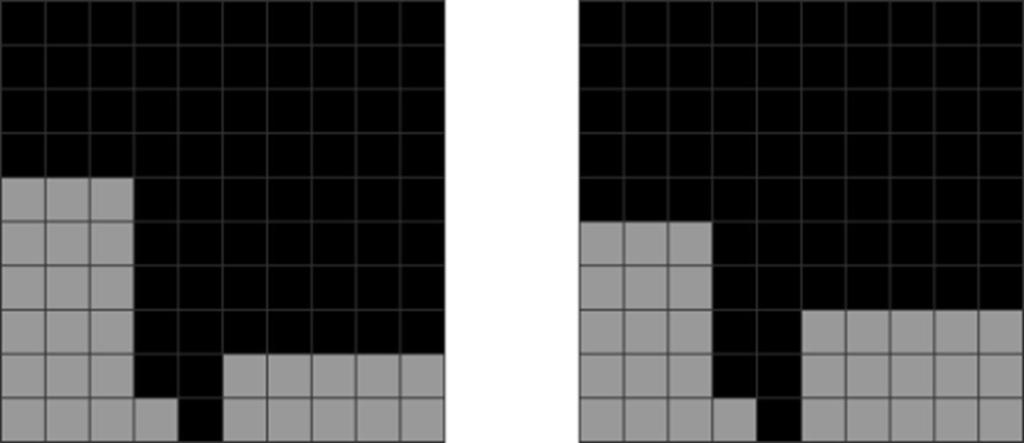
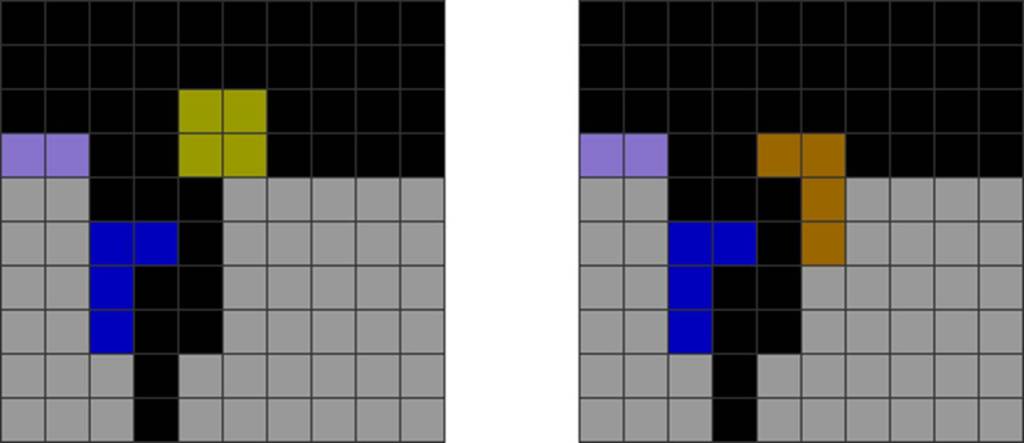
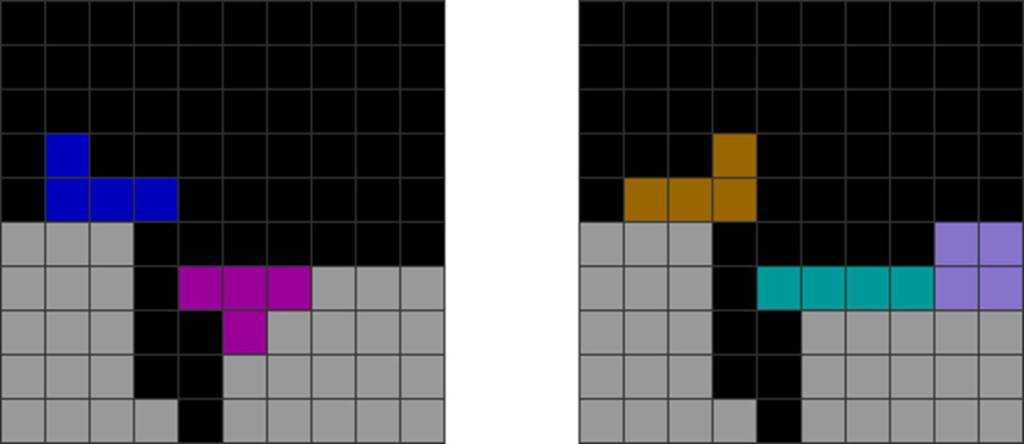
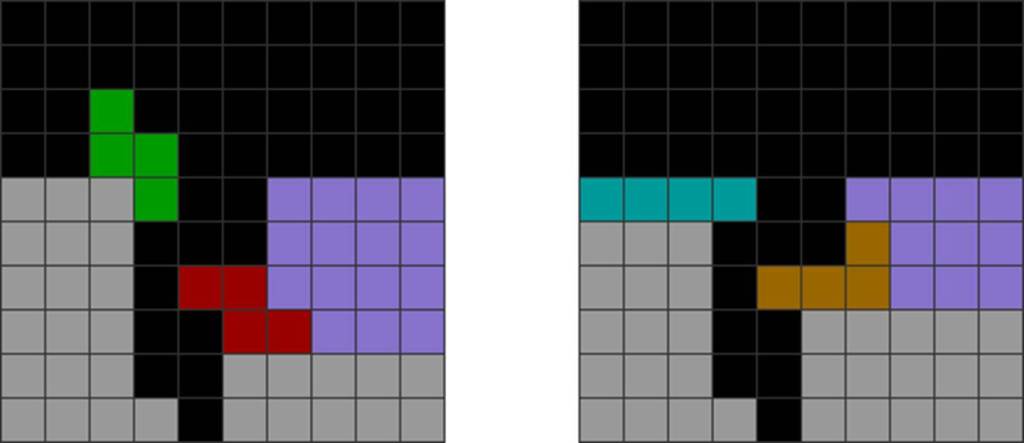
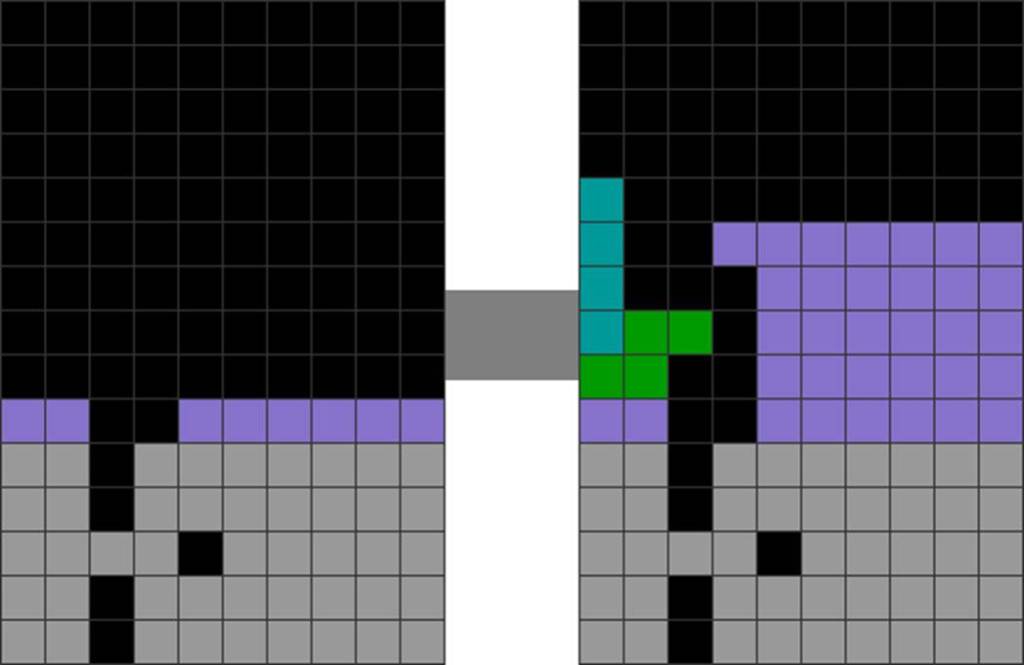
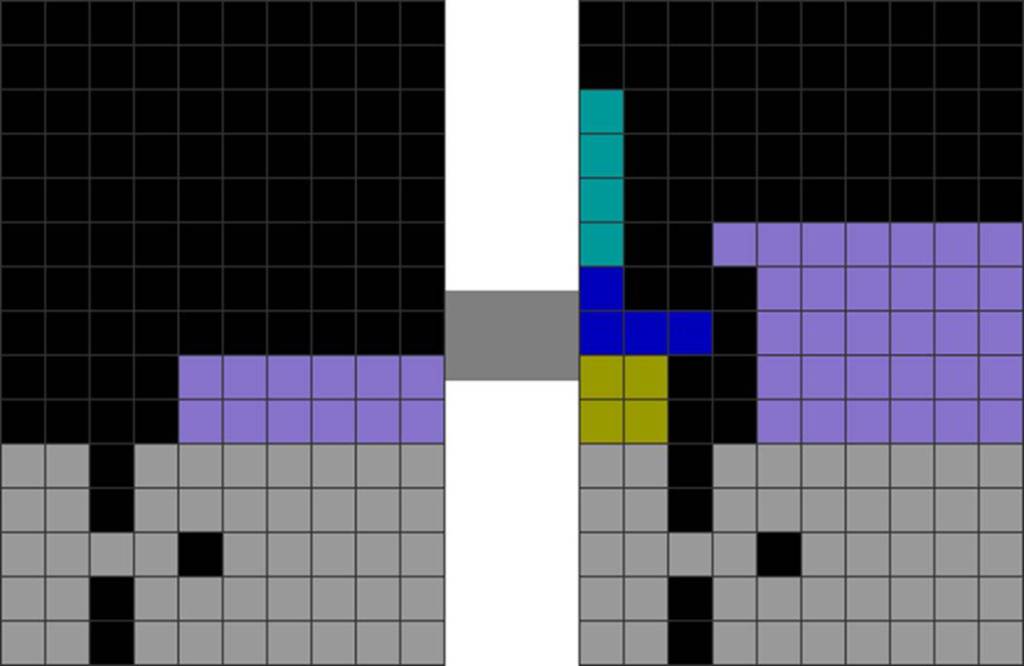
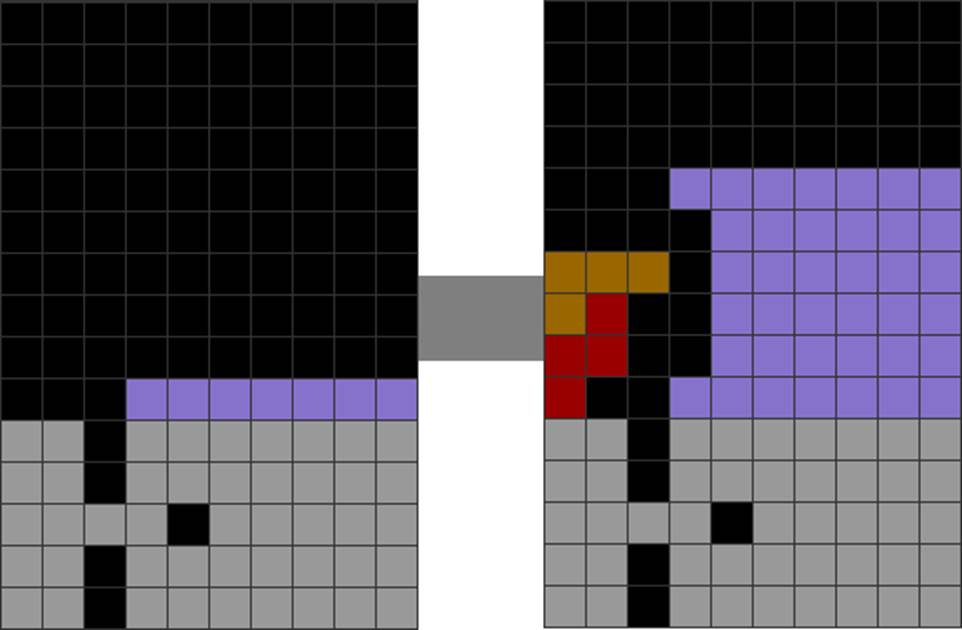
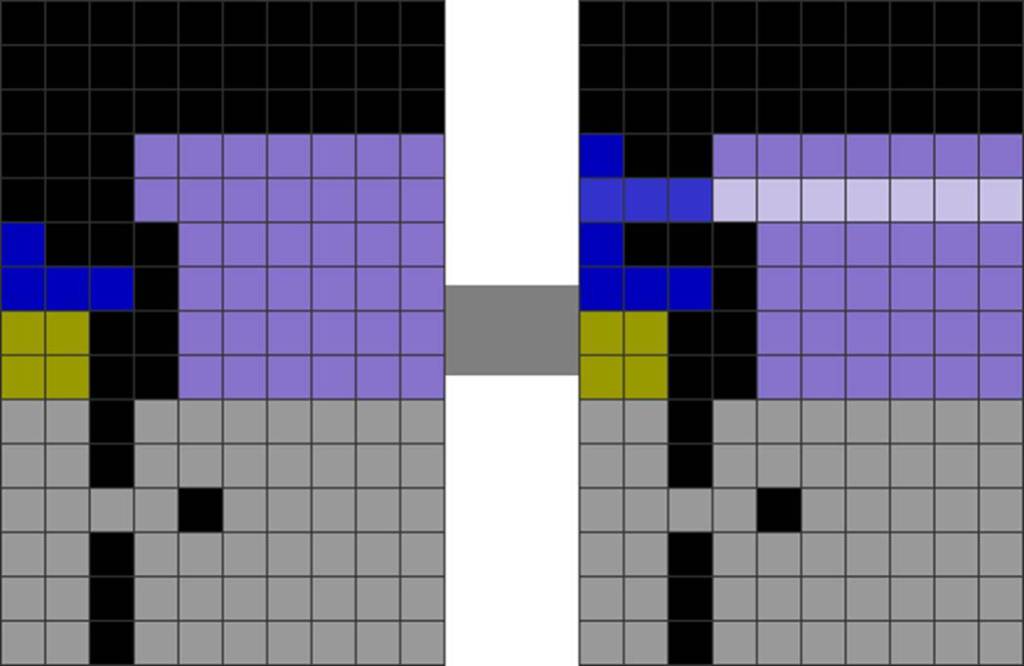
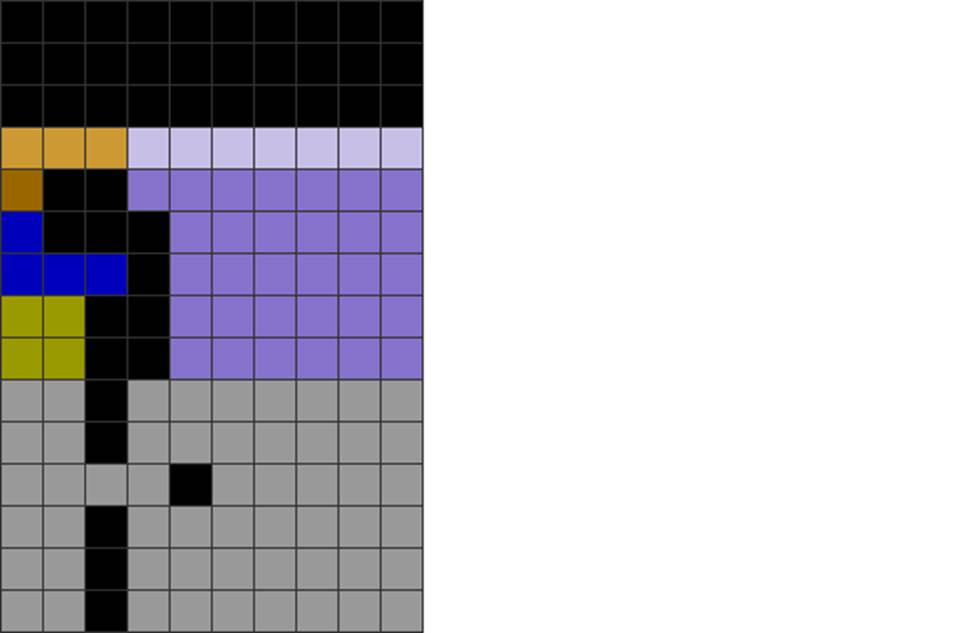
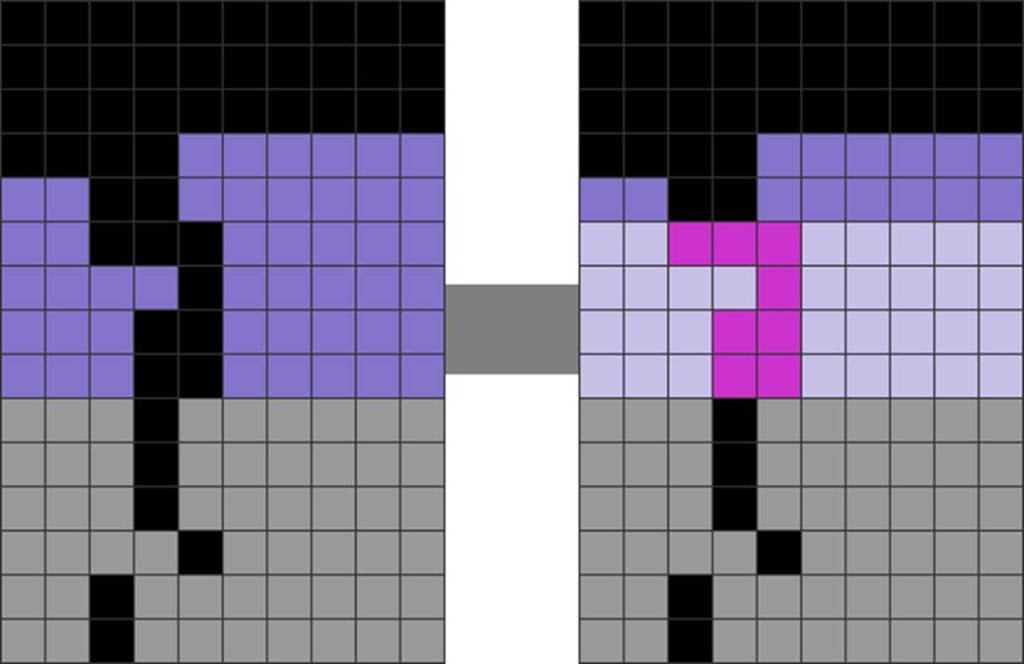
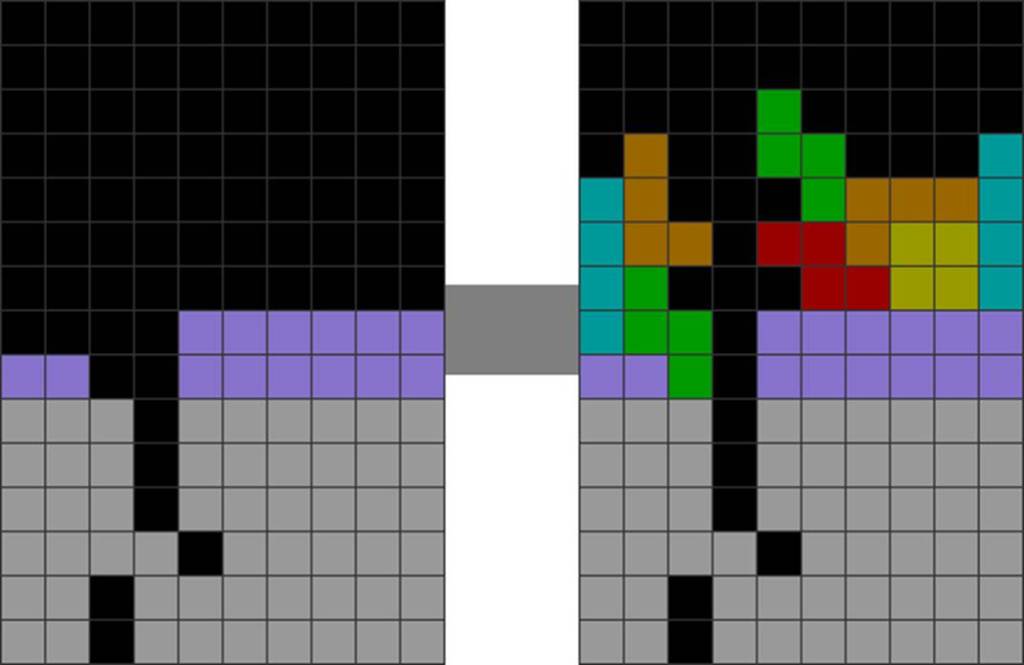
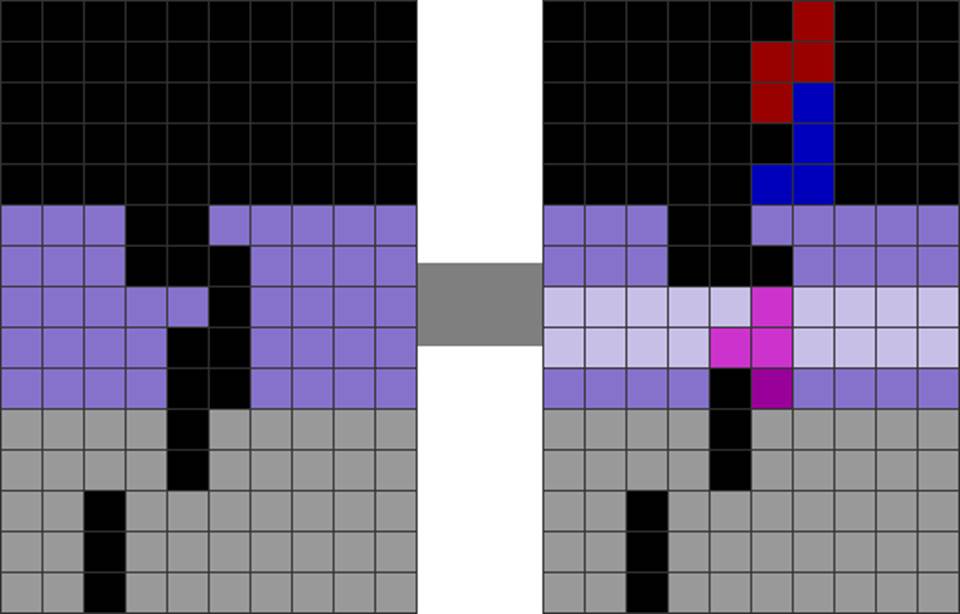
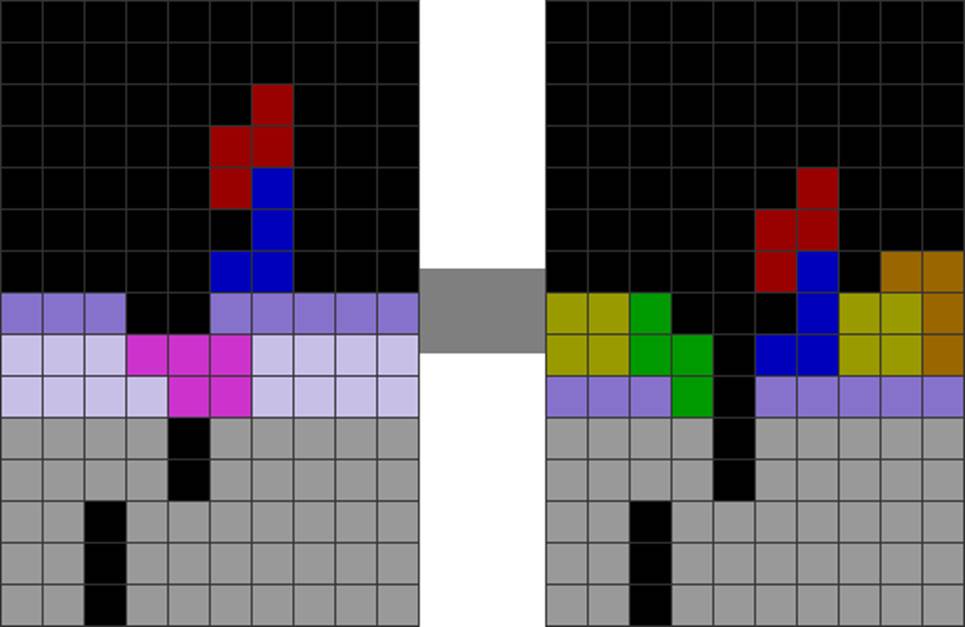
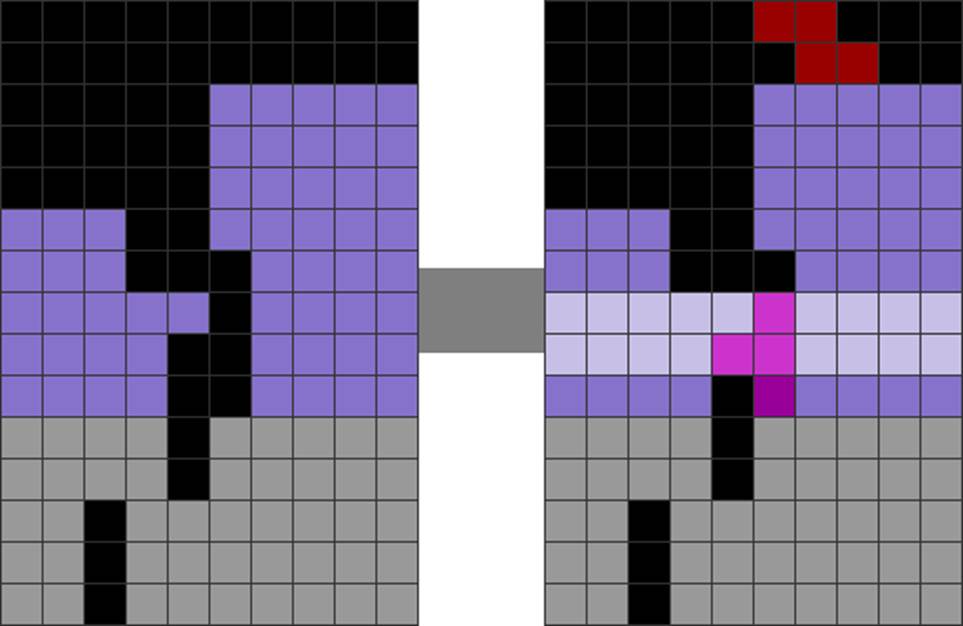
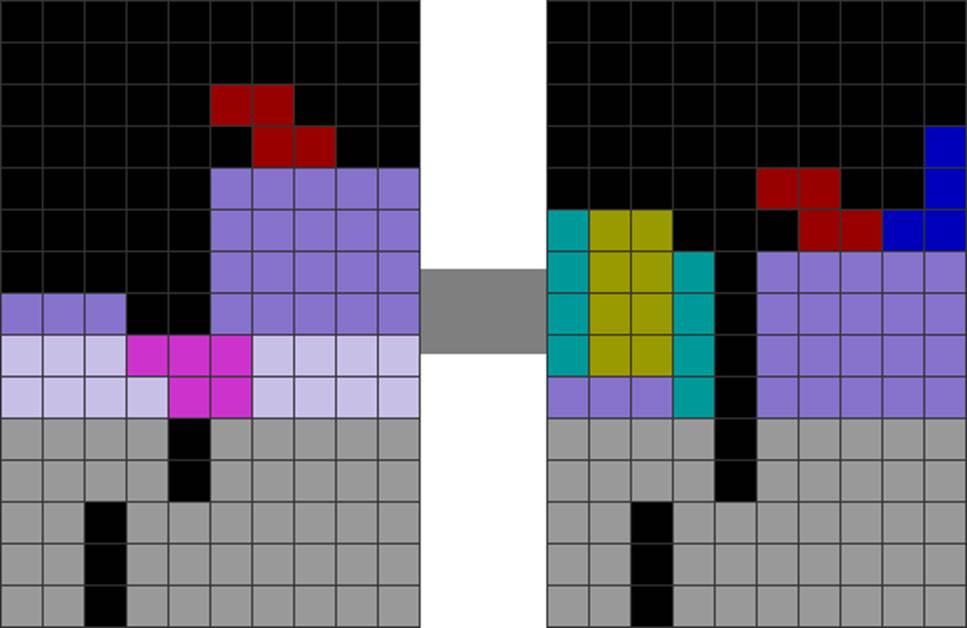
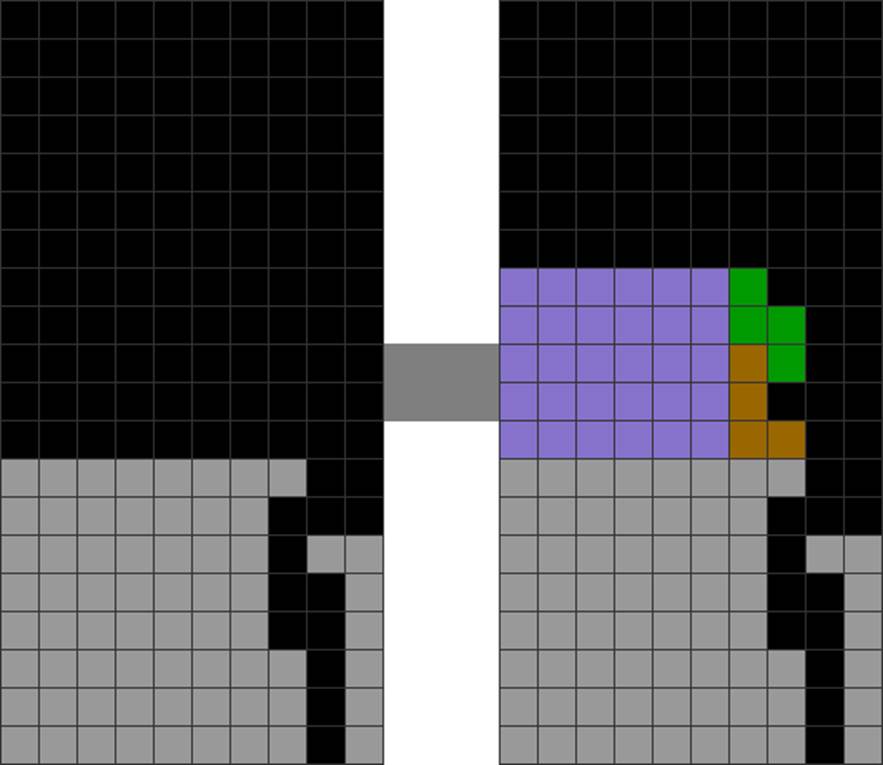
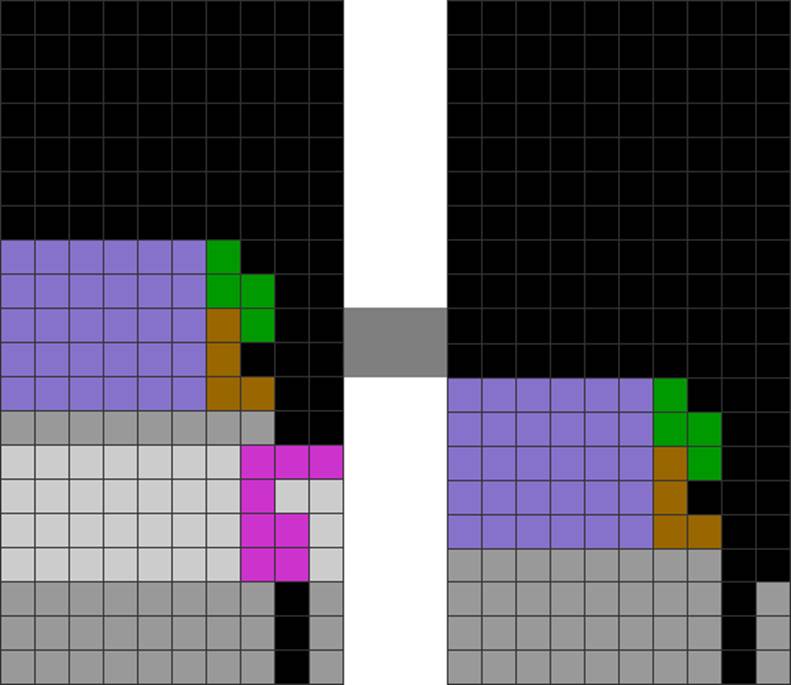
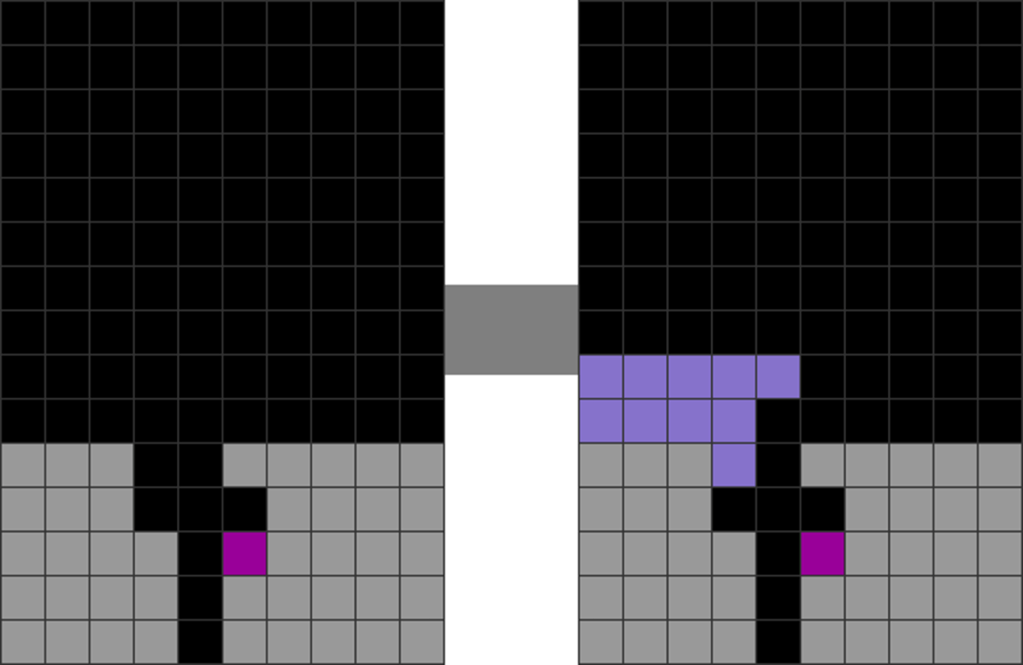
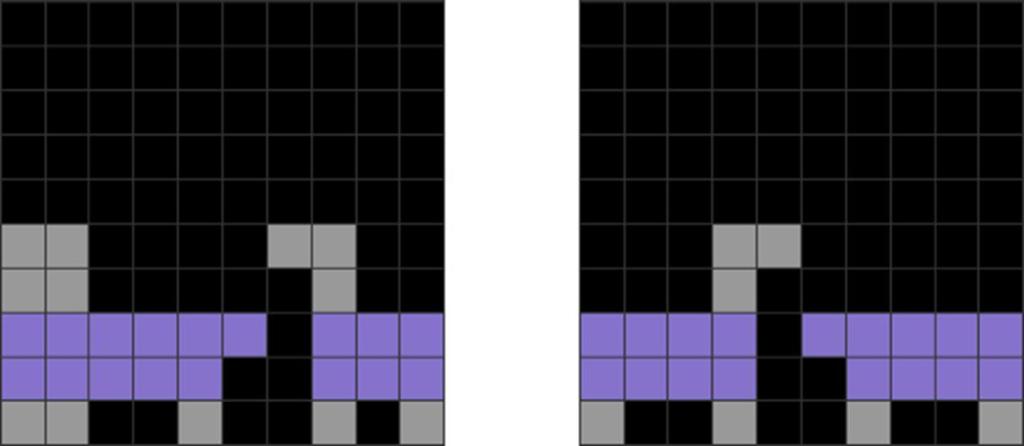
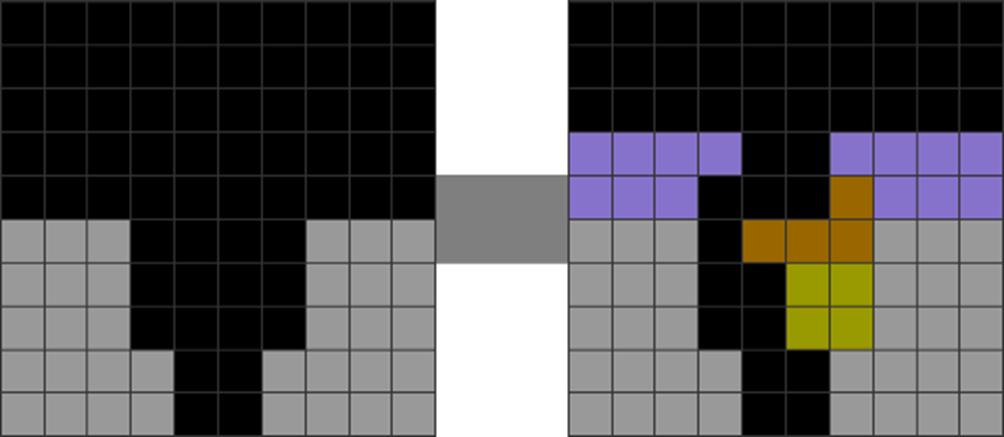
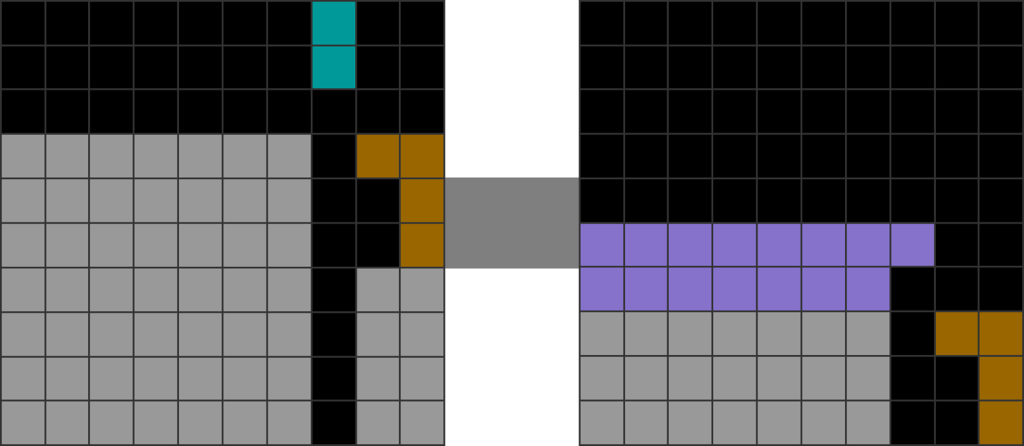
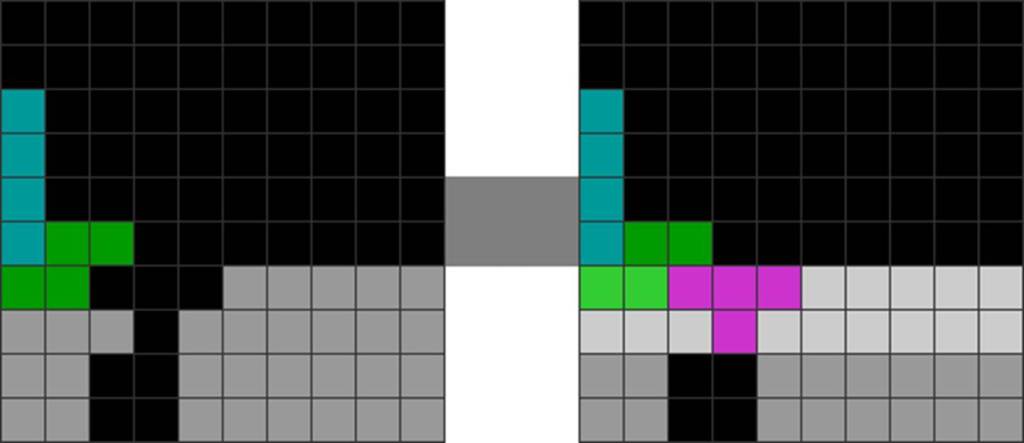
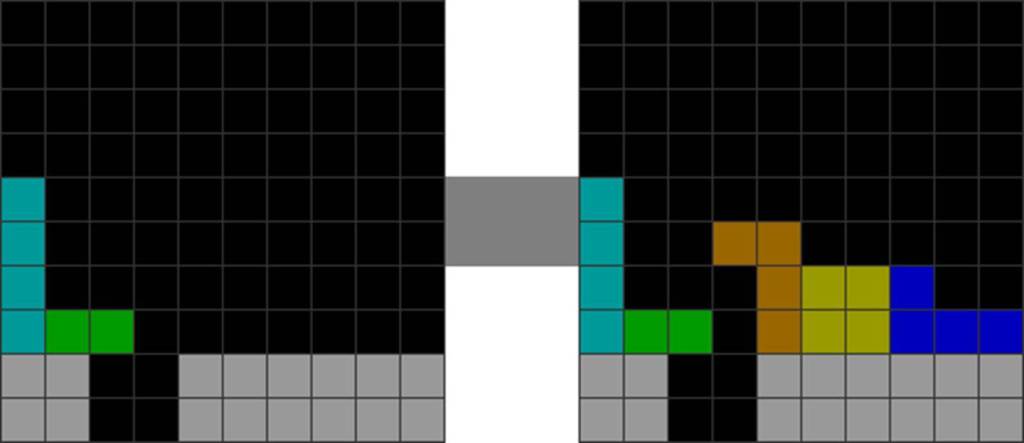
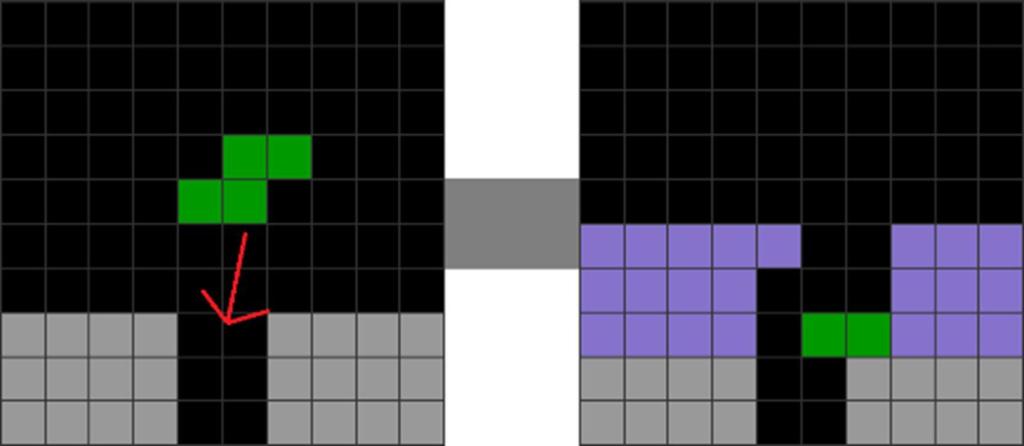
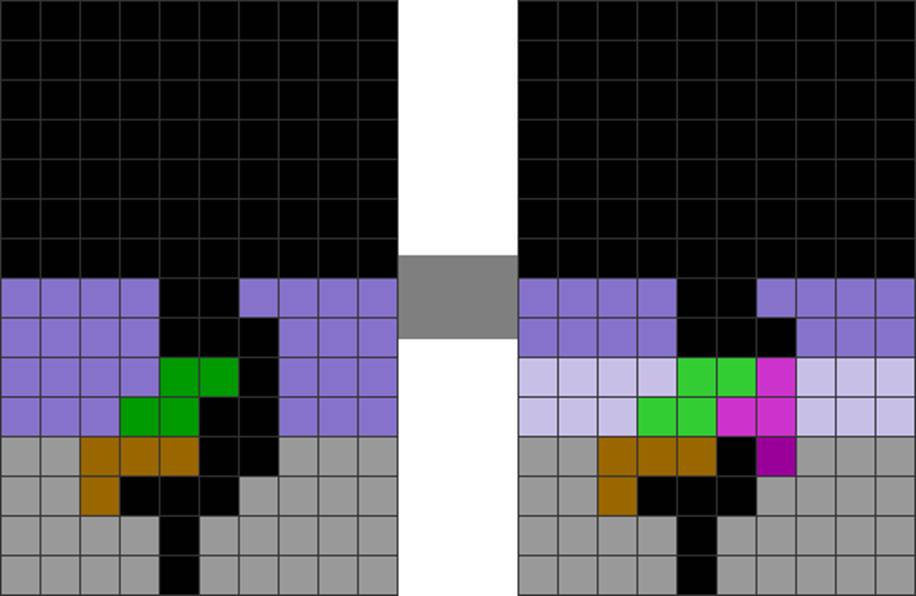
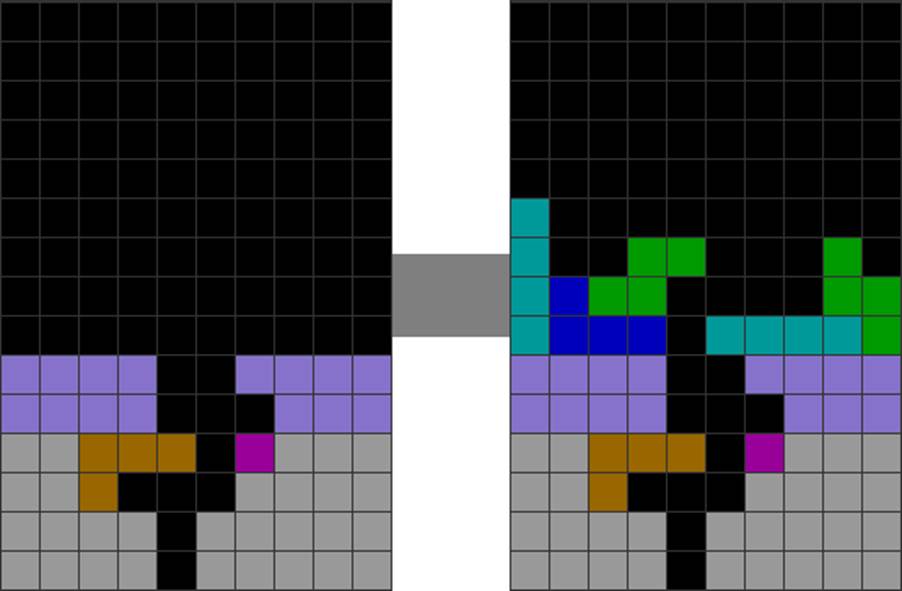
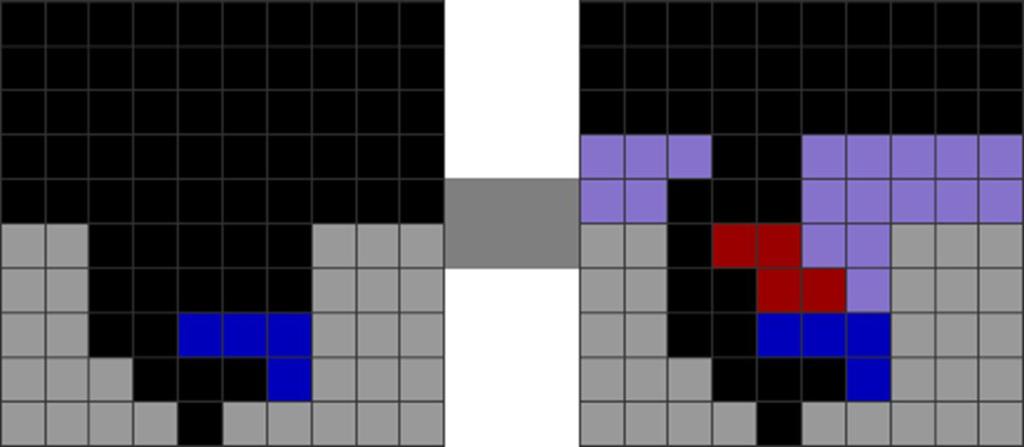
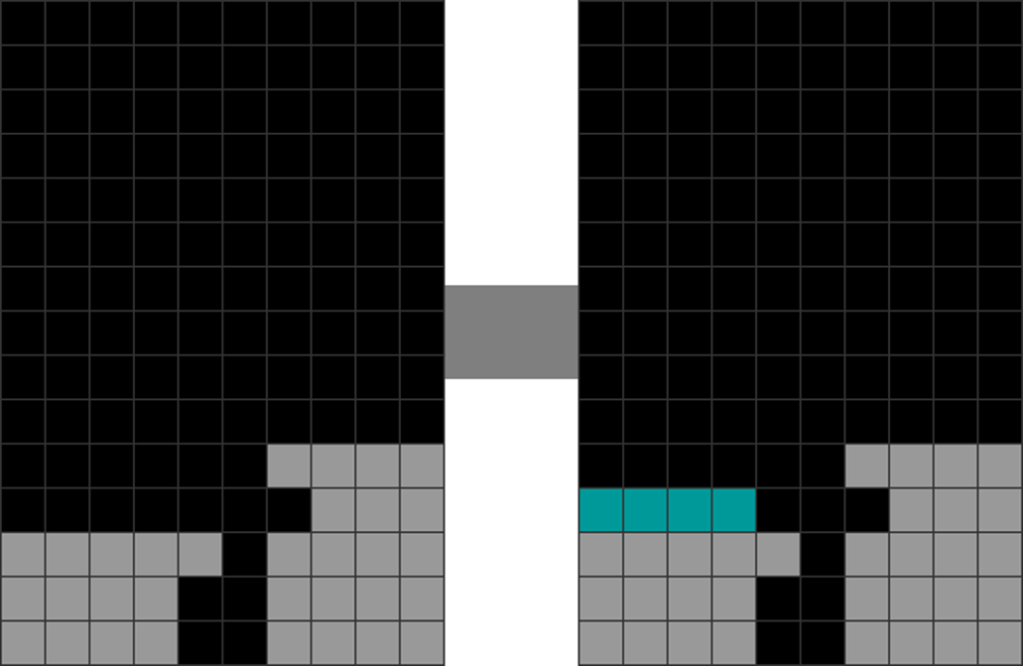
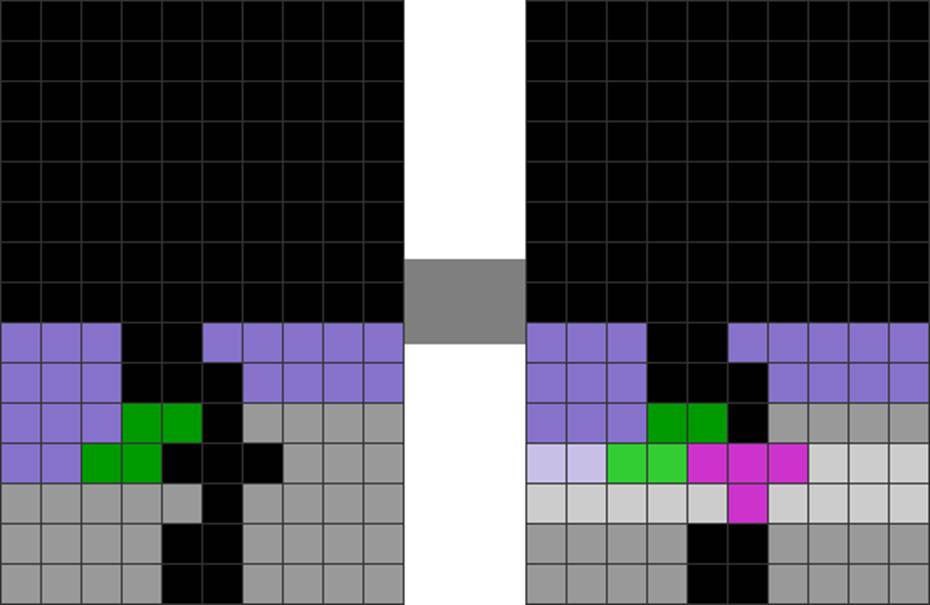
The Super T-Spin Double (STSD) method is a double T-spin double setup.
Diagram Set 4-1
1
2
3
4
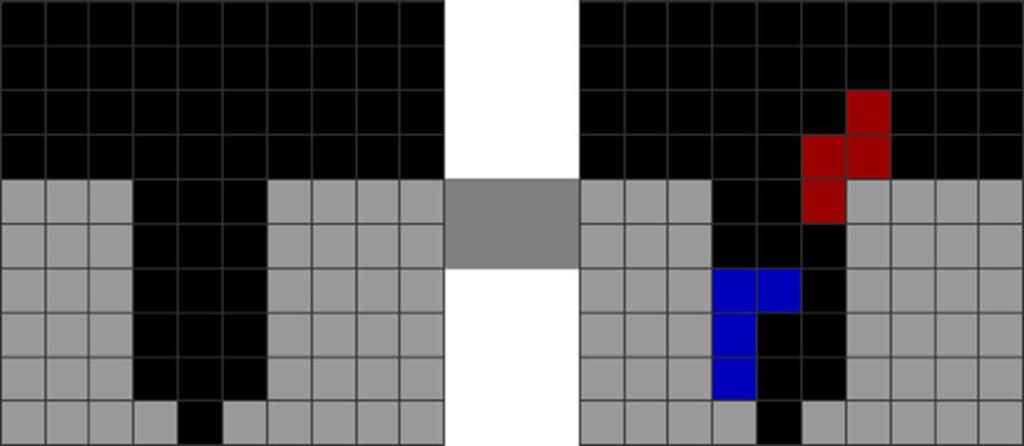
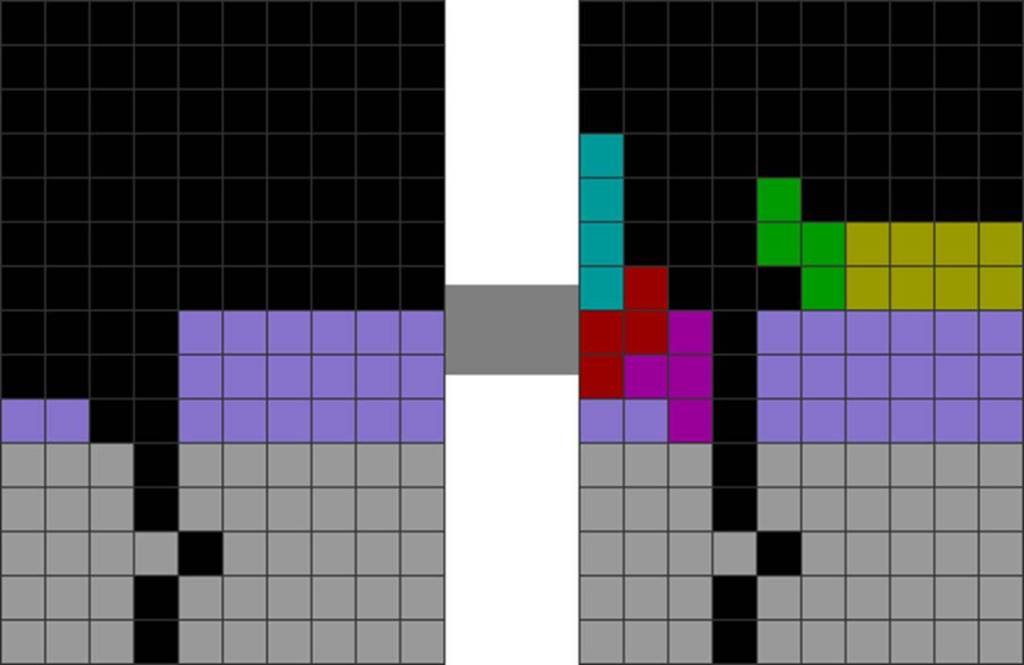
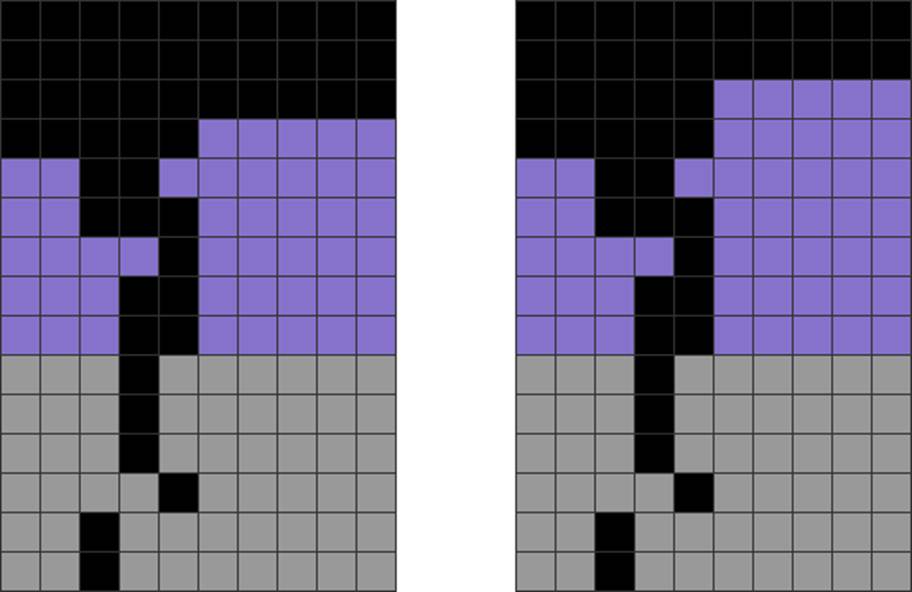
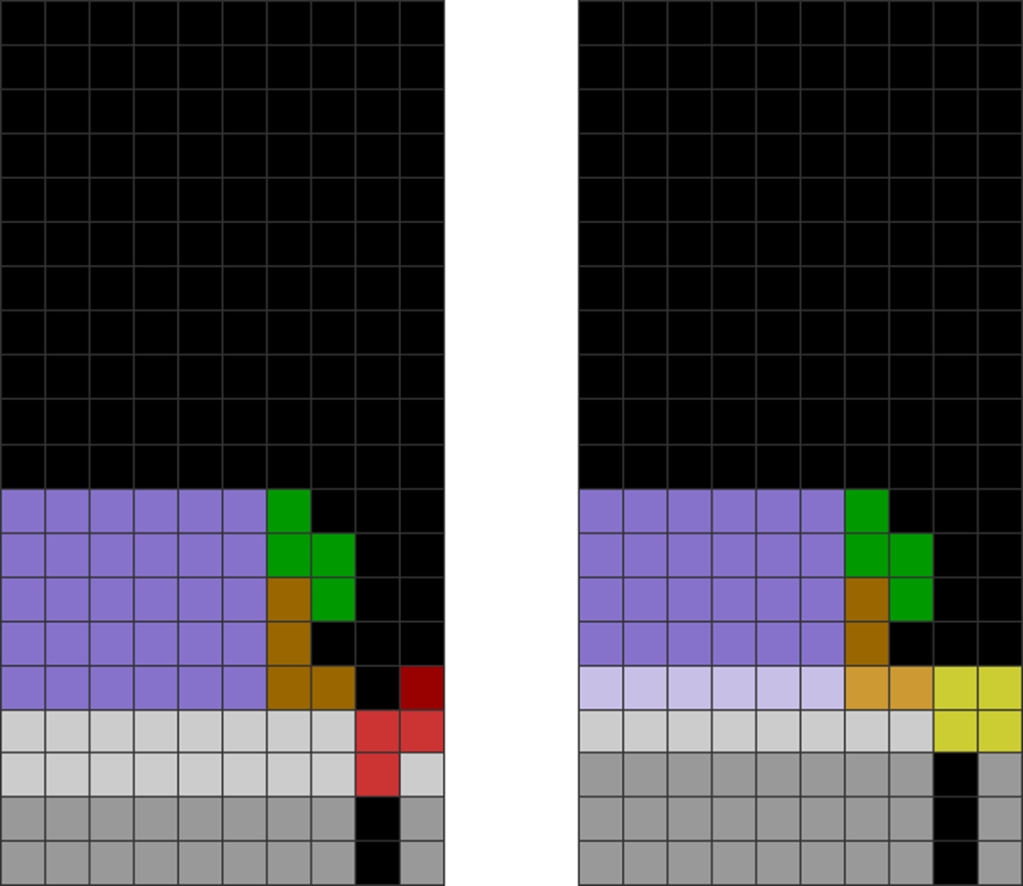
The first T-spin double is spun vertically. This then leaves a second T-spin double.
It is one of the easiest methods to create. Its mid-game opportunities are easily recognizable. It is also clean and leaves no residue after completing the 2 T-spin doubles, like the Fractal method (to be covered later).
However, it is slightly more dangerous to use than a Fractal. This is because its complete shape blocks the Tetris or garbage hole. Thus, this results in T-piece dependencies. Giving up the method is better if one does not have enough Ts.
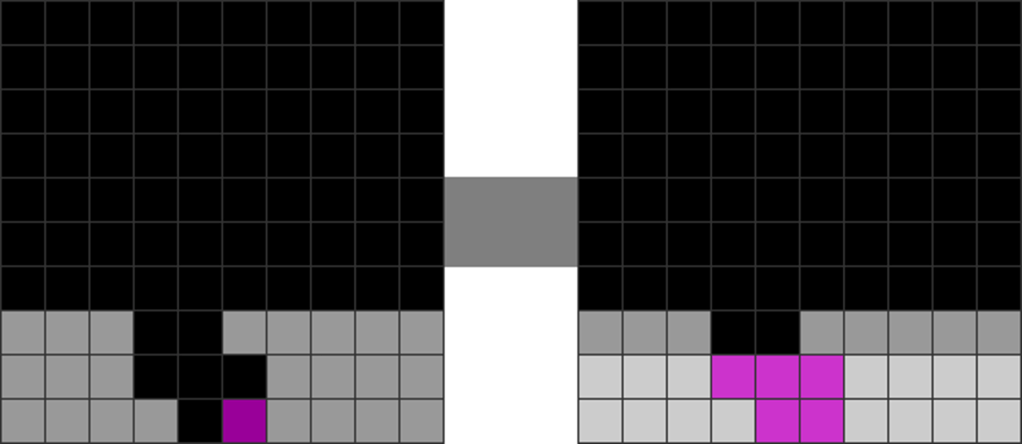
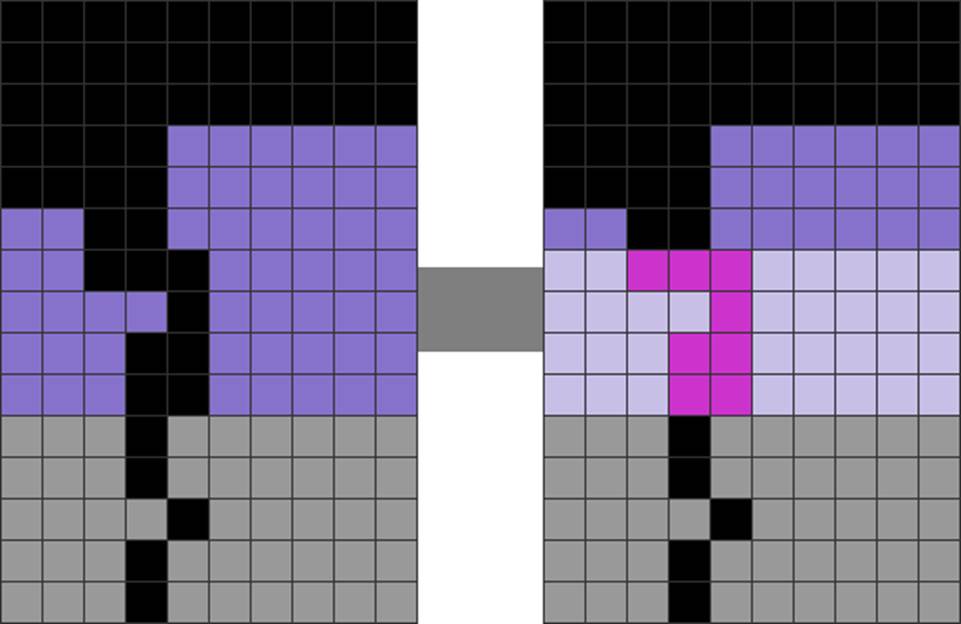
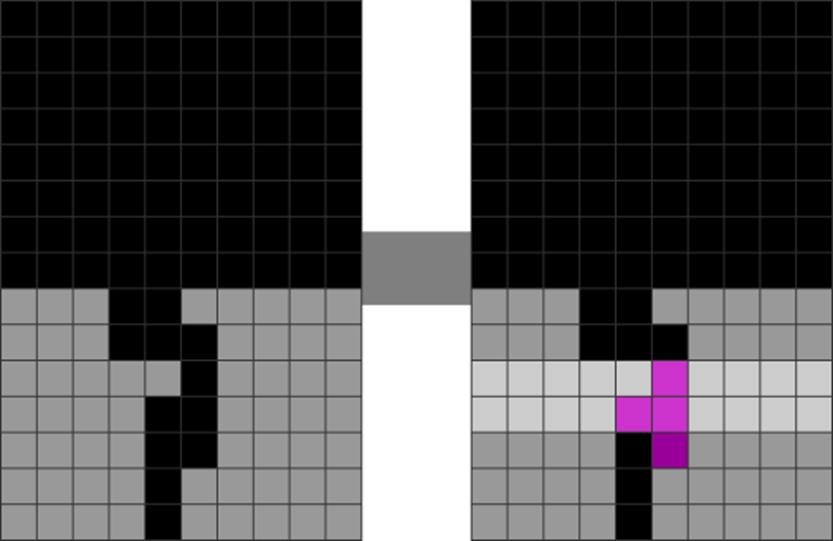
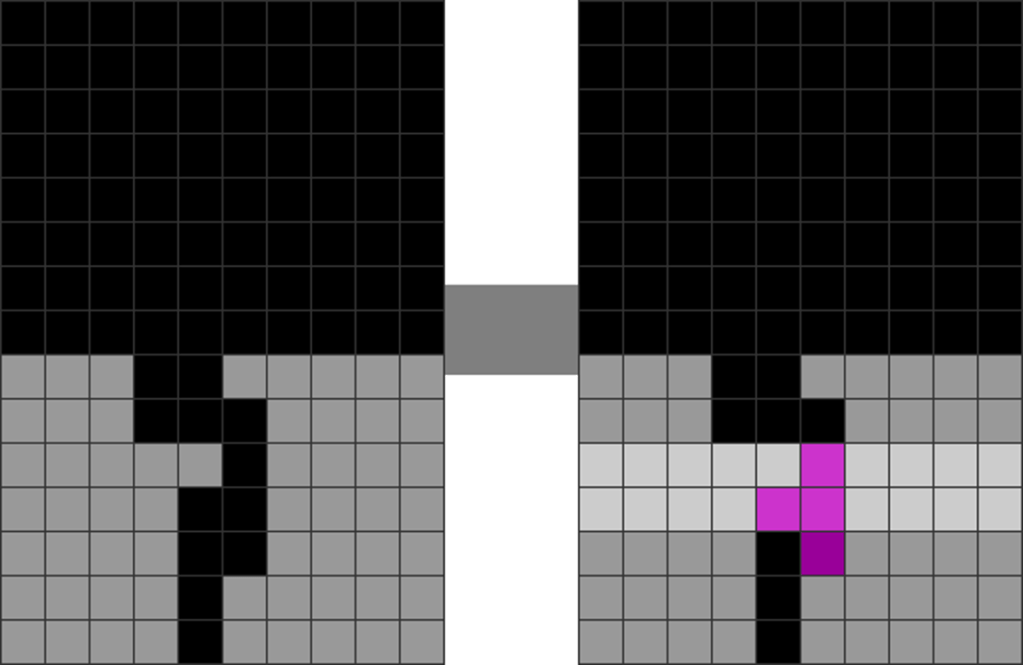
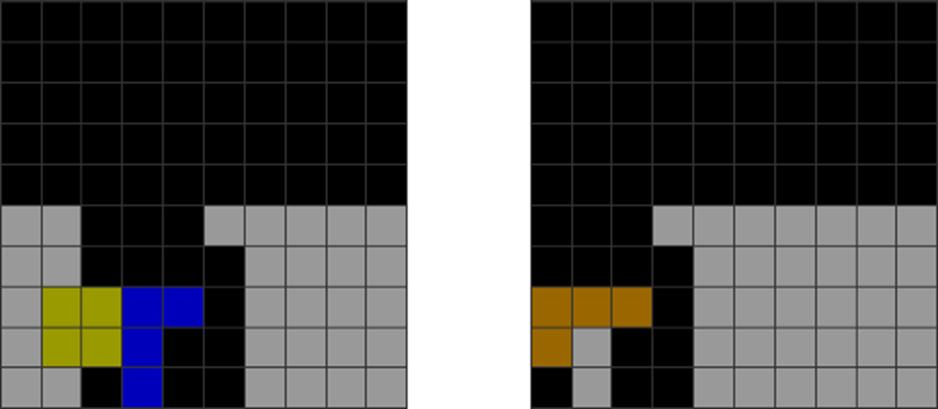
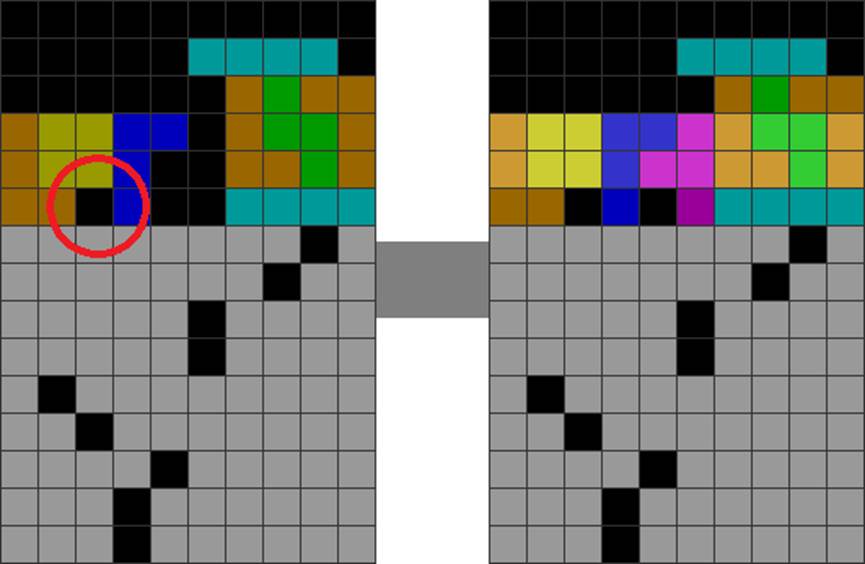
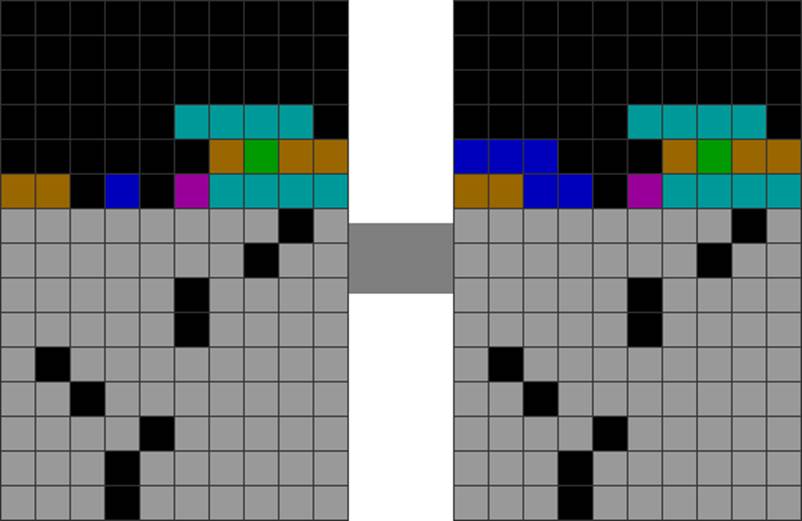
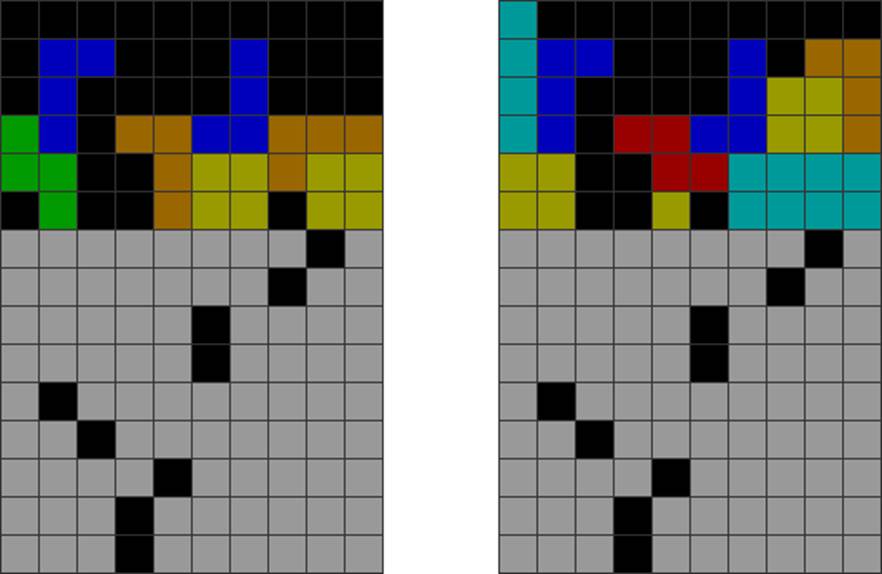
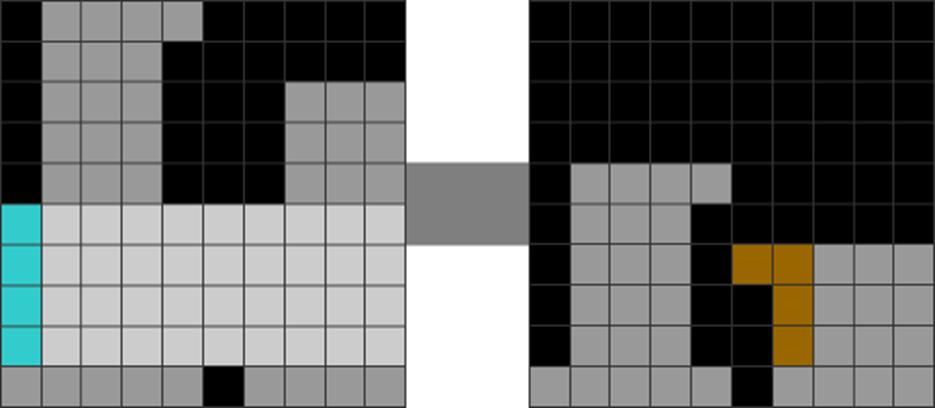
Sometimes, because of random garbage patterns, you can get the following shape. If so, using a J-spin (L if mirrored) can fix the problem, turning the ruined STSD into a standard T-spin double:
Diagram Set 4-2
1
2
The Boomerang method places an L- or J-spin into an STSD cavity. The J-spin here changes the pattern into a T-spin double.
Common Mid-Game Chances
STSDs have an extremely broad range of mid-game opportunities. It is even more flexible than Kaidans or Yoshihiros.
1. The Most Basic Mid-Game Situation
This is the easiest way to first learn how to use mid-game STSDs: by spotting a 3-wide well during 9-0 stacking:
Diagram Set 4-3
1
2
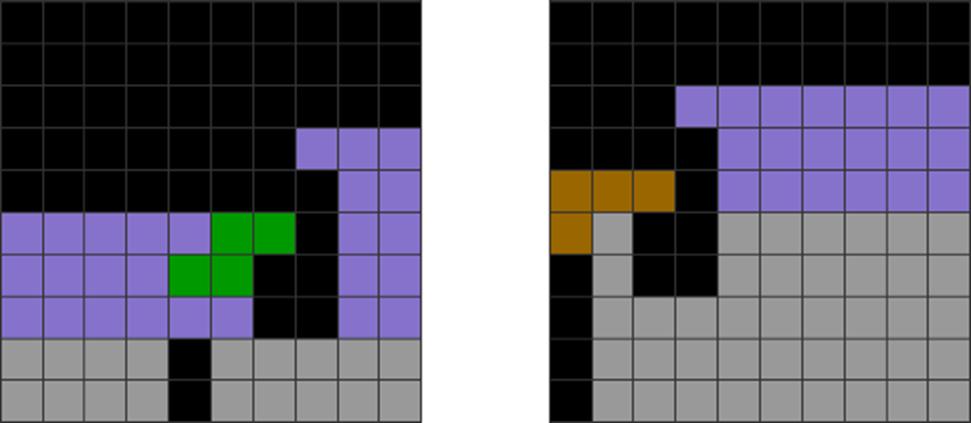
Spot a 3-wide well like this.
Put an inverted L and make an overhang. Done!
Here are the most common STSD mid-game bases:
Diagram Set 4-4
A
B
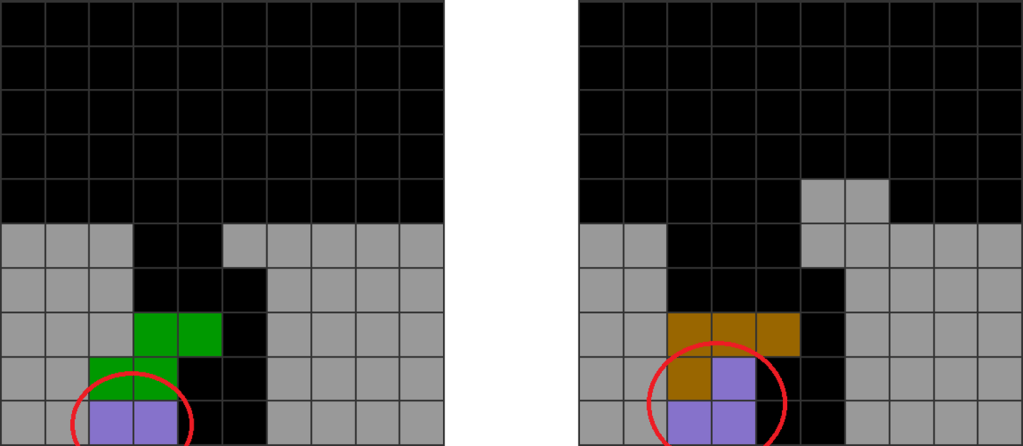
Spot the red-circled lavender mid-game pattern. Top an S over it as the STSD base.
Spot the red-circled lavender pattern and put an L over it as the STSD base.
When you have familiarized yourself with it, transition to spotting them in the mid-lane:
Diagram Set 4-5
1
2
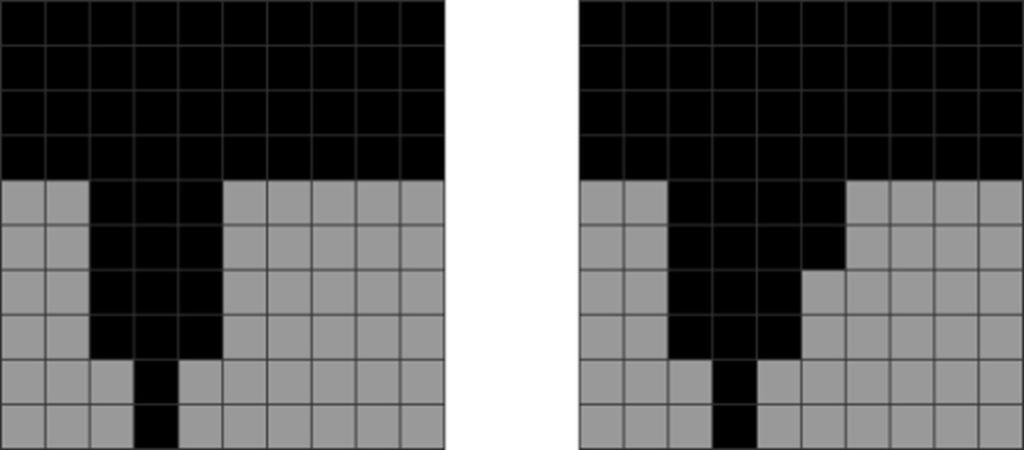
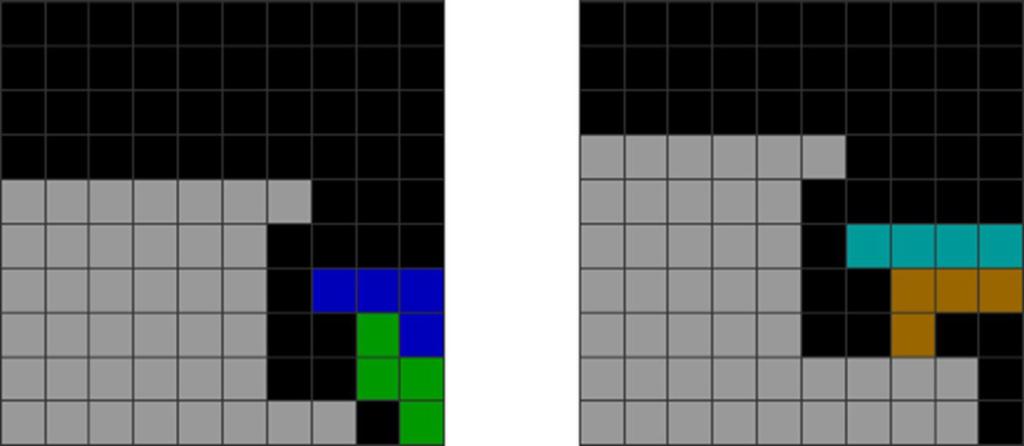
Spot a mid-game 3-wide well. It can be in the mid-lanes.
Put an inverted J and make the overhang. Done!
2. General Ways
Here are some common mid-game opportunities. Memorize and recognize these recurring shapes:
Diagram Set 4-6
A
B
C
D
E
F
Here are 6 of the most common mid-game opportunities to create STSD, per my experience.
Knowing just these 6 will easily and significantly improve your mid-game STSD vision.
How do we create STSD? Please observe:
Diagram Set 4-7
A
B
C
D
E
F
Please memorize the above patterns to make STSDs. These follow from set 4-6.
They can be partly freestyled — so there is no need to adhere to rigid patterns staunchly.
To use STSD well, ensure that one side is upstacked a lot already, which means it is faster to get off STSDs. Be sure to watch for extra Ts first for the second T-spin.
Next, time yourself: if you have been recently attacked, and your opponent is unlikely to attack, you can have some safe time to set it up.
3. Stack Height Imbalance Fixes
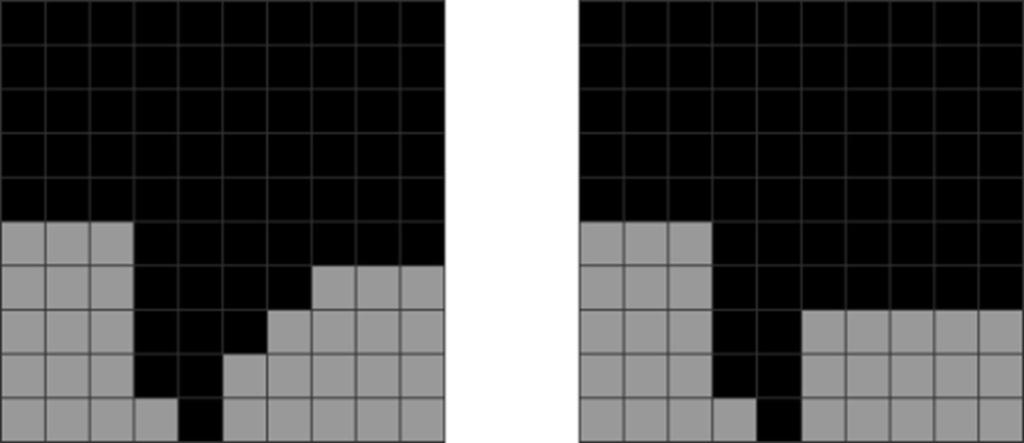
Sometimes, both sides of the stack can be imbalanced, leading to poor follow-ups. This means the left and right stacks have a height difference of varying block numbers.
STSDs can help resolve such imbalances by creating more T-spin continuations:
Diagram Set 4-8
1
2
Diagram Set 4-9
1
2
Diagram Set 4-10
1
2
The last 3 diagram sets show the most common STSD fixes for height imbalances.
Memorizing them improves your T-spin vision quickly and significantly.
4. STSD Overhang Skims
When you make an STSD at the corner, like in the charts below, you can sometimes get into the following situation. Here is how to fix it:
Diagram Set 4-11
1
2
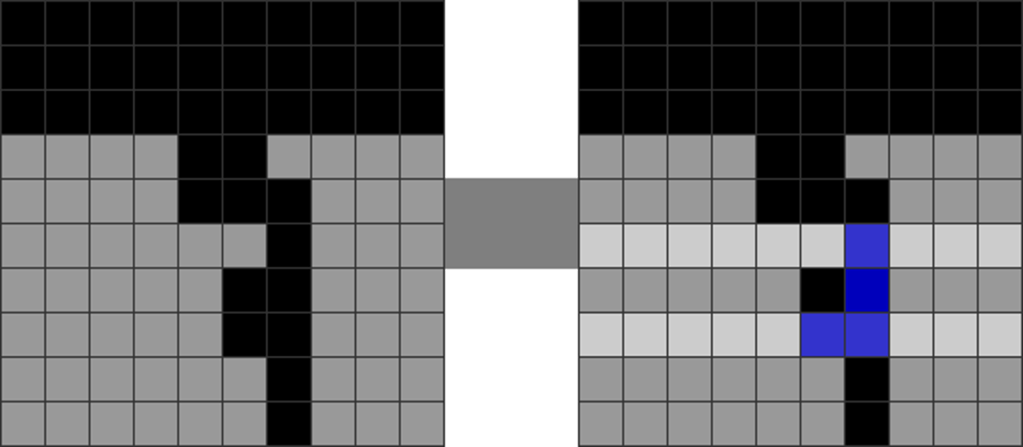
You cannot spin the T into the STSD, as the left side needs a 2-block-high wall before you can kick in the T piece.
To resolve this, use the J piece to skim and create an artificial 2-high wall, allowing you to complete the STSD.
Alt. A
An L-skim works, too.
Continuations and Follow-Ups
STSDs have many creative follow-ups that are not covered in most other Tetris guides.
1. General Follow-Ups
Here are some stacking patterns that lead to poor continuations:
Diagram Set 4-12
1
2
An overhang of 3 blocks high leads to less smooth T-spin continuations.
The 2 T-spin doubles conclude.
3
4
You get this inconducive shape.
You may have to put a vertical T to balance both sides of the stack. This creates another T-spin double but moderately reduces your efficiency.
Below are more patterns that ruin continuations:
Diagram Set 4-13
A
B
Explaining how these patterns ruin continuations is tricky. However, these common patterns are based on my experience, which shows they ruin T-spin continuations.
As the player gains experience, he will understand why.
Here are those that improve T-spin continuations:
Diagram Set 4-14
1
2
This STSD has an overhang height of 2, which makes T-spin follow-ups easy.
The 2 T-spin doubles conclude.
3
4
You get this propitious shape.
It is easily followed up with a Fractal.
Hence, STSD overhang heights of certain thickness (mainly 2 and 4 blocks) can lead to better T-spin continuations.
Below are other stacking continuations:
Diagram Set 4-15
1
2
3
4
You can use an STSD continuation when the overhang is 1 block high. Just put the J and Z like this in step 2. It leads easily to LST or ST stacking in step 4.
An overhang thickness of 4 blocks is also decent:
Diagram Set 4-16
1
2
3
4
An overhang of 4 is less efficient. However, it lets you put an I piece in step 4 to balance both sides of the stack like this. This creates another T-spin double.
Sometimes, you must break a back-to-back bonus. Here are examples that involve skims to provide continuations, often when the STSD is near the field’s corners:
Diagram Set 4-17
1
2
The player starts with an STSD at the right corner. It may seem like there are no T-spin continuations.
However, he places an L and an S on top of the overhang.
3
4
The 2 T-spin doubles conclude.
This then leads to this shape.
Is it a dead-end? Nope! Once you get step 4’s shape, you can choose 2 options:
Diagram Set 4-18
A
B
A involves a Z-skim to create a T-spin double. B uses an O-skim to make a T-spin double. This creates instant pressure!
2. STSD to DT Cannon Follow-up
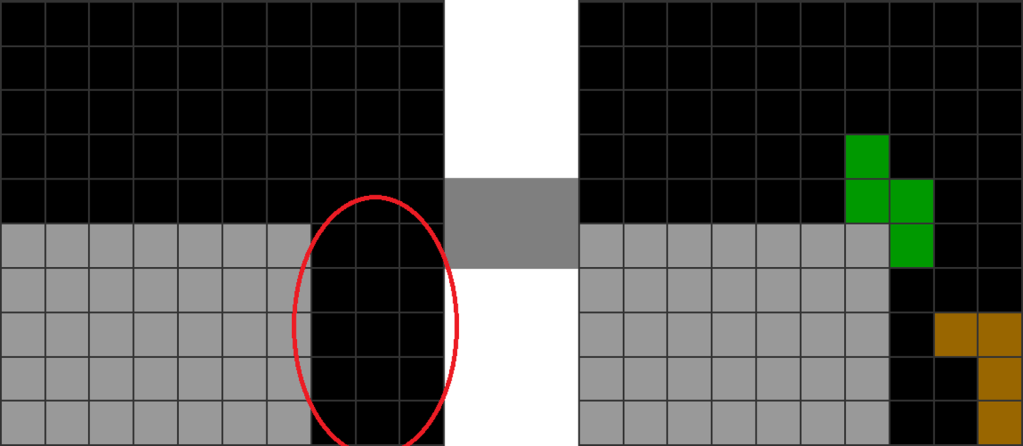
STSDs can be followed up by DT Cannons:
Diagram Set 4-19
1
2
3
4
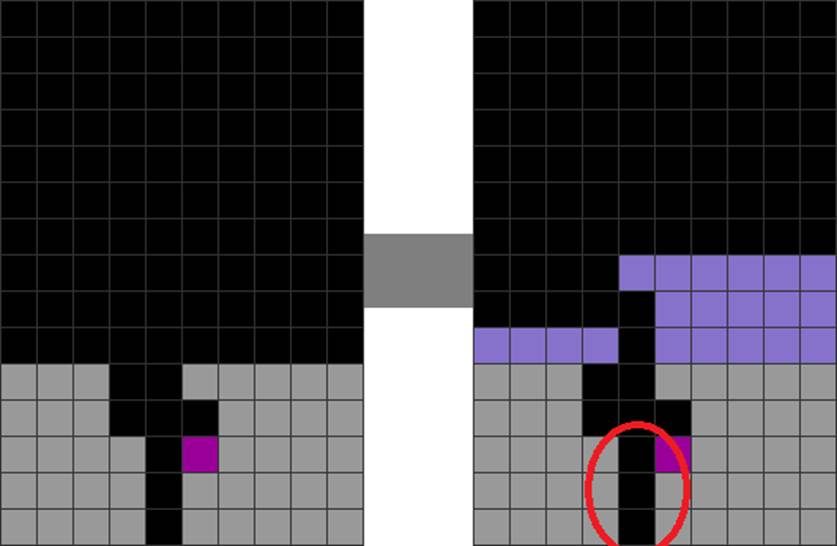
STSDs can be followed up with a DT Cannon in step 4. A DT Cannon is a T-spin double to T-spin triple setup. Note that the lowest-most holes in the fifth column (red circle) must be at least 2 blocks deep for the DT Cannon to work.
3. STSD to Imperial Cross Follow-up
You can also follow STSD up with Imperial Crosses:
Diagram Set 4-20
1
2
3
4
STSDs can lead to an Imperial Cross. However, in step 4, the garbage hole is shifted by 1 block to the left or right. This makes it unclean. Thus, it is a less suitable follow-up.
Advanced
It is rarely known that STSDs can be donated, or have parts of them made using a supporting prop. Donations are just ways to make T-spins by blocking a Tetris or a garbage hole.
1. Partial STSDs and Props
STSDs can be partially donated like this:
Diagram Set 4-21
A
B
STSDs can be partial (incomplete). The above examples are the most common and easiest to create mid-game.
Knowing just this single trick in the aboveB alone opens up your mid-game STSD donation vastly, as it is the most commonly used one.
Diagram Set 4-22
A
B
This is a highly common STSD donation pattern.
You can perform this during 9-0 stacking.
The aboveA is the second-most common mid-game STSD donation prop, per my experience.
Sometimes, you can combine pieces to make props (parts of the STSD donation):
Diagram Set 4-23
A
B
You can use multiple combinations of pieces to make props or parts of the STSD. Be creative and experiment!
The aboveA is the third-most common mid-game STSD donation prop, per my experience.
2. Freestyle STSD Donations
This is the general form of advanced partial STSD donations:
Diagram Set 4-24
A
B
Used very often by top Tetris players like Furea (Flare), these are advanced methods that “suspend” the lavender parts over holes to make the STSD’s first T-spin double.
Here are freestyled STSD donations that happen in actual mid-game situations:
Diagram Set 4-25
1
2
Notice the red-circled cavity. This part does not have to be filled.
You can make the first T-spin double line clear first.
3
4
This leaves this T-shaped pattern.
You then fill up the left with a J for a second T-spin double.
Here are other creative ways to make STSD donations cleanly:
Diagram Set 4-26
A
B
C
These 3 examples show STSD donations.
To my knowledge, these 3 are among the most common mid-game freestyle STSD donation methods and are, thus, worth memorizing. They are, however, extremely subtle to spot.
3. Floating STSDs
You can also float STSDs:
Diagram Set 4-27
1
2
STSDs can float just like STMB Caves and Sky Props (both to be covered later). The easiest mid-game opportunity is the one above.
However, this is dangerous and viable only in solo games, like 20 TSD sprints.
4. Prophecy STSDs
It is a little-known fact that STSDs can be constructed out of order, as shown below, where you make a forecasted STSD, clear the lines in between, and then build an overhang:
Diagram Set 4-28
1
2
These setups typically involve making some parts, like the overhangs, before the base (the L here). You must spot the entire setup mentally before making them.
This can be generalized into the following:
Diagram Set 4-29
1
2
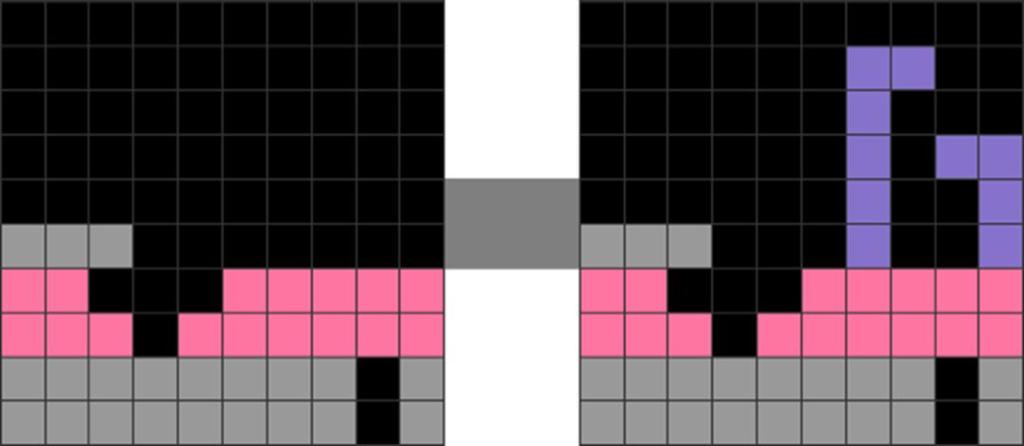
Spliced methods involve inserting a T-spin (pink lines), then forecasting the STSD by building on top of it.
You can also forecast a Tetris into an STSD:
Diagram Set 4-30
1
2
Ensure that the garbage column in column 8 is exactly 4 blocks tall. Make a Tetris line clear.
Fill in the rest and make your STSD.
Other tricks involve:
Diagram Set 4-31
1
2
This T-spin double is dirty.
The T-spin double line clear finishes.
3
4
You get this pattern.
You follow it up with an STSD.
5. STSD Skims
One can also apply skims to shape the field into an STSD:
Diagram Set 4-32
1
2
Spot this mid-game pattern and insert a horizontal S into it.
After the skim, you upstack a bit from the residue to make an STSD.
6.Advanced Spliced STSDs
You can insert T-spins into an STSD. There are several variants, as covered in my Book 3:
Canis Majoris
The method below inserts an STSD into another T-spin setup:
Diagram Set 4-33
1
2
The player makes a Canis Majoris.
3
4
After step 3’s shape, you can further upstack to an Andromeda as a viable and practical continuation.
Andromeda is a spliced DT Cannon, covered more deeply in Book 3.
To create Canis Majoris, do this:
Diagram Set 4-34
1
2
Spot a T-spin single chance and place a J this way.
Construct the rest.
Hercules
Hercules is a spliced STSD with 3 T-spin doubles:
Diagram Set 4-35
1
2
An I piece can easily upgrade step 1 to a Sky Prop. However, the I piece may not arrive.
Alt. A1
Alt. A2
You can instead make a Hercules. The first T is horizontal, leading to an STSD.
In a Nutshell
Among the spliced T-spin methods (those that incorporate 2 or more T-spins within), STSD has the most variation and mid-game applications. Therefore, this chapter is the longest in this book.
Pros and Cons
Pros
Great follow-ups and pressure.
A lot of situations allow you to use STSDs.
It is highly suitable for Tetris versus Puyo in Puyo Puyo Tetris, as you do not get attacked too fast.
Ideal for getting rid of many extra Ts quickly.
STSDs are flexible, and the second T-spin double can be denied for a DT Cannon or Imperial Cross continuation.
Clean.
Cons
Blocks the Tetris hole.
Receiving garbage in the wrong column can ruin it.