Note: This is a truncated version of book 2’s opener chapter, which is nearly twice as long. The full book chapter contains more openers and follow-ups.
Openers are mostly fixed-piece placements that can be created based on the opening sequences to create powerful setups that send vast amounts of garbage to the opponent.
This is possible in modern Tetris games because of the seven-piece bag randomizer. This ensures that every seven pieces guarantee one of the seven unique tetrominoes.
Openers may include various ways to send garbage, such as T-spins, Tetrises, combos, or perfect clears. This chapter covers some of the most common openers.
Good openers share the following traits:
- Low KPP (Key Presses per Piece): Openers such as DT cannon require minimal key presses per piece, allowing them to be placed quicker than others.
- Consistent follow-ups leading to the mid-game: Good openers allow one to transition to the mid-game with freestyle follow-up methods such as LST stacking or 6-3 stacking.
- High burst damage: Good openers such as TKI to perfect clear variants provide extreme burst that can top off an opponent fast.
- Do not waste too many Ts: Good openers use nearly every T for T-spinning. There are exceptions: where Ts come too early, the player will have no choice but to use the Ts in the stack, such as in some perfect clear openers.
- Sends off a T-spin attack as soon as possible: An early T-spin or attack disrupts the opponent’s perfect clear openers if they use it. I prefer quick openers unless low KPP makes up for it or other factors like good burst or follow-ups.
- Easy to learn: The focus of Tetris is the mid-game, not the opener phase. An overemphasis on openers relies on pure memory work and does not lead to mastery of mid-game fluidity.
- Covers many initial piece sequences: The best openers, such as TKI, cover up to 50% of all initial piece sequences.
Knowing at least one opener to transition into each column hole is best. For instance, TKI flat top transitions into 7-2 stacking, while DT Cannon transitions into 9-0. Having one of each helps train back-to-back T-spins and Tetrises at each Tetris column, which helps in the mid-game.
Relying upon openers too much to the exclusion of mid-game knowledge and decision-making stifles the mind. Thus, please do not be too reliant on openers.
A) List of Practical Openers You Will Ever Need
These are the most practical openers that I know.
I have estimated the rough percentages for each usable opener using an Excel sheet table. I have mentioned these probabilities in some openers’ sections.
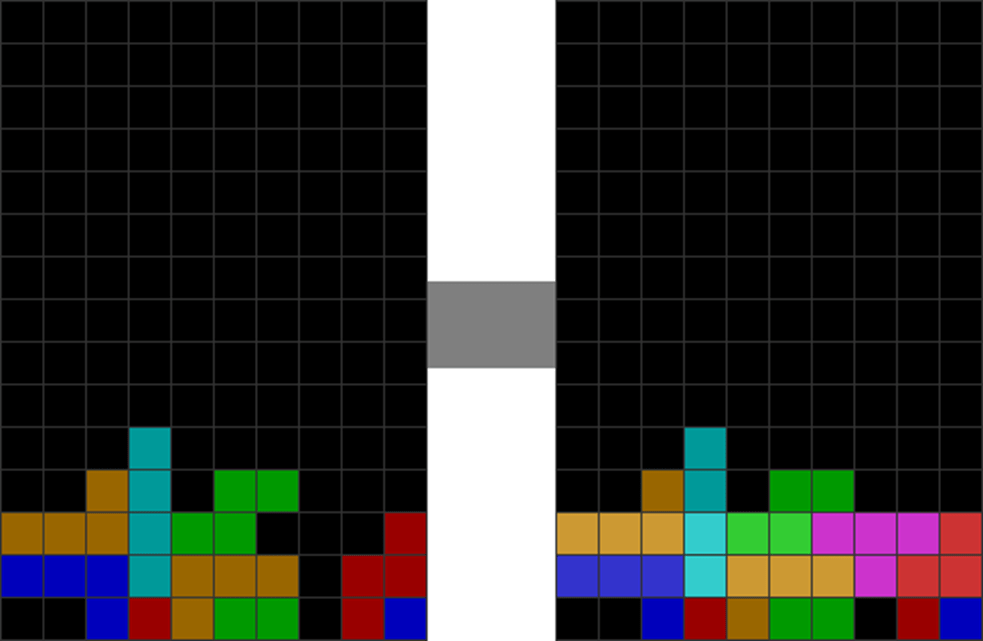
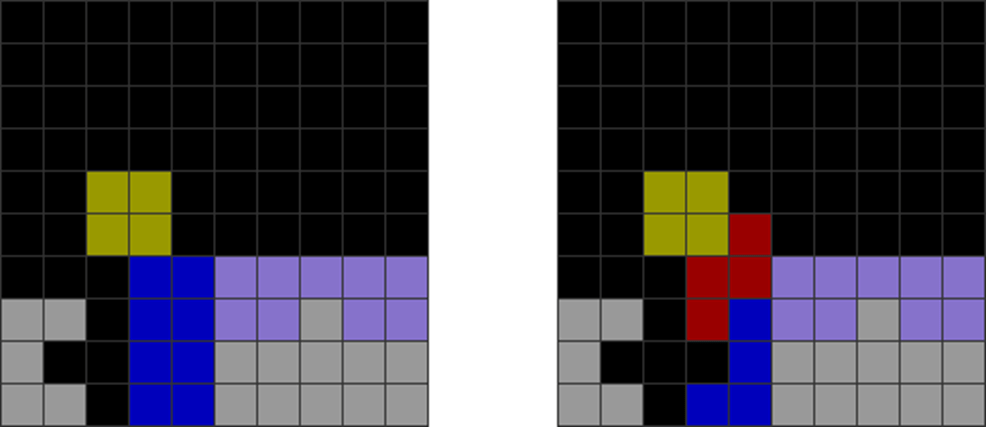
1) DT Cannon (Double Triple Cannon) Opener
Estimated chance where the opening sequence allows for this opener: 36 to 40%
Starting Pieces Needed: Early L and J
The DT Cannon opener is one of the lowest KPP openers in the entire opener arsenal. It provides a T-spin double, followed by a T-spin triple. It also has many continuations.
Requiring an early L and J presence, it can be used nearly 40% of the time with proper planning. Therefore, many high-level players use this method a lot.
To use it, place the first bag of 7 pieces in the following two manners:
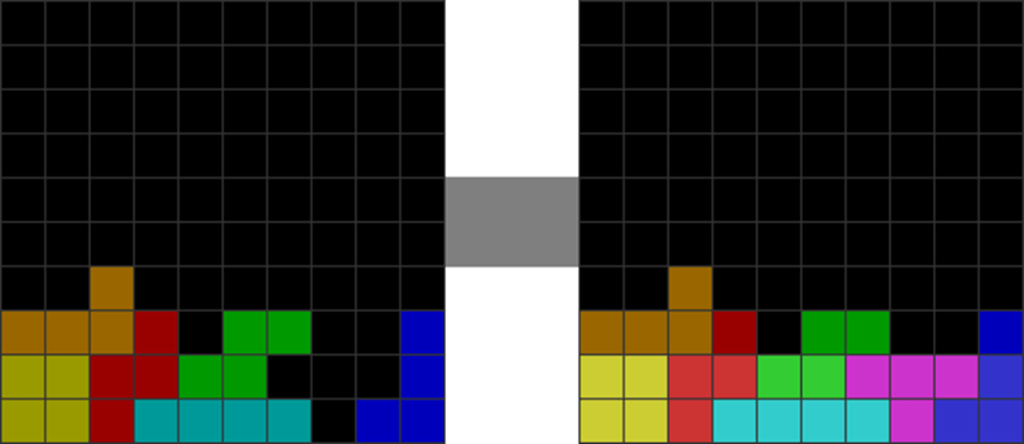
| Diagram Set 20-1 | |
| A | B |
| This is the most common DT Cannon pattern if L and J come first. | This is used when either L or J comes (or both come late). You can place S or Z vertically first, then soft drop L or J under them. |
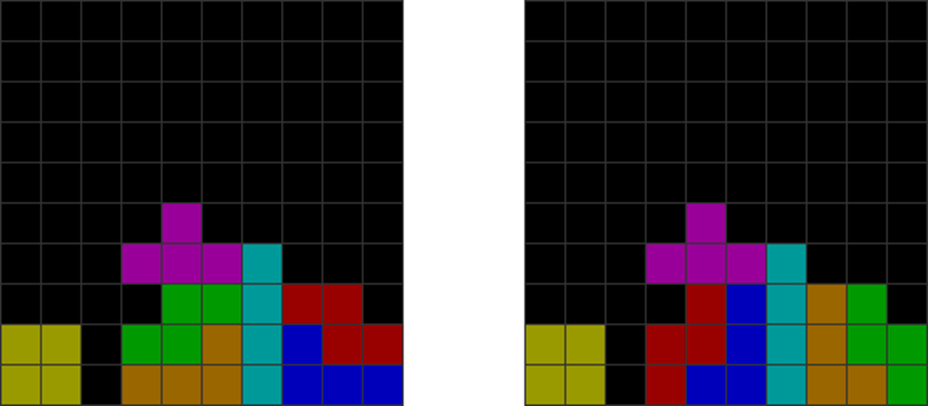
For A, because the L, J, S, and Z pieces are placed in their default positions, they don’t need any rotation. This makes the first seven pieces astronomically fast to place.
The method in B opens up more ways to construct DT Cannon from more starting sequences, such as early S and Z pieces.
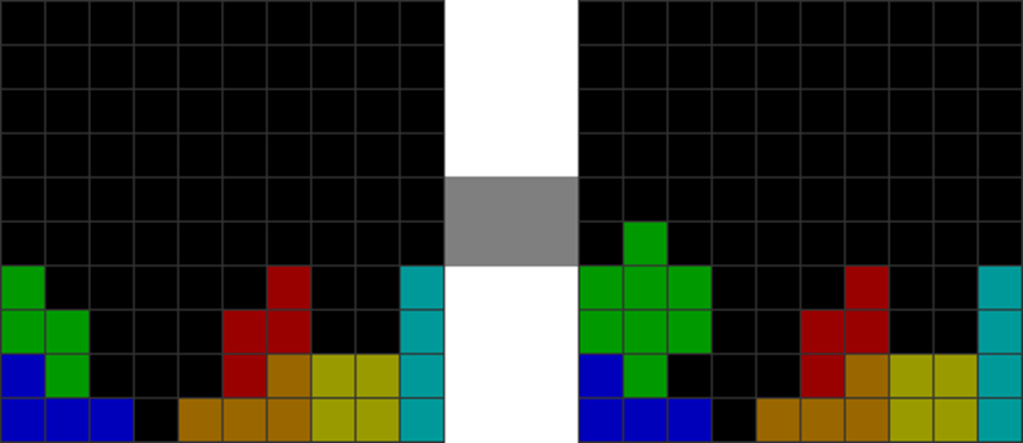
Then, for the second bag, you have two possible sequences, depending on the availability of incoming pieces:
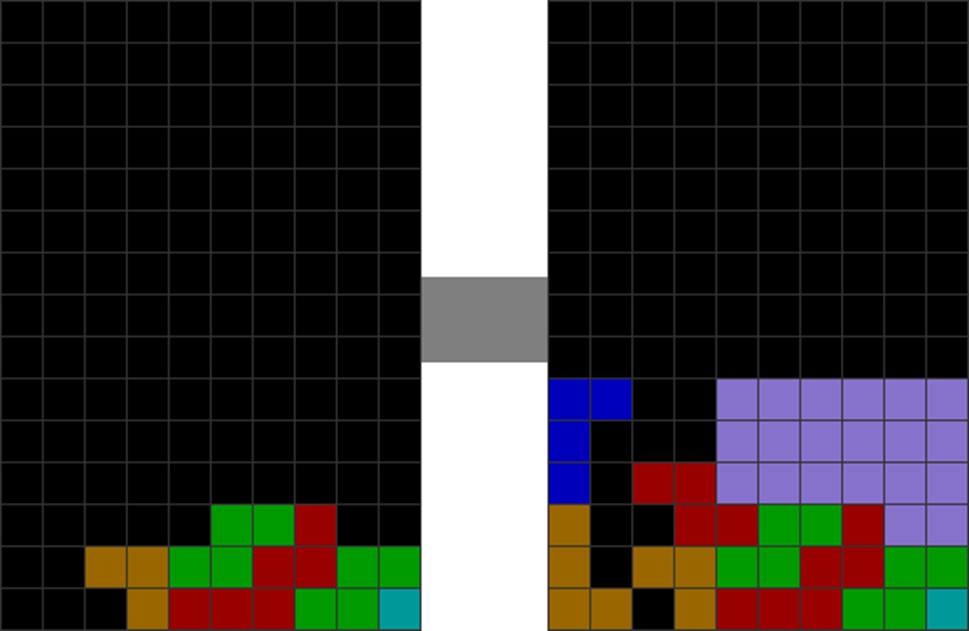
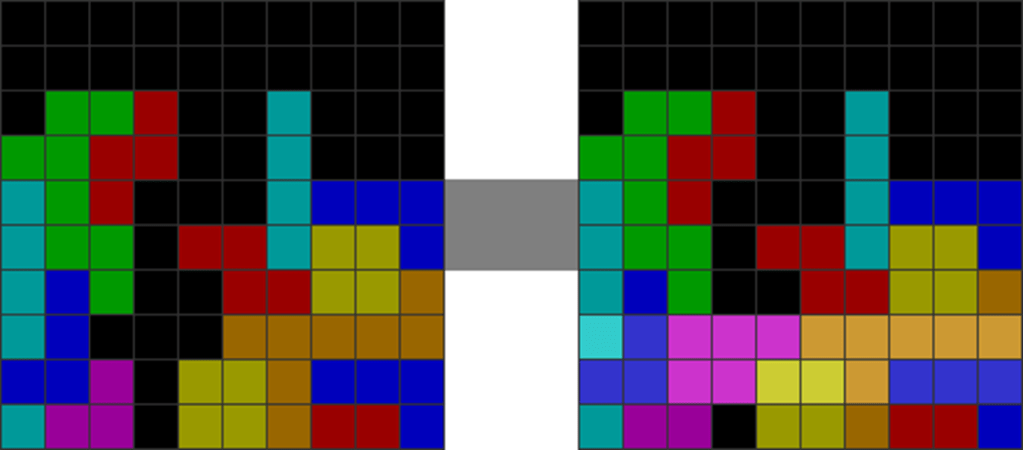
(i) DT Cannon to Amemiya Cannon
| Diagram Set 20-2 | |
| 1 | 2 |

| The gray blocks represent the shape from the first bag’s seven pieces. You place the second bag’s L, J, S, Z, O, and I this way. | You do the T-spin double and T-spin triple. |
| 3 | 4 |
| You make this pattern. | You continue, leading to the Amemiya Cannon continuation, a T-spin double. |
This grants a respectable amount of garbage to attack the opponent.
In step 3, the Z can be placed before the L. You can then spin the L under the Z.
Step 4’s T-spin double can be freestyled with several possibilities:

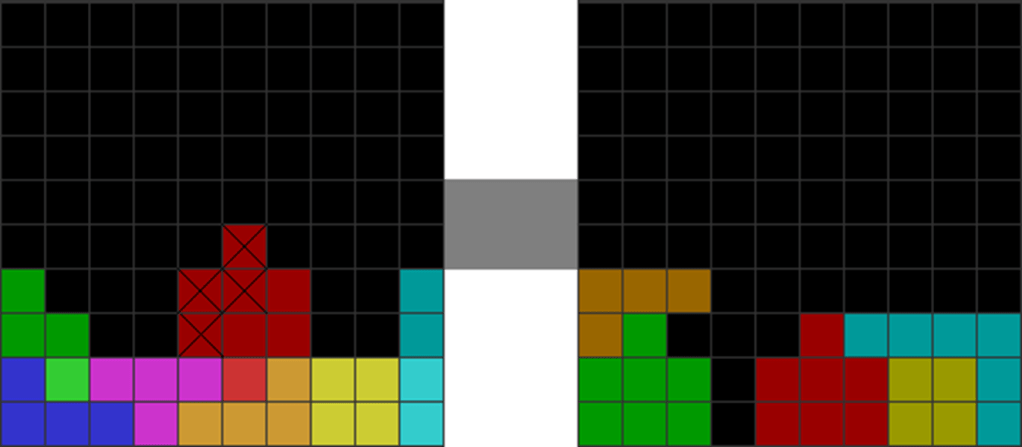
(ii) DT Cannon to Tetris or T-spin Mini
| Diagram Set 20-3 | |
| 1 | Alt. A |

| This is diagram set’s 20-2 resulting pattern in the former step 3. | You can follow up with a Tetris. |
| Alt. B |
| You can also follow up with a T-spin mini. However, this is weak. |
I prefer the Tetris follow-up, as a T-spin mini is weak and may alter local parity.
(iii) DT Cannon to C-spin
Once the first two T-spins are done, you can sometimes freestyle and follow up with a C-spin:
| Diagram Set 20-4 | |
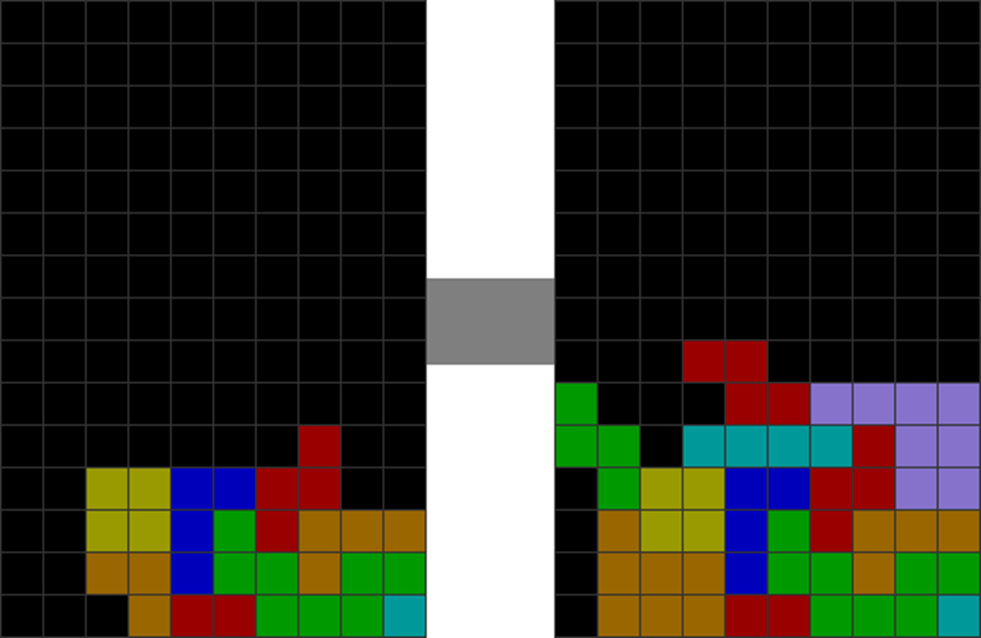
| 1 | 2 |
| Place the next bag of pieces, the L, J, S, Z, O, and I this way. | Conclude the T-spin double and T-spin triple. |
| You are left with this aftermath pattern after placing S and Z. | You can follow up with a C-spin. This step should be freestyled. |
(iv) New DT Cannon to Kaidan
New DT Cannon is an alternate follow-up to DT Cannon. It leads to two Kaidan follow-ups, the latter being an Anchor setup.
| Diagram Set 20-5 | |
| 1 | 2 |

| Put the second bag this way. | Conclude the T-spin double. |
| Stack the next bag this way. You can spin the S on the far right under the J. | Conclude the T-spin triple. |
| Alt. A | Alt. B |

| Kaidan T-spin double follow-up. | Kaidan with Anchor follow-up. |
After the T-spin double, you can easily upgrade the remaining stacks to a Tetris.
2) TKI Opener
Estimated chance where the opening sequence allows for this opener: 40 to 50%
Starting Pieces Needed: Early I
TKI is among the top two commonly used openers, matched only by the DT Cannon opener.
TKI has several variants. The flat-top is the most common variant.
Flat-top TKI easily transitions to mid-game LST and ST stacking, making it one of the game’s most consistent openers and follow-ups. This is done with:
| Diagram Set 20-6 | |
| 1 | 2 |
| This is the first bag’s placement. It is the most common TKI pattern. | You get your first T-spin double. |
| Diagram Set 20-7 | |
| Alt. A | |
This alternate pattern is needed sometimes if L comes early. Alt. A and set 20-6’s step 1 form the same shape. After the first T-spin, you get the same after-pattern.
The above grants an easy T-spin double for a quick attack, wasting no Ts in the stack.
Note that I doesn’t have to be early. You can create this opener by having Z come first in step 1. You then soft drop I under the Z.
For the second bag, place it in the following ways:
| Diagram Set 20-8 |

(i) LST Stacking Follow-up
You can then follow up with the following.
This below sequence continues from set 20-8’s first picture.
| Diagram Set 20-9 | |
| 1 | 2 |

| After the initial bags, you can easily get this pattern. | You get another T-spin double. |
| 3 |

Then, you transition to mid-game LST stacking.
If you have studied The Easiest T-spinning Methods chapter, this should be evident how to.
If done right, getting off and wasting no Ts in the stack is easy. This allows one to interrupt an opponent’s perfect clear opener.
TKI Variant 2
This variant is used if it’s not possible to construct the Flat-top variant:
| Diagram Set 20-10 | |
| 1 | 2 |
| 3 | 4 |
| This TKI variant is excellent, giving you two T-spin doubles. You can follow up with freestyling or mid-lane LST stacking after step 4 over column 5’s hole. |
You can sometimes vertically put the L piece in step 1 on the extreme left. However, I rarely use this variant.
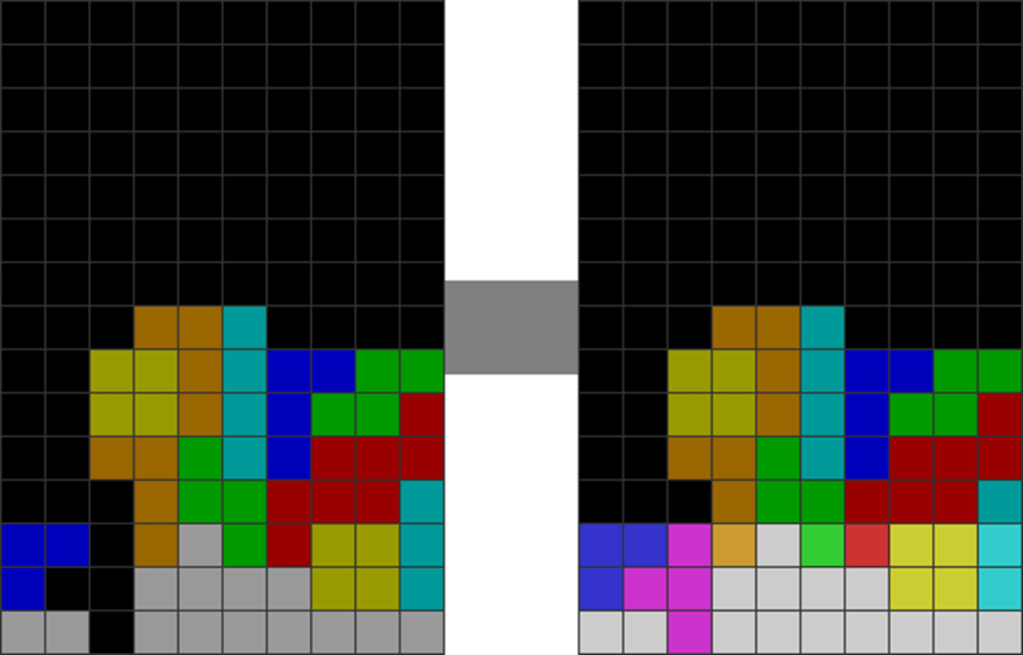
(ii) Back-to-back T-spin Triple Tower
The below continues from set 20-8’s picture 3:
| Diagram Set 20-11 | |
| 1 | 2 |
| On rare occasions, you will be forced to make this placement. | You get another T-spin double. |
| Then, you transition to a back-to-back T-spin triple tower. |
I’m not too fond of this follow-up. However, it’s sometimes the most optimal setup, given this situation.
3) Mr. T-Spin STD
Estimated chance where the opening sequence allows for this opener: 12.5%
Starting Pieces Needed: Early S and Z
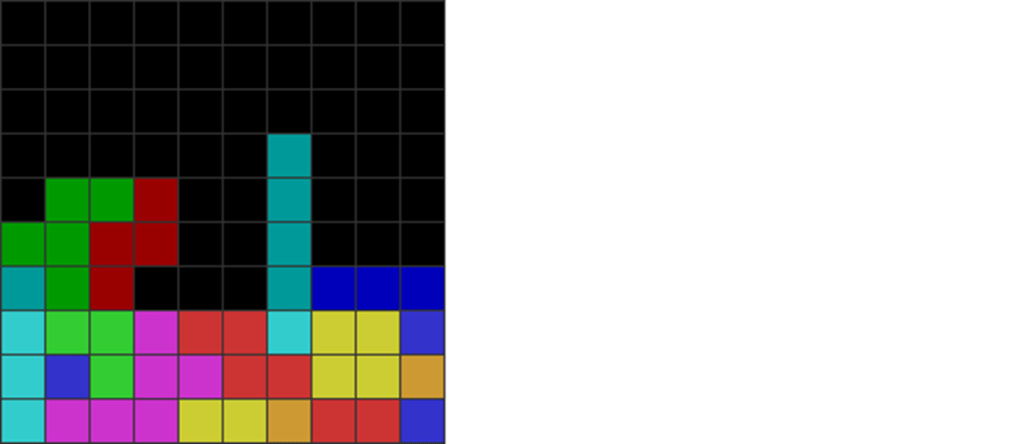
Mr. T-Spin STD (Single-Triple-Double) opener is useful if one has early S and Z pieces.
| Diagram Set 20-12 | |
| 1 | 2 |

| Place the first seven pieces (first bag) to create the shape in step 1. Next, spin a T piece into the cavity to make a T-spin single. |
Second Bag:
| Diagram Set 20-13 |

| Next, place the second bag in the above manners. Note the symmetry of the S, Z, and O placements on the far right of each 4 examples (last four columns). This can be oriented as long as it creates the same shape. Doing so makes a complete T-spin triple. |
It is powerful because of its many follow-ups, such as a DT Cannon continuation (the Nosomi method). It can then be followed up by 5-4 stacking.
(i) Nosomi DT Cannon Continuation
This is a DT Cannon continuation. To do the Nosomi continuation, place the subsequent pieces this way:
| Diagram Set 20-14 | |
| 1 | 2 |

| Perform the second T-spin (the T-spin triple). | Create the pattern above. |
| 3 | 4 |

| When you use your third T-spin, slot it into the cavity and rotate it as shown above. This makes a T-spin single. | Top the Z pieces this way to create a DT Cannon continuation. This gives an extremely powerful T-spin double and T-spin triple. |
To perform the DT Cannon, do this:
| Diagram Set 20-15 | |
| 5 | 6 |
| 7 |
| Perform the DT Cannon’s two T-spins, then transition to the mid-game through freestyling. |
This continuation is powerful; however, the continuation of the DT Cannon may be dangerous. Many new players mindlessly follow it without knowing when to give it up. Often, I find it more than likely that I would give up the DT Cannon continuation as my field is expected to be above the 50% mark by the time I use it.
4) Hachispin
Estimated chance where the opening sequence allows for this opener: 12.5%
Starting Pieces Needed: Early O and S (O and Z if mirrored)
When you have an early O and S piece (O and Z if reversed), you can use Hachispin.
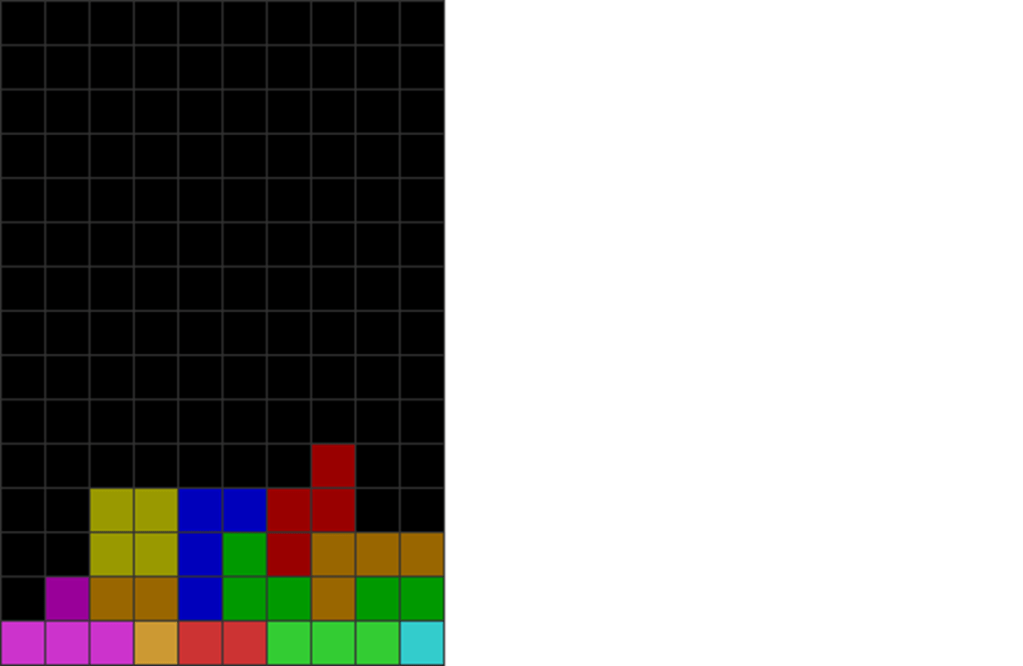
Hachispin, from my experience, leads to effortless follow-ups, such as mid-game LST stacking. However, its first T-spin is a T-spin single. This makes its pressure slightly weaker at the start, but it is compensated for with a more potent T-spin triple after the first T-spin.
First Bag:
| Diagram Set 20-16 | |
| 1 | 2 |
| Place the first bag in the above manner and spin the T piece into the right cavity to perform a T-spin single. |
There are several ways to place the following bag:
Second Bag:
| Diagram Set 20-17 | |
| A | B |
| C | A to T-spin triple |

| For clarification, the gray blocks represent the first bag’s leftovers. Depending on which pieces come first, you can place the following seven pieces in these three ways. The T (not placed) is reserved for the T-spin triple. |
The second bag leads to a T-spin triple, which is powerful.
After that, you can freestyle in many manners. We assume that the following continuations follow from A above after the T-spin triple. It matters little if the following are created from B or C — the follow-ups below are freestyled just as easily.
(i) LST and ST Stacking Follow-up
My favorite transition is a T-spin double below. This leads to a string of T-spin doubles and Tetrises.
| Diagram Set 20-18 | |
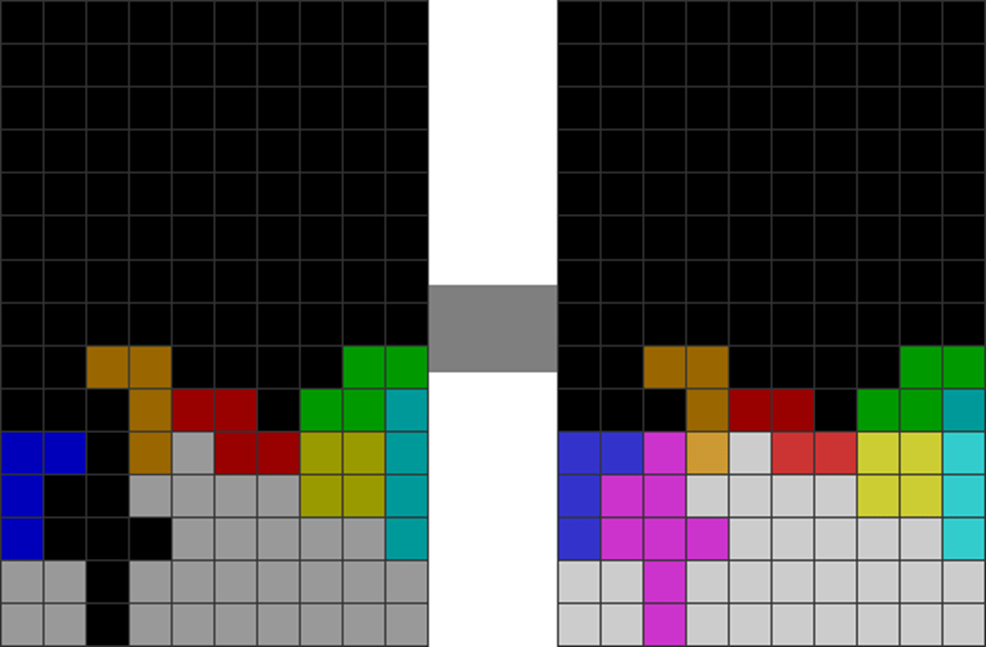
| 1 | 2 |

| Put the L, J, and S pieces this way to create a simple T-spin double. | Execute the T-spin double. Upstack the lavender parts. |
| 3 |

| You can quickly get another T-spin. Then, you freestyle everything from here. This can lead to mid-game LST or ST stacking easily. |
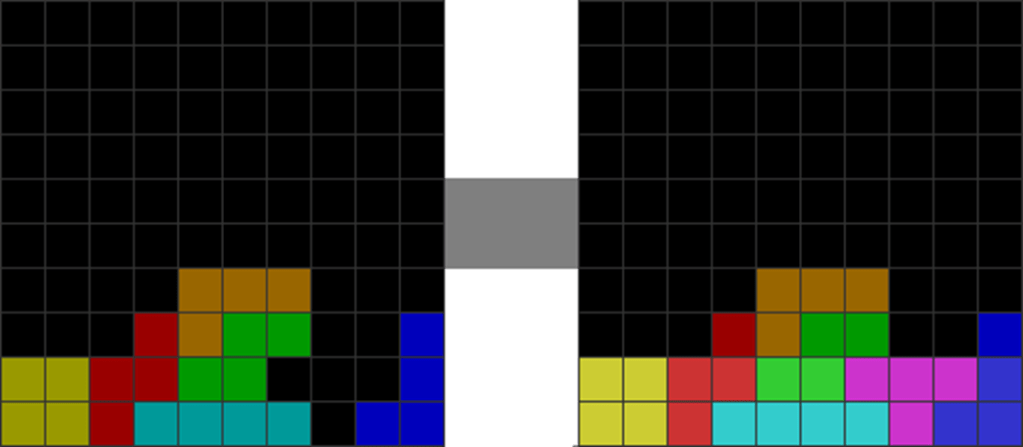
(ii) T-spin Triple and Imperial Cross Follow-ups
However, some players may prefer the other two final continuations below. If done right, Hachispin leads to another T-spin triple or an Imperial Cross (2 T-spin doubles).
| Diagram Set 20-19 | |
| A | B |
| These two are suggested T-spin triple and Imperial Cross continuations. There are no fixed patterns to stack — they are freestyled. |
5) MKO Stacking
Estimated chance where the opening sequence allows this opener: About 45 to 50%.
Starting Pieces Needed: Early L and J
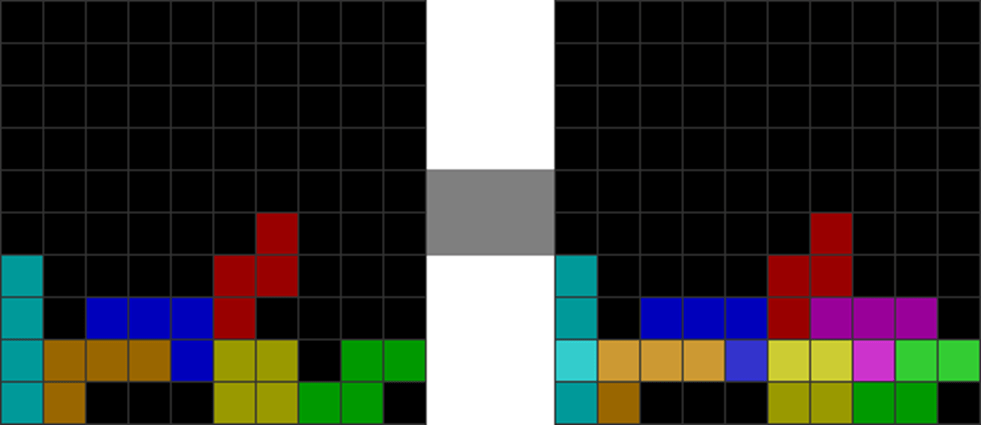
An alternative to DT Cannon for early L and J starts is MKO stacking. You can usually get off the first T-spin fast without wasting a T in the stack as an overhang. It also has many good continuations, some leading to perfect clears. To create it, do this:
| Diagram Set 20-20 | |
| 1 | 2 |
| 3 | 4 |

This opener grants a quick first T-spin double. Note that the overhang can also be on the other side (on the right side as a vertical Z). However, sometimes, using an S or Z overhang is impossible. The following Z overhang alternative continues from the above diagram set’s step 1. This gives a second T-spin double.
| Diagram Set 20-21 | |
| 1 | 2 |
| 3 |
| In step 1, the Z (with checkerboxes) is placed as a vertical overhang in columns 5 and 6. |
You are sometimes forced to use a T overhang. This gives a second T-spin double:
| Diagram Set 20-22 | |
| 1 | 2 |
MKO Stacking has several common follow-ups:
(i) Kaidan Follow-up
The below examples continue from diagram 20-27’s step 2. The follow-up to the T overhang method is straightforward. Do this:
| Diagram Set 20-23 | |
| 1 | 2 |
| Perform the second T-spin. | You get this after-pattern. |
| 3 |

| You then make a Kaidan with the S and Z pieces this way. This is the most common Kaidan follow-up pattern. |
Some freestyling may be needed, such as:
| Diagram Set 20-24 | |
| 1 | 2 |

| 3 |
| This also leads to a Kaidan. However, the L overhang here is rarer compared to the last set of diagram placements. |
The above two sequences can then be quickly followed up to give a third T-spin double each. With proper stacking, you can quickly get a fourth T-spin double. However, it’s preferable to freestyle everything from now on.
(ii) 2-7 Stacking Follow-up with Freestyle, LST, or ST Stacking
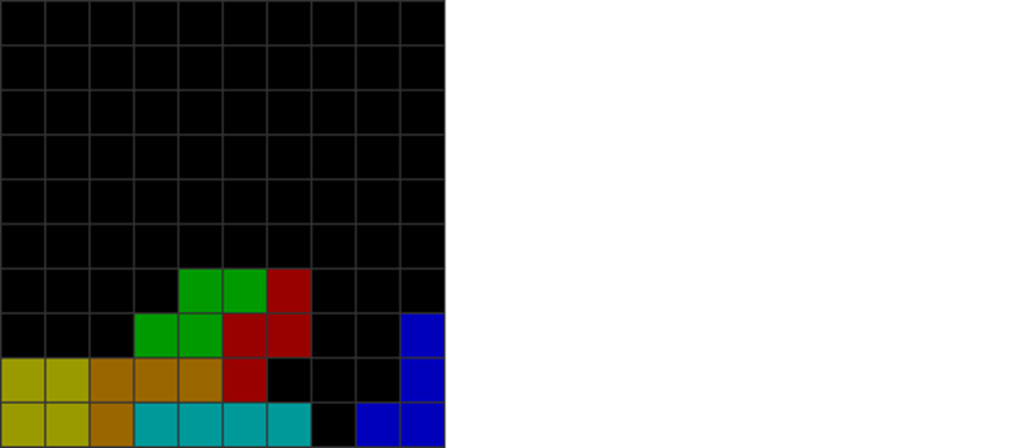
Another continuation from diagram 20-25’s step 1 is:
| Diagram Set 20-25 | |
| 1 | 2 |

| The first T is put vertically as an overhang. He makes the first T-spin a T-spin single by rotating the T vertically. | You get the following pattern, which continues quickly into a string of T-spin doubles and Tetrises with proper freestyling. |
The user should be able to see that step 2 leads easily to ST or LST stacking by now.
See how consistent it is? Because of its faster attack and consistency, I prefer it over DT Cannon. From experience, MKO can be used in around 45% of all opening sequences, making it a highly reliable and easy-to-learn opener.
Summary and Conclusion
I suggest beginner Tetris players quickly learn as few required openers as possible, then move on to learn the mid-game.
| Concept | Summarized Rules-of-Thumb |
| Flow | A good opener has low key presses, consistent follow-ups, and is easy-to-use. |
| Form | Be familiar with each opener’s starting sequence and when to use them. Be familiar with each opener’s follow-ups that lead to the smoothest mid-game continuations. |
| Balance | It’s better to know just 5 or 6 quick, optimal openers than memorize a hundred inefficient ones like those on Hard Drop Wiki. Give up an opener’s follow-ups if you need to downstack to survive. |
