Whenever you join consecutive attacks, such that each line clear immediately follows each other, you do extra damage from combos. Combos add valuable damage that augments the garbage pressure from one’s T-spins, Tetrises, doubles, and triples.
Every consecutive skim or downstack adds +1 to a combo meter. The higher this is, the more garbage the following line clear gives. I summarize this in the following chart:
| Garbage per line | |
| Line Clear | Sent |
| Single | 0 |
| Double | 1 |
| Triple | 2 |
| Tetris | 4 |
| T-Spin Single | 2 |
| T-Spin Double | 4 |
| T-Spin Triple | 6 |
| Perfect Clear | 10 |
| Mini T-Spin | 0 |
| Back-to-Back | 1 |
Garbage combo table:
| Garbage per Combo | ||||
| Combo | Tetris 99 | Puyo Puyo Tetris 2 | Tetris Effect | Tetris Effect Zone mode |
| 0 | 0 | 0 | 0 | 0 |
| 1 | 1 | 0 | 0 | 0 |
| 2 | 1 | 1 | 1 | 1 |
| 3 | 2 | 1 | 1 | 1 |
| 4 | 2 | 2 | 2 | 2 |
| 5 | 3 | 2 | 2 | 2 |
| 6 | 3 | 3 | 2 | 2 |
| 7 | 4 | 3 | 3 | 2 |
| 8 | 4 | 4 | 3 | 2 |
| 9 | 4 | 4 | 3 | 2 |
| 10 | 5 | 4 | 3 | 3 |
| 11 | 5 | 4 | 3 | 3 |
| 12 | 5 | 4 | 3 | 3 |
| 13+ | 5 | 5 | 4 | 3 |
To illustrate, a setup that involves three consecutive Tetrises will generate 5+5+5 = 15 garbage from the Tetrises, assuming the first already has a back-to-back bonus. However, it generates more garbage because of the combo in the subsequent line clears beyond the first Tetris. This grants more garbage lines from the combo. This extra amount depends on which Tetris version you use.
The higher the combo count, the more damage one generates.
Combos from downstacking increase one’s damage substantially. Hence, it is essential to maximize one’s garbage output with combos.
Here are easy-to-memorize combo methods that can be readily used:
A) 2-Wide
2-widing is the most basic downstacking combo method. It involves building up next to a well that is two blocks wide.
Here’s how:
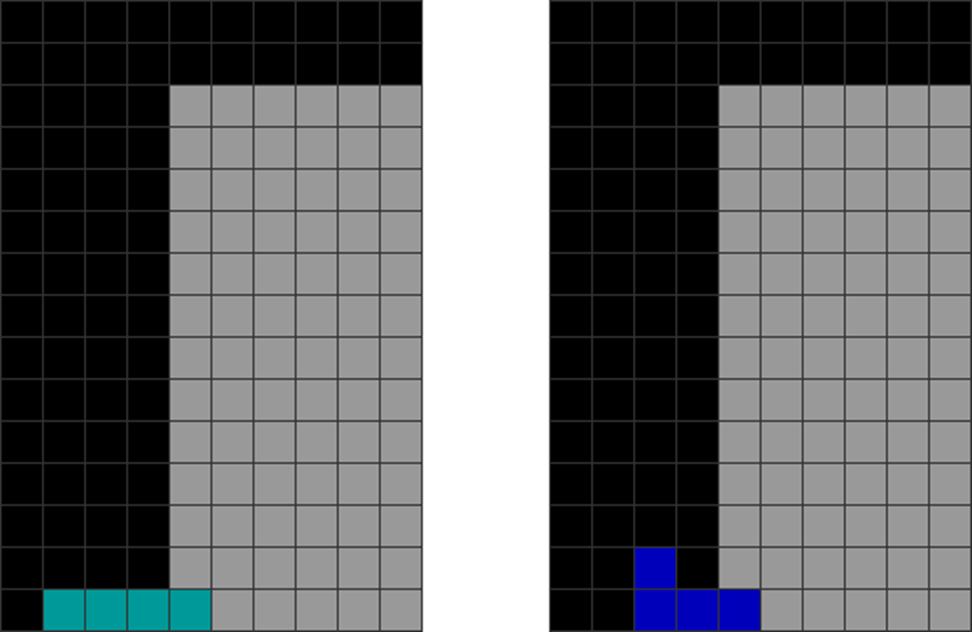
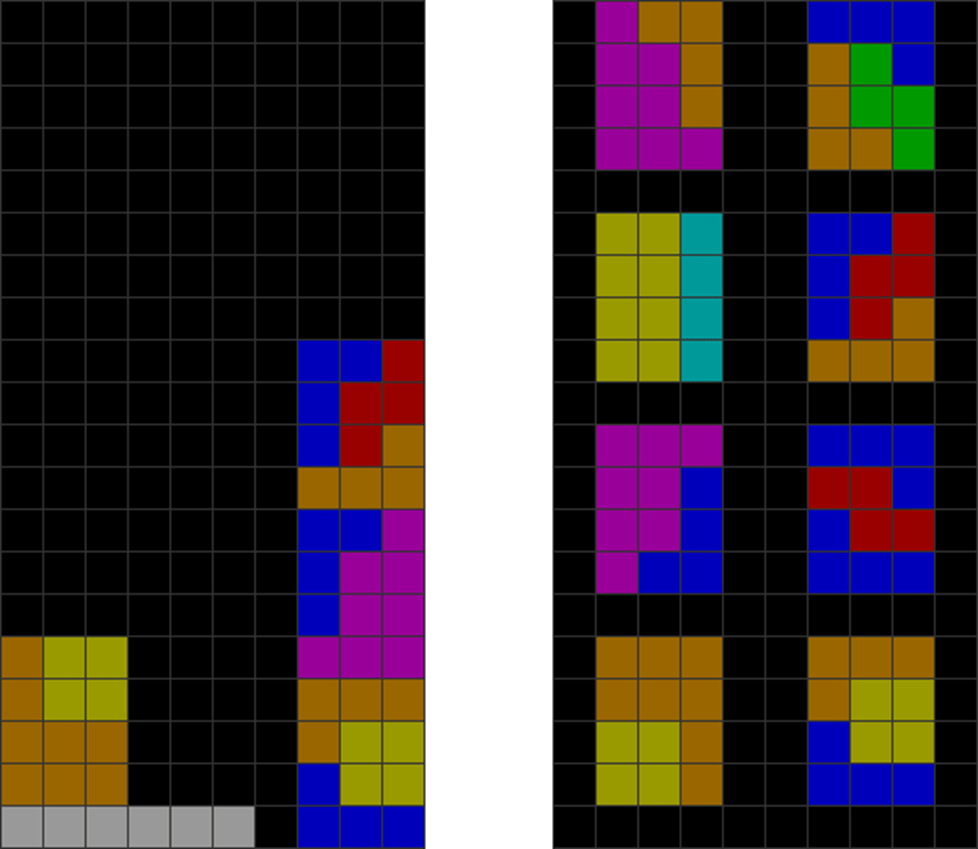
| Diagram Set 6-1 | |
| 1 | 2 |
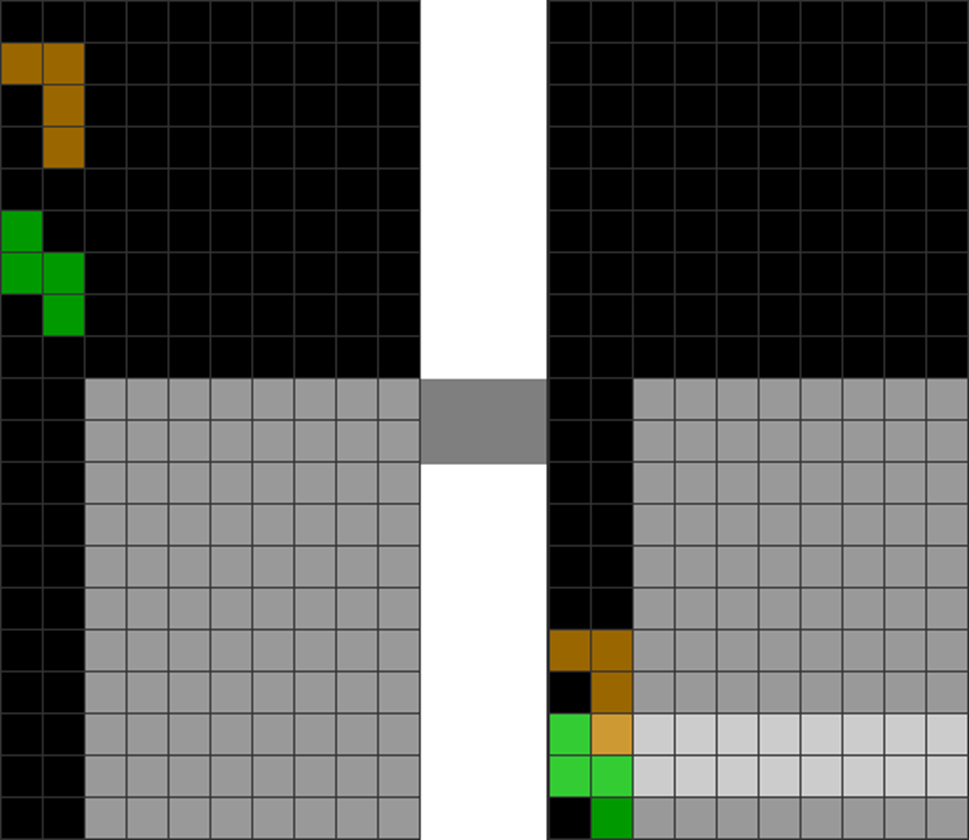
| The player makes a 2-wide well on the left side (columns 1 and 2) while stacking up the right side. This creates a 2-wide combo sequence setup, starting with the S and L pieces’ line clears when they enter the gap. |
To complete the downstack combo sequence, fill the 2-wide cavity with pieces, leading to a chain of connected line clears to increase the combo meter. Whenever you stop the line clears and place pieces without invoking a new line clear, the combo meter resets to 0.
The taller the upstack on the right side, the greater the combo can reach.
2-wide is very simple. Here are a few hints on how to improve its effectiveness:
S and Z pieces are the best ones for 2-wide. Their vertical placements can most often continue the downstack combo. They can fill cavities of 1 or 2 blocks wide.
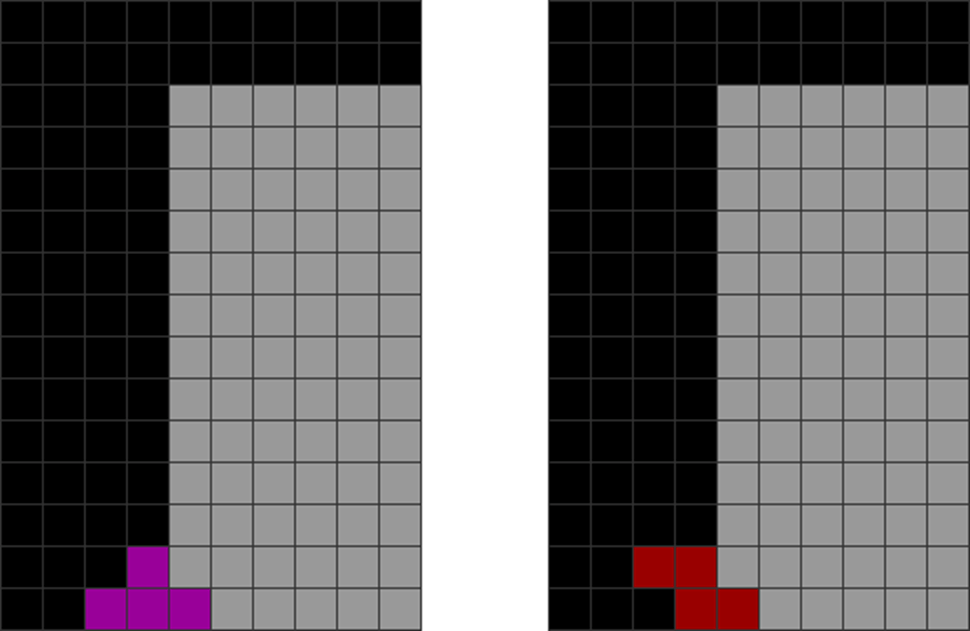
| Diagram Set 6-2 | |
| 1 | 2 |
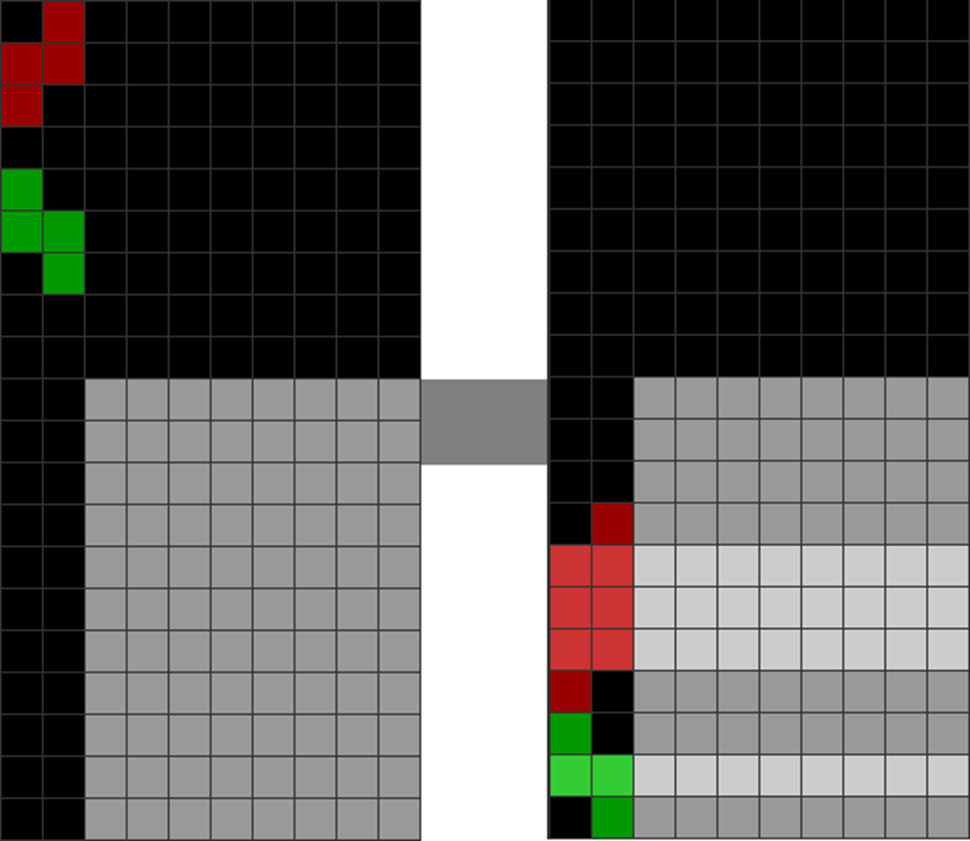
| The player easily starts a downstack combo with a series of S and Z pieces. |
See how easy it is to make 2-wide combos with S and Z? Whenever you’re in doubt, prioritize S and Z pieces to extend a combo.
L and J pieces are the second best for 2-wide. They have many orientations and can fill 1 or 2 blocks wide cavities. Poor usage of L and J pieces can lead to I piece dependencies, so knowing how to avoid such needs proper planning:
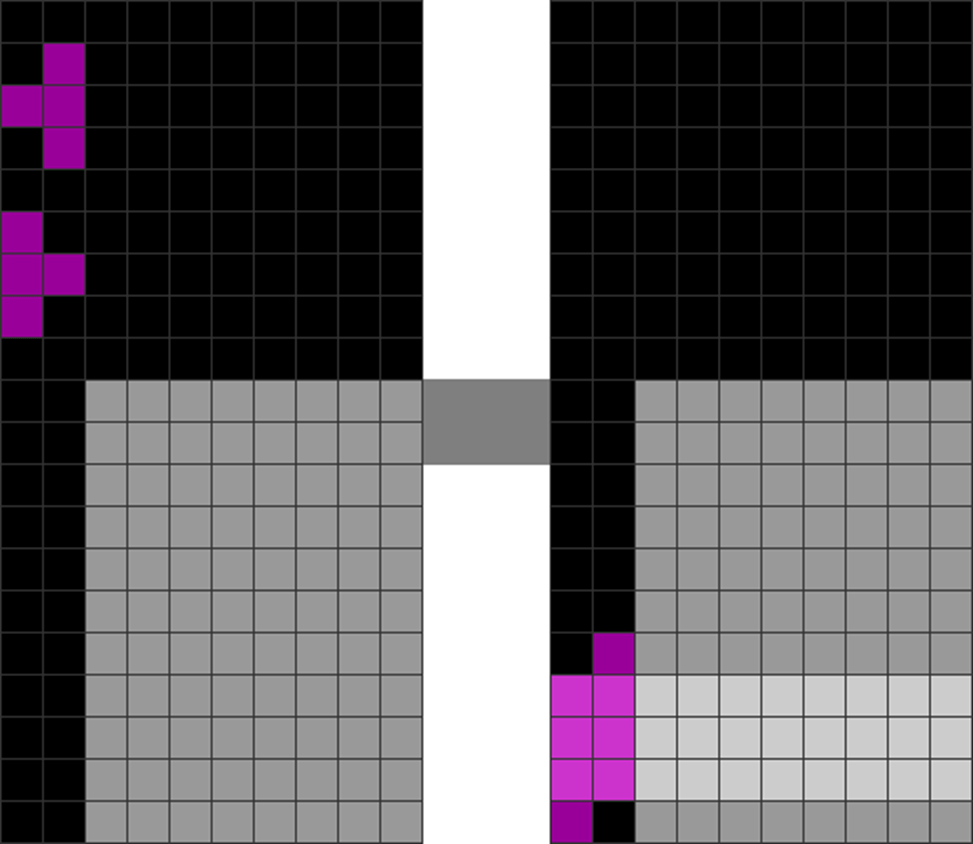
| Diagram Set 6-3 | |
| 1 | 2 |

| L and J placements can only be put vertically into a 2-wide well, making it easy to cultivate the intuition to use them for 2-wide combos. |
The T piece is decent as it has two main mirrored orientations:
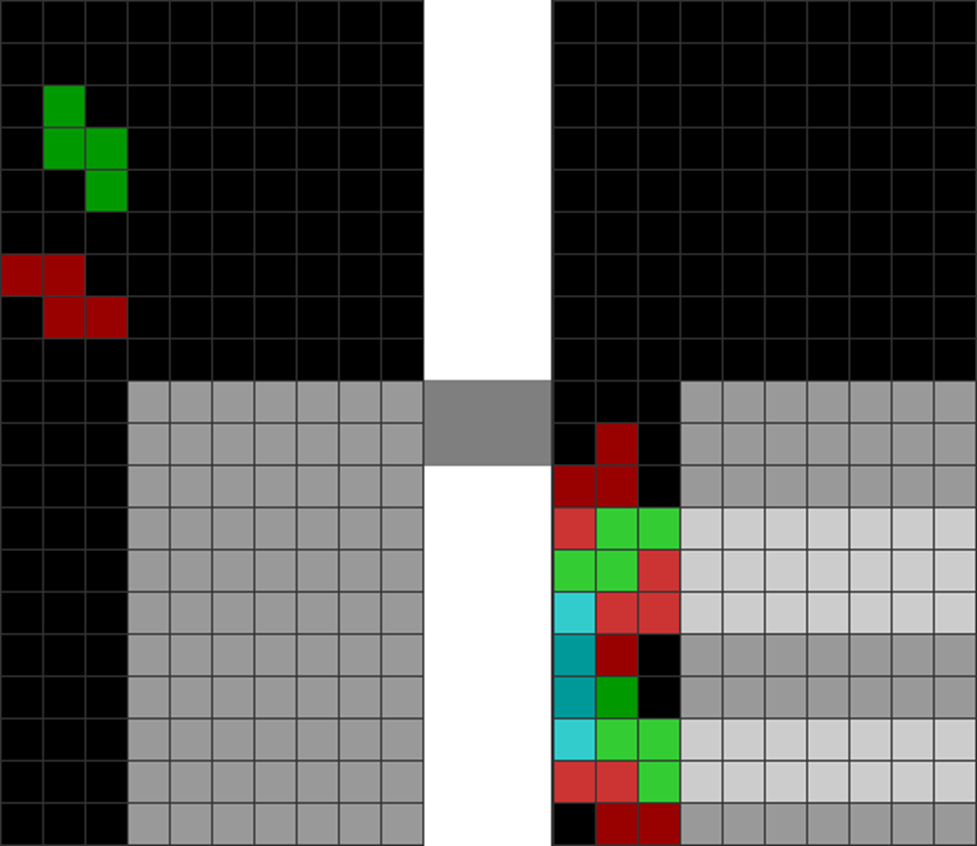
| Diagram Set 6-4 | |
| 1 | 2 |
| Ts can only be put vertically into a 2-wide well, just like the L and J pieces, making them easy to memorize and use. |
O pieces are next on the list. However, they pale in effectiveness as they only have one orientation:
| Diagram Set 6-5 | |
| 1 | 2 |

| Since the O piece can only have one orientation, there’s a high chance they can discontinue some combos. Regardless, they are still highly effective. |
The I piece is the worst as it only has one orientation, leading to further I-piece dependencies.
| Diagram Set 6-6 | |
| 1 | 2 |

| An I piece will likely end many 2-wide downstack combo sequences. |
Thus, I advise minimizing the usage of I pieces sometimes.
B) 3-Wide
3-widing is the second most basic downstack combo method.
It is more efficient than 2-wide and can sustain a higher maximum combo count. However, it has more complex downstacking sequences to master. It involves upstacking next to a well with three blocks wide instead of 2 in 2-wide. The taller the upstack on the right side, the greater the combo can reach.
Here are the best pieces for use to extend combos in 3-wide:
| Diagram Set 6-7 | |
| 1 | 2 |

| L and J pieces are the best for 3-wide as they can fill 1, 2, and 3-wide cavities. |
The sheer number of orientations ensures they can extend most continuations, especially their horizontal placements. If you have to prioritize holding a specific piece for 3-wide combos, Ls and Js would be.
| Diagram Set 6-8 | |
| 1 | 2 |
| From my experience, the S and Z pieces come next, with many ways of filling 1, 2, and 3-wide cavities. They also have many orientations. However, 3-widing with S and Z may need I pieces to continue the combo. |
| Diagram Set 6-9 | |
| 1 | 2 |

| The T piece is not the most efficient, as some piece placements lead to a jagged edge jutting out. They might be combined with L or J pieces to continue the combo. |
Ts can often break downstack continuations unless you use horizontal L and J pieces to skim through the bumpy spot.
| Diagram Set 6-10 | |
| 1 | 2 |

| The I and O pieces are among the last because of their inflexibility. They only have one orientation each, and it’s best to avoid them as much as possible. |
C) 4-Wide
4-wide involves making a well that is 4 blocks wide. There are several kinds of 4-wide.
Of all combo methods, 4-wide is the most efficient compared to 2-wide and 3-wide. It gives the highest possible combo count and continuations.
i) Side 4-Wide
Side 4-wide involves leaving a well with a 4-wide gap in the corners. Often, the cavity is filled with a certain number of residues (blocks). The taller the upstack on the right side, the greater the combo might reach.
3-residue 4-wide:
| Diagram Set 6-11 |
| 3-residue 4-wide has three blocks in the 4-wide activation area (columns 1 to 4) on the left side for all the above four examples. |
That’s why it’s called 3-residue 4-wide. Using three residues is the most common and conventional form of 4-wide.
I have provided the solutions for the most easily memorized 3-residue 4-wide here.
After providing their solutions list, I will teach you how to read the charts.
3 Residues:
How to Read the Charts:
Here are several simple steps to read the charts.
- The first column represents the residue pattern you must recognize in the 4-wide activation area. Create your 4-wide field, then look for the pattern.
- Read horizontally and find the list of ways to place the S, Z, T, O, I, L, or J pieces.
- Once you place the above pieces in your chosen orientation, the line clear will cause the 4-wide residue pattern to transform into something else.
- Repeat step (1) after you identify the correct pattern that is transformed into in step (3).
- Repeat the other steps.
Simple Trick to Maximize 4-Wide Combo Continuations
The sheer number of combo patterns may seem overwhelming. However, there is a simple set of tricks to maximize combos easily.
- Hold the I piece
The I piece has a 100% chance of continuing a combo if it is placed horizontally.
- Prioritize L and J pieces
These two pieces have the greatest number of orientations, making them fill many combo situations.
- Prioritize T pieces next
T pieces aren’t as good as I, L, or J. However, they still have an extremely high chance of continuing a combo, per my extensive experience.
- S and Z pieces are less optimal
While not the worst pieces, they have a lower chance to continue the combo.
- Avoid O pieces like the plague
Os give the lowest chances to continue a combo as it has only one orientation.
ii) Center 4-Wide
Perhaps the most controversial and hated method in Tetris lies in the dreaded center 4-wide:
| Diagram Set 6-12 | |
| A | B |

| To make center 4-wide, make the 4-wide residue pattern (it can be any residue, but most people typically use three residues) precisely in the center. Stack the two adjacent sides until they become tall towers. The green circled columns 4 to 7 should be empty, except for the residue pattern. |
The taller the upstack on the left and right sides, the greater the combo can reach.
I will be honest: there is no other method that is more loathed in Tetris.
Why is it so overpowered? It is because pieces spawn in the green circled area at the highest blocks. In normal side 4-wide, you can get topped out if you receive garbage too suddenly. The piece will spawn and collide with the upstacked tower when it surges. However, in center 4-wide, this does not happen, allowing the sides to rise far above the ceiling. At the same time, you can continue to 4-wide while being alive.
This lets you soak up an unbelievable amount of damage while sending immense dirty garbage to your opponent.
The Trick to Center 4-Wide Opener Stacking
The number of patterns to stack the two side towers of center 4-wide may seem daunting. However, there’s an easy way to stack them.
| Diagram Set 6-13 |
| Note how some pieces come together easily, such as LOJ, JJO, LSL, OOI, TTJ, and LJS, to make a rectangle. SSI (ZZI if mirrored) are also common patterns. |
Only a finite number of tower arrangements exist. You eventually learn them all. Learn these patterns and stack them on both towers.
Why? Because the 3-blocks-wide patterns on the left and right sides involve the following repeating patterns that can be memorized and placed quickly:
| Diagram Set 6-14 | |
| A | B |
| These are common ways to stack three pieces (LZJ, JTT, LOJ, and LLO) to make 3×4 rectangles for the center 4-wide’s left and right sides. | These are more exhaustive ways to do so. |
Memorizing these patterns on the far-right will make you more proficient in center-4-wide.
The other principle to note is to manage jaggedness. When your stack is jagged, I recommend putting a T to make it easier to place L, O, and J pieces again like this:
| Diagram Set 6-15 | |
| 1 | 2 |
| The player puts a T on the far right tower. | To even out jaggedness during center 4-wide tower stacking, combine pairs of Ts. |
Be sure to observe both sides of the stack’s jaggedness instead of mindlessly just managing one.
Summary and Conclusion
Combos are vital as they give you an additional way of sending (often dirty) garbage to an opponent on top of back-to-backs, T-spins, Tetrises, doubles, and triples.
| Concept | Summarized Rules-of-Thumb |
| Flow | O pieces are the worst for 4-wides; I, L, and J are the best – hold them! |
| Form | Memorize the standard 2, 3, and 4-wide pattern solutions. For the 4-wide center, memorize the common ways to stack the corner towers with composite pieces. |
| Balance | Prioritize the most optimal pieces to downstack combo such as L, J, T, and I. Watch piece dependencies while you upstack and start a combo. |
