In addition to building up for offensive attacks, it is vital to lower your field by digging downwards.
This is the art of downstacking, which means to skim off the top layers of your field to lower its height.
Mastering this boosts your survivability significantly!
Combos: Up Your Attack!
When you start clearing lines continuously without breaking the sequence to place pieces elsewhere, you begin building a combo meter.
Diagram Set 7-1
1
2
The starting field.
The player begins a downstack combo sequence with an S piece.
3
4
He then continues with an L piece.
Then, another L and I piece.
Here, the player connects the field while downstacking. He does not interrupt the sequence. Every subsequent line clear beyond the first adds to a combo meter that sends extra garbage to the opponent.
The longer this is sustained, the more powerful the combo meter is. At the 12th combo, you can send up to 5 extra lines of garbage per line clear!
1. 2-Wides
Among the first offensive methods that most beginner players are exposed to is the 2-wide method.
This involves stacking to make a 2-block-wide well like this:
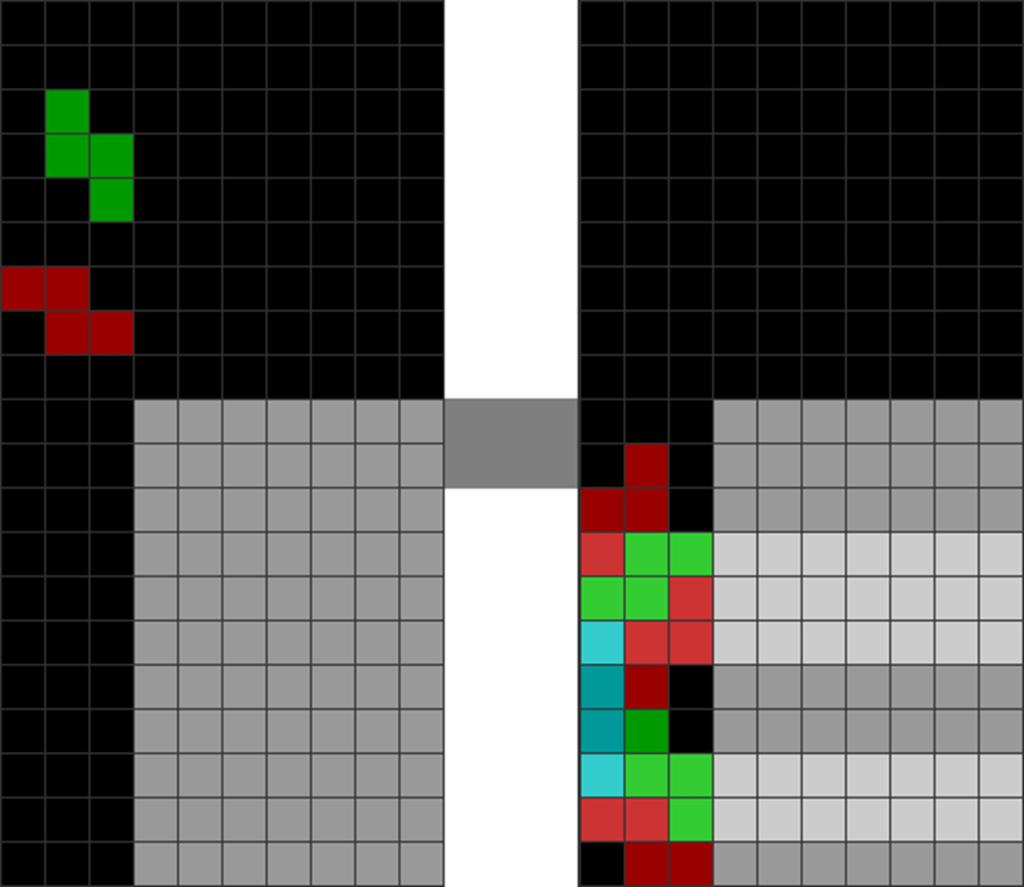
Diagram Set 7-2
1
2
The player makes a 2-wide well on the left side (columns 1 and 2) while stacking up the right side. This creates a 2-wide combo sequence setup, starting with the S and L pieces’ line clears when they enter the gap.
The player can then insert pieces in the well to begin a downstack sequence. If you join the sequence (without stopping to place pieces elsewhere with no line clears), you get a combo bonus.
Every additional combo creates even more garbage for you to send over to your opponents.
I encourage the player to freestyle and use trial-and-error to figure out what pieces work best to continue the combos.
However, the best pieces for 2-widing are the S, Z, and T pieces:
Diagram Set 7-3
1
2
The player easily starts a downstack combo with a series of S, Z, and T pieces.
2. 3-Wides
3-wide methods are an upgrade from 2-wides. They are more efficient and generate more garbage. Combos typically last longer.
To create them, make a 3-block-wide well and upstack the rest of the field like this:
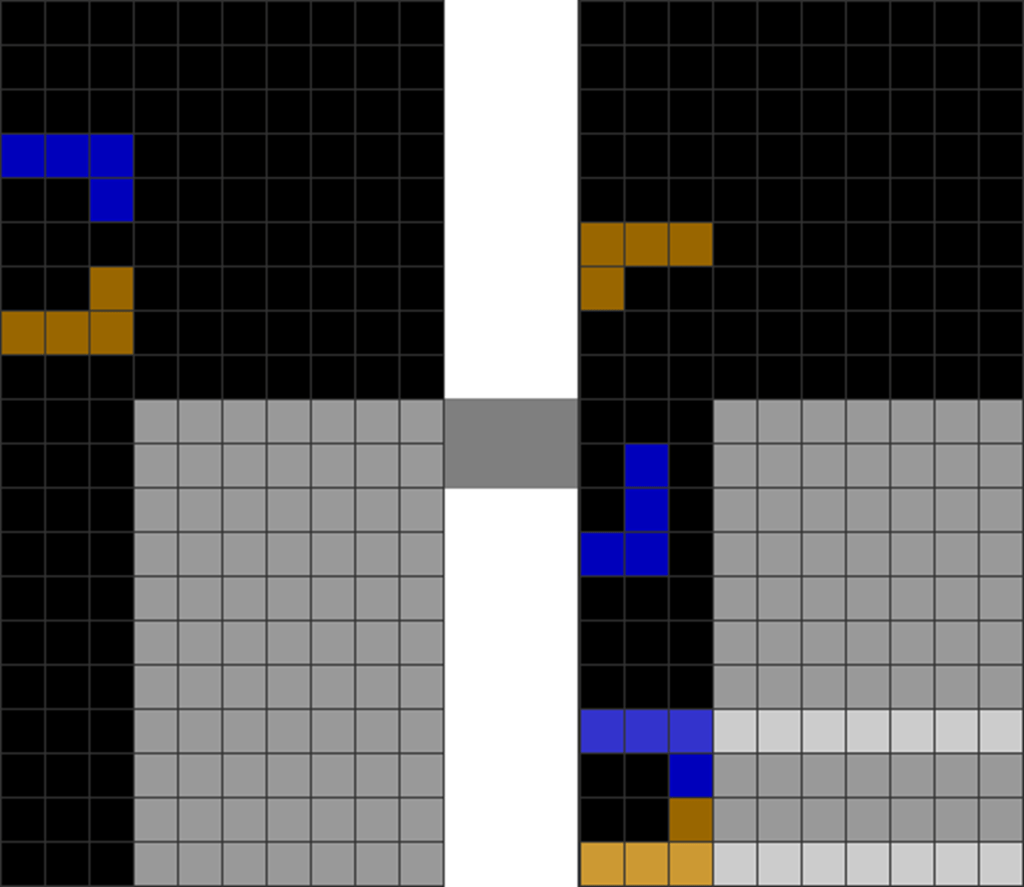
Diagram Set 7-4
1
2
A 3-wide field in step 1. The player starts a combo sequence with I, S, and Z pieces in step 2.
Again, join the field and continue the combo sequence to maximize damage.
Most players learn which pieces to use to sustain the maximum combo count using trial-and-error.
However, the best pieces to sustain combos during 3-widing are the L and J pieces:
Diagram Set 7-5
1
2
L and J pieces are the best for 3-wide as they can fill 1, 2, and 3-block-wide cavities.
The worst pieces are the O and I pieces:
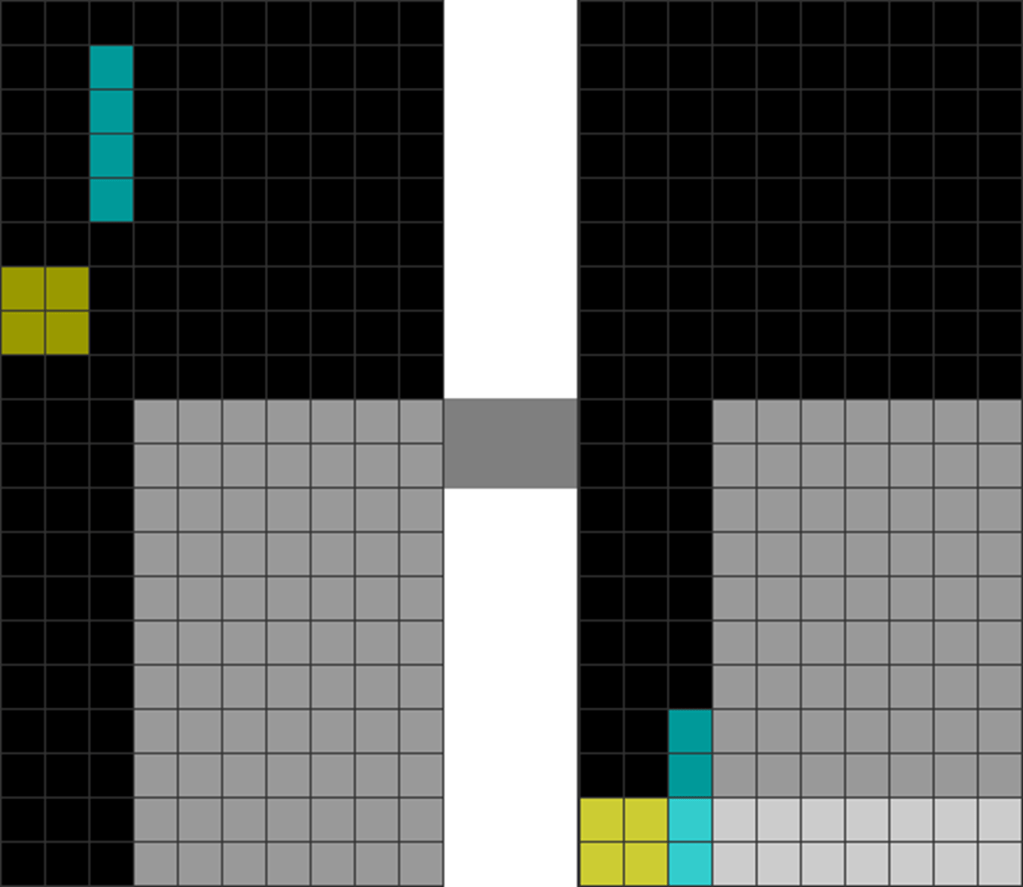
Diagram Set 7-6
1
2
The I and O pieces have only 1 orientation each. It is best to avoid them whenever possible for 3-widing.
O pieces cannot be rotated and are, hence, very inflexible. While I pieces can be rotated, only their vertical orientations can be inserted into the 3-blocks-wide cavity (that’s what she said … no, just kidding).
Defending Made Simple
Defending with downstacking may seem like rocket science, but I have streamlined everything down to the core essentials.
With this, you can free up your precious time to do something more important, like finding out if humankind faked the moon landings.
1. The Dreadful Beginner Mistake
The most common casual beginner mistake is this:
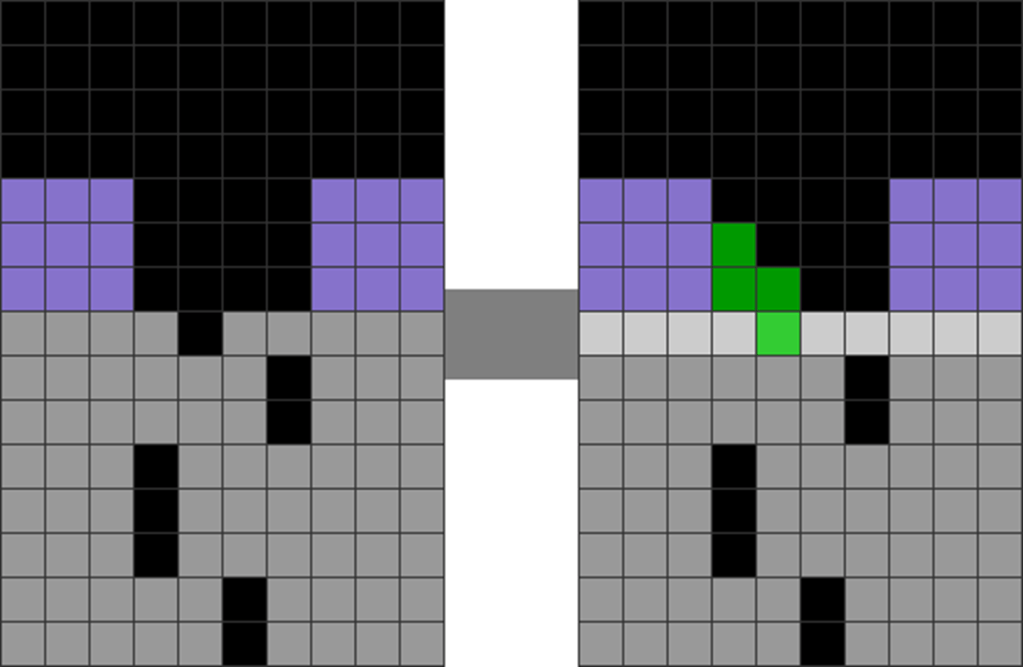
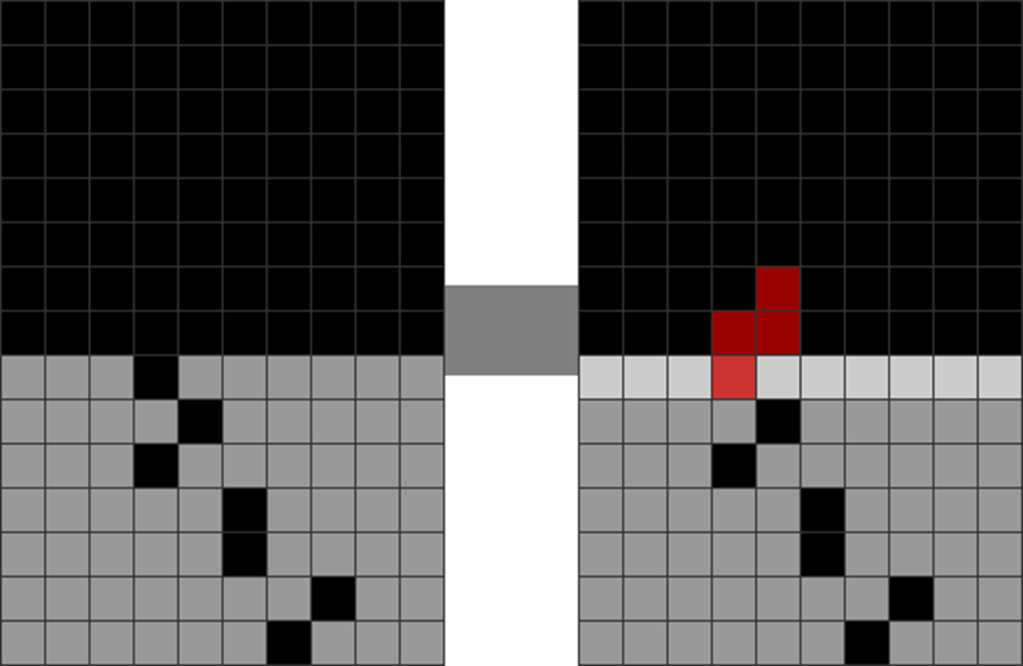
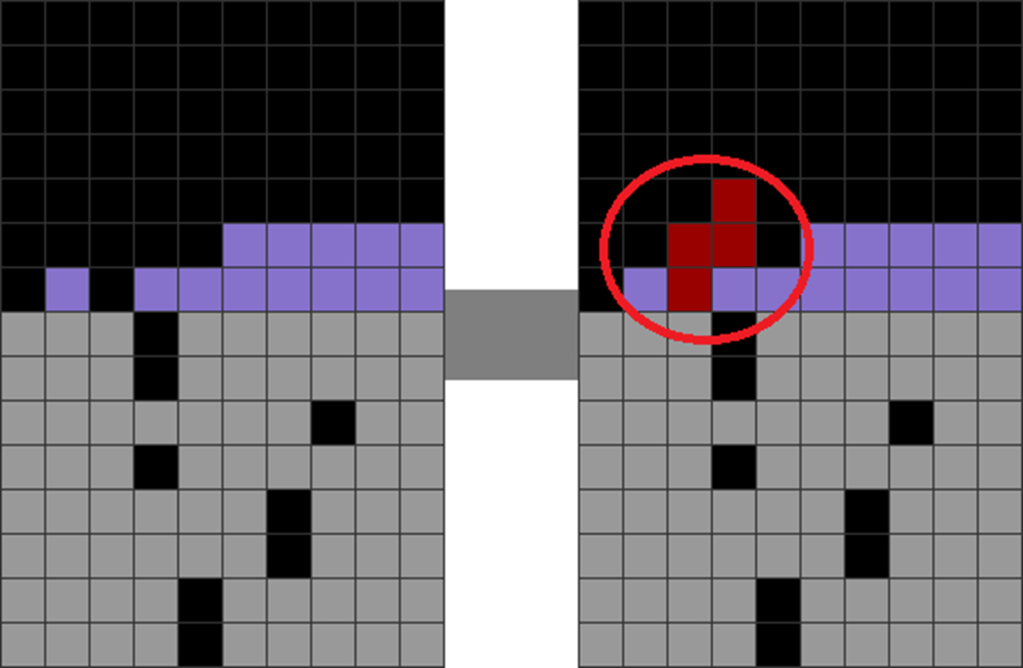
Diagram Set 7-7
1
2
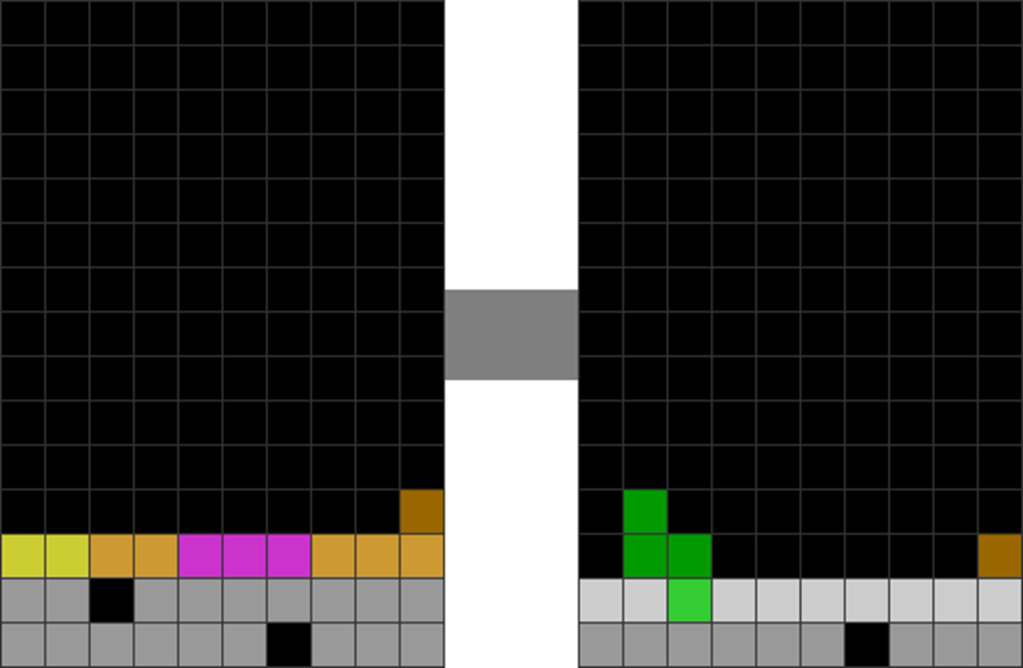
This is the starting field, with semi-dirty garbage.
The player uses a vertical Z piece to downstack the first garbage hole.
3
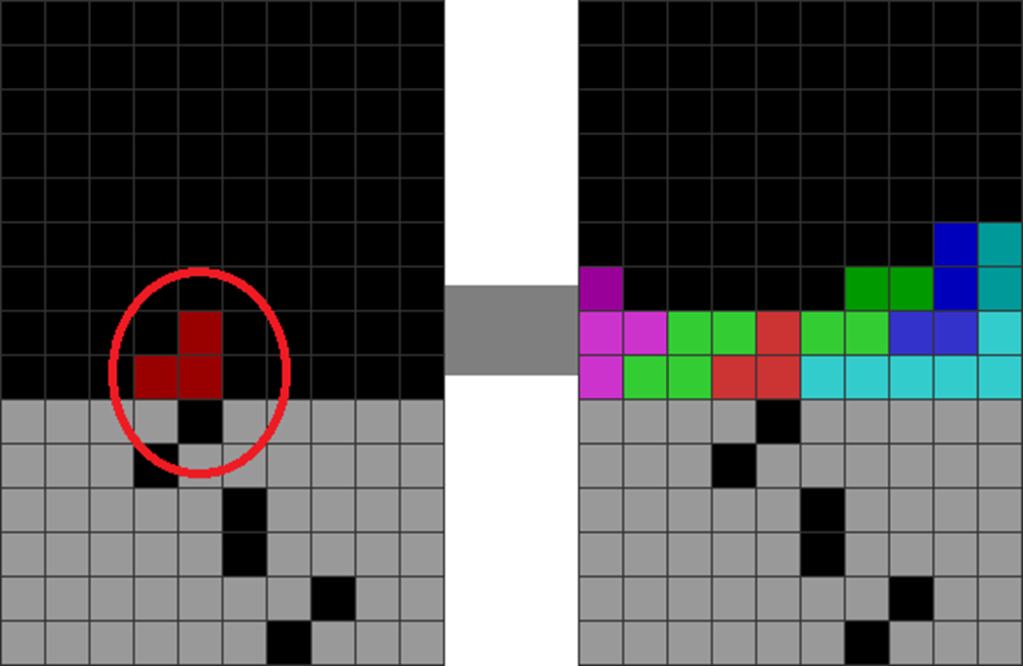
4
This leaves a red-circled area where the 2 red-colored blocks are upstacked over the next garbage hole.
A player must build up 2 layers to skim through them to expose the next garbage hole.
This is lethal, as the red-circled blocks will cover the next garbage hole. To get down, the player must skim off these blocks, which can take a long time due to line clear delays.
But, no worries, here is an easy fix to catapult you away from this tragic scenario!
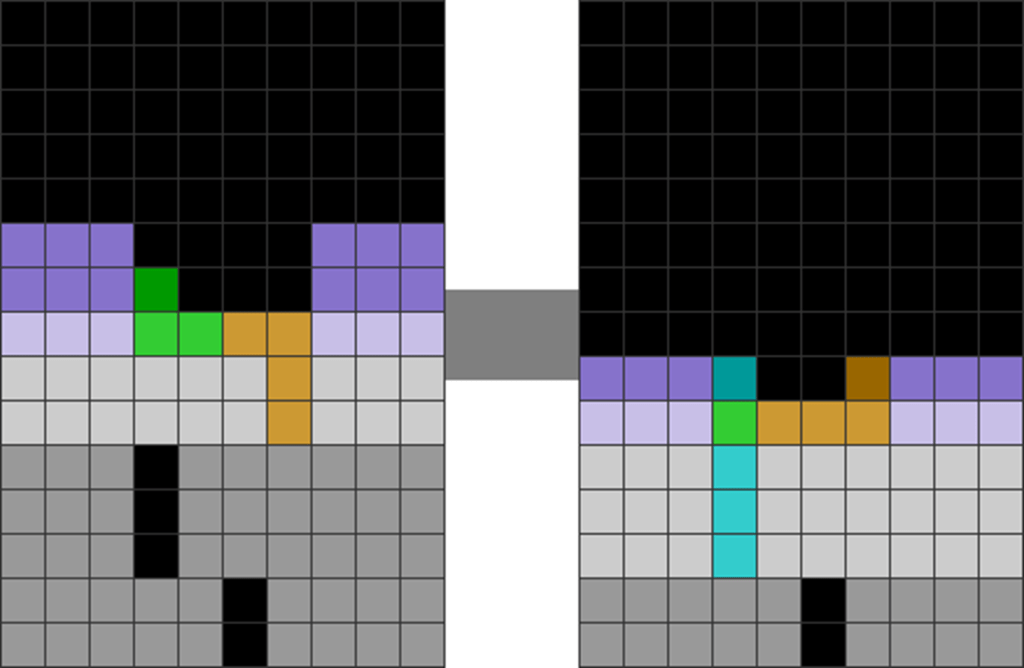
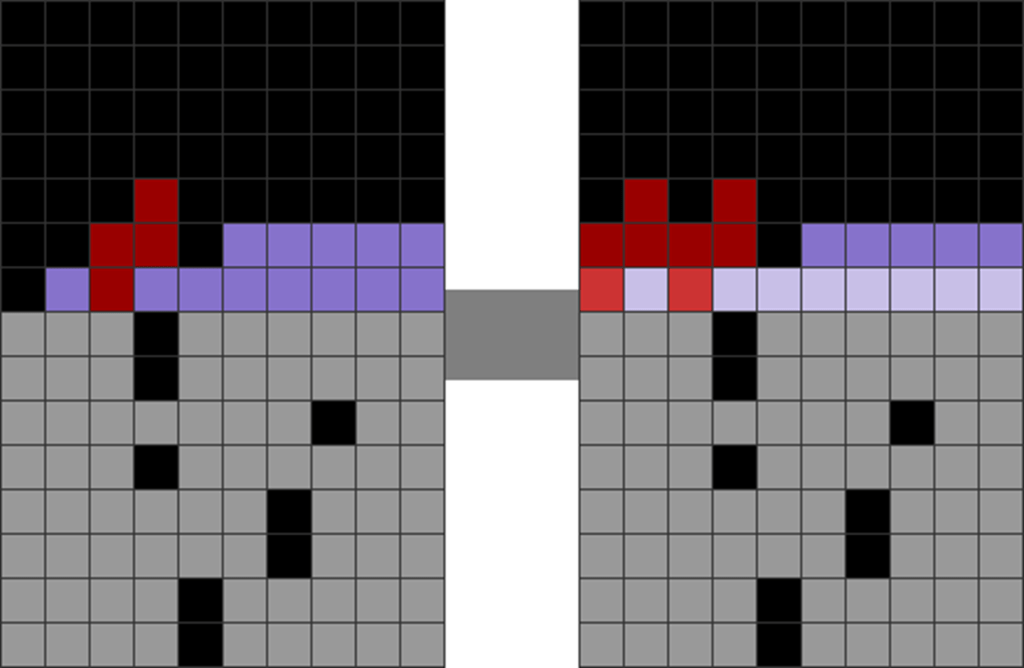
Diagram Set 7-8
1
2
The same starting field as the last diagram set.
The player stacks a bit with the J and I pieces first.
3
4
The player downstacks with the L piece.
The next garbage hole is exposed cleanly and safely!
Here, the player uses alternate ways to skim off the top layers to get down, avoiding the former terrible habit’s pitfalls.
Notice how, unlike the last choice, the placements do not leave any extra, upstacked blocks over the next garbage hole?
This exposes the next garbage hole, letting you get down safely and quickly!
This single practice alone vastly increases your survival rate.
2. Filling Cavities Flatly
What do most beginner players do when they face such situations below?
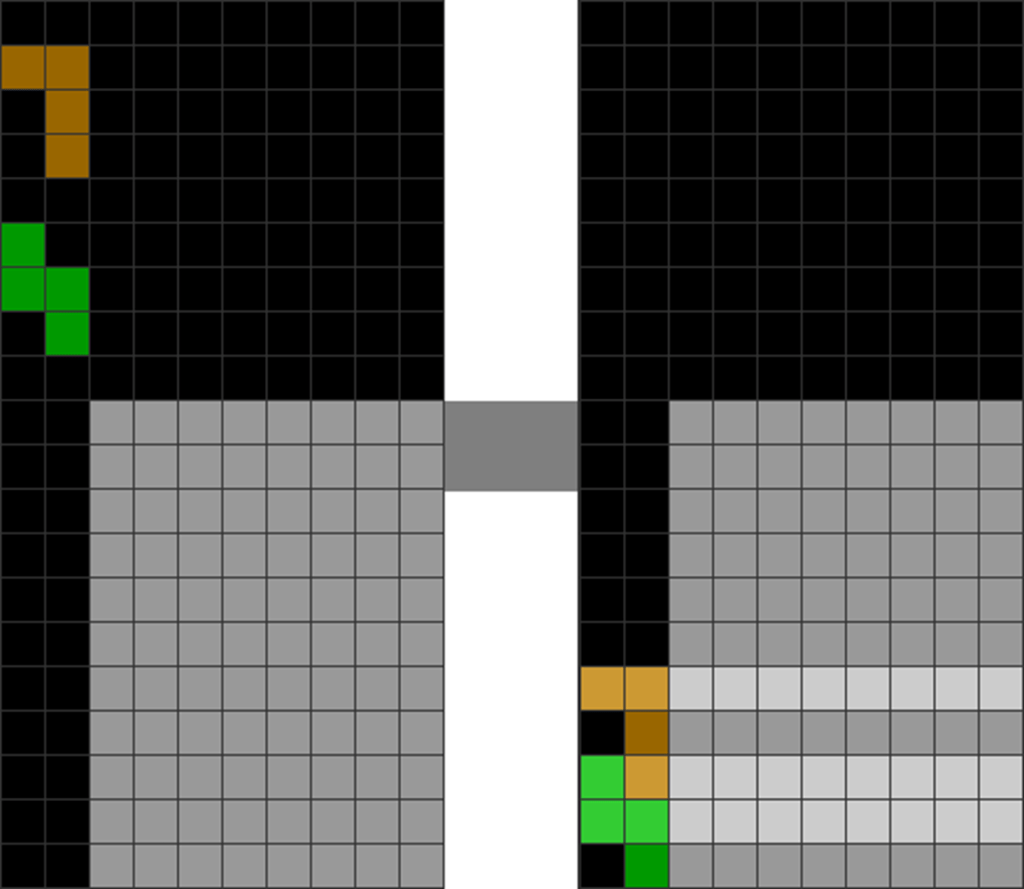
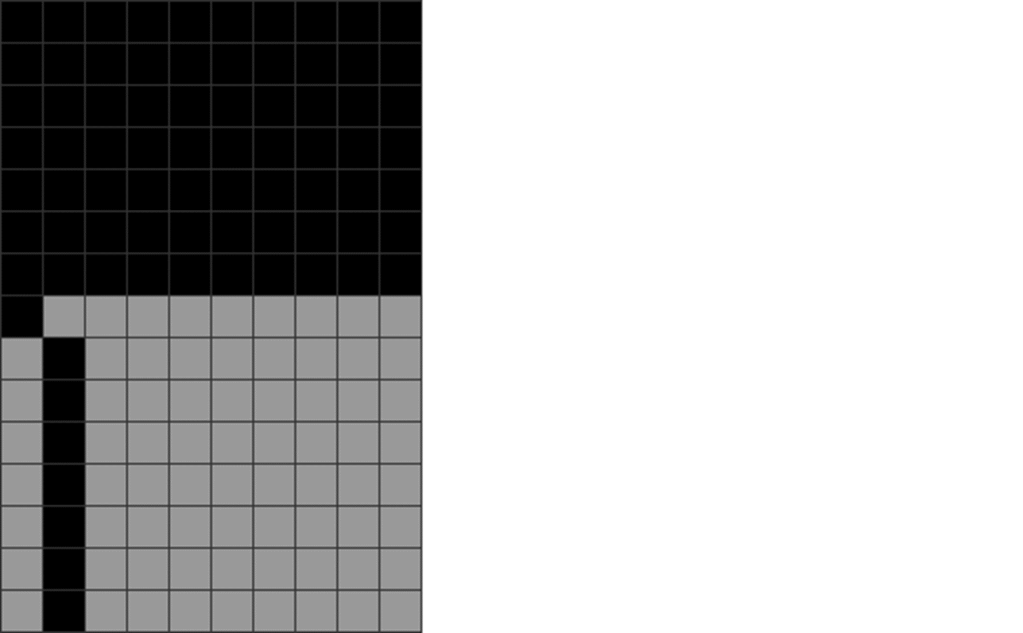
Diagram Set 7-9
A
There is a cavity in the red circle.
They often do this:
Diagram Set 7-10
1
2
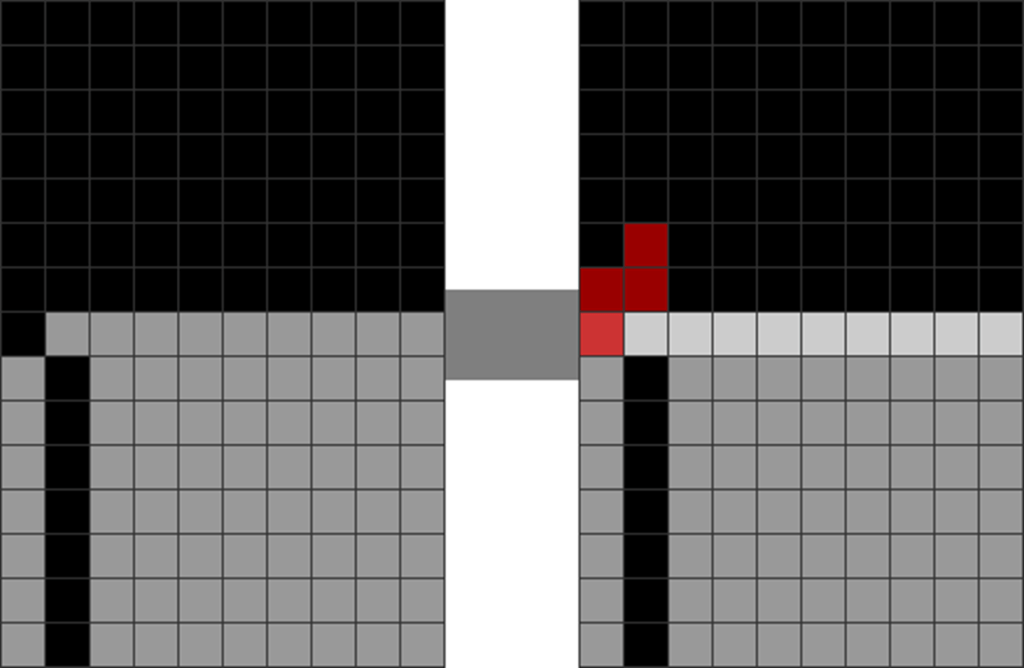
Starting field from the last diagram set.
The player places a vertical Z piece. The red-circled area becomes jagged.
Here, the players fill the cavities with vertical S and Z pieces, resulting in a jagged, divided field.
They may also fill them up with vertical pieces, like the I mino.
This causes the field to overstack. When this happens, downstacking becomes difficult. For instance:
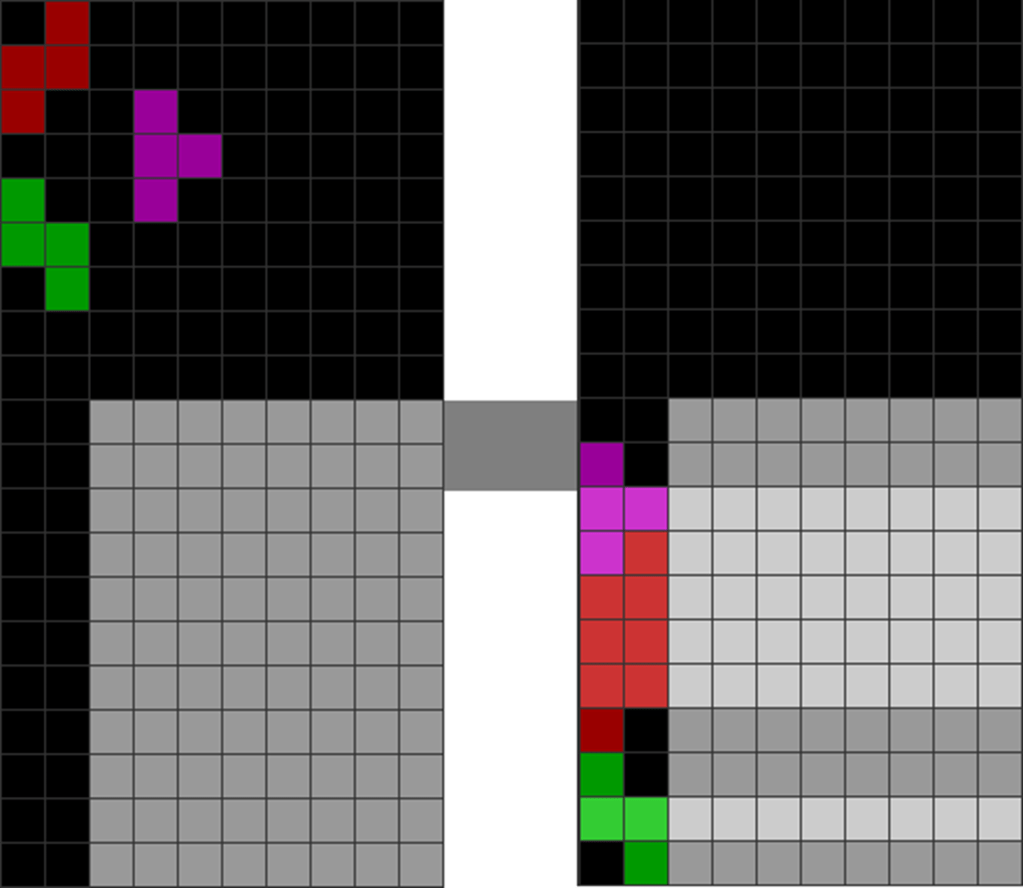
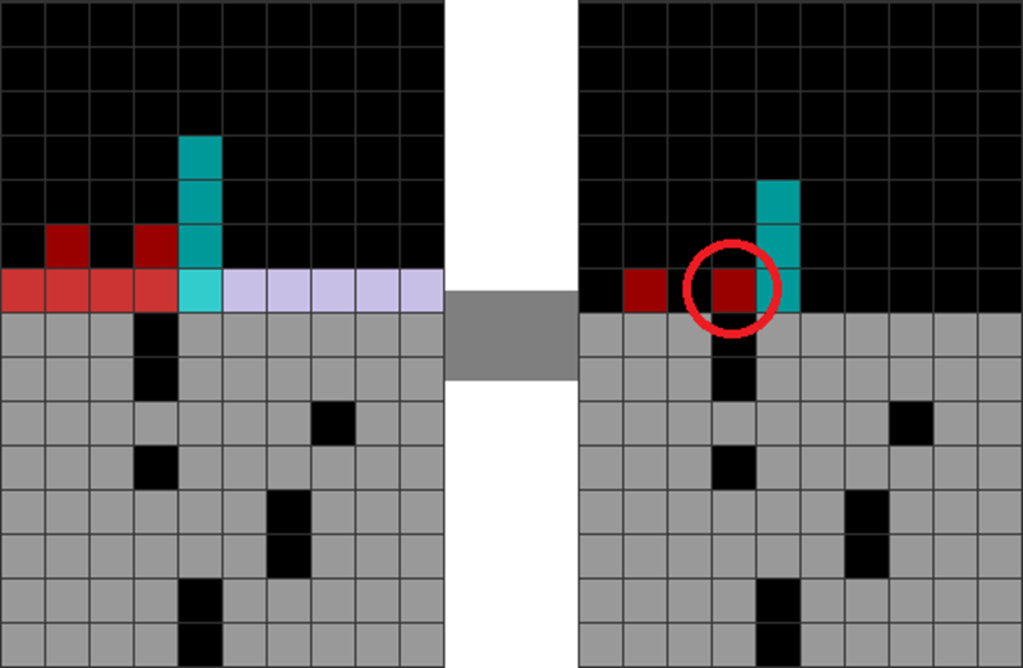
Diagram Set 7-11
1
2
Continues from the starting field of the last diagram set.
The player skims with a Z piece.
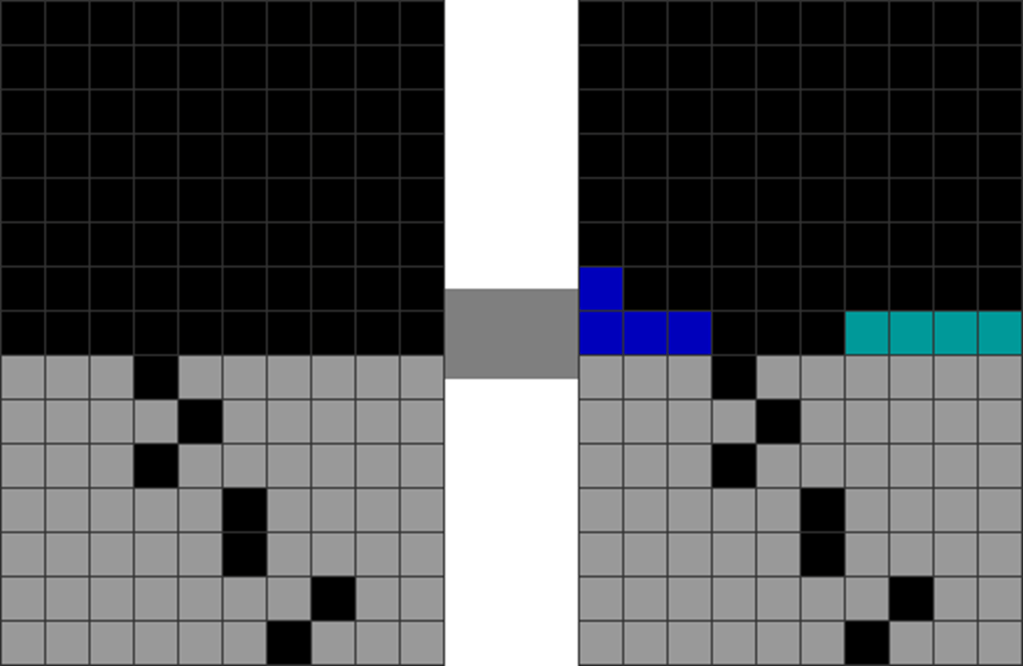
3
4
Then, with an I piece.
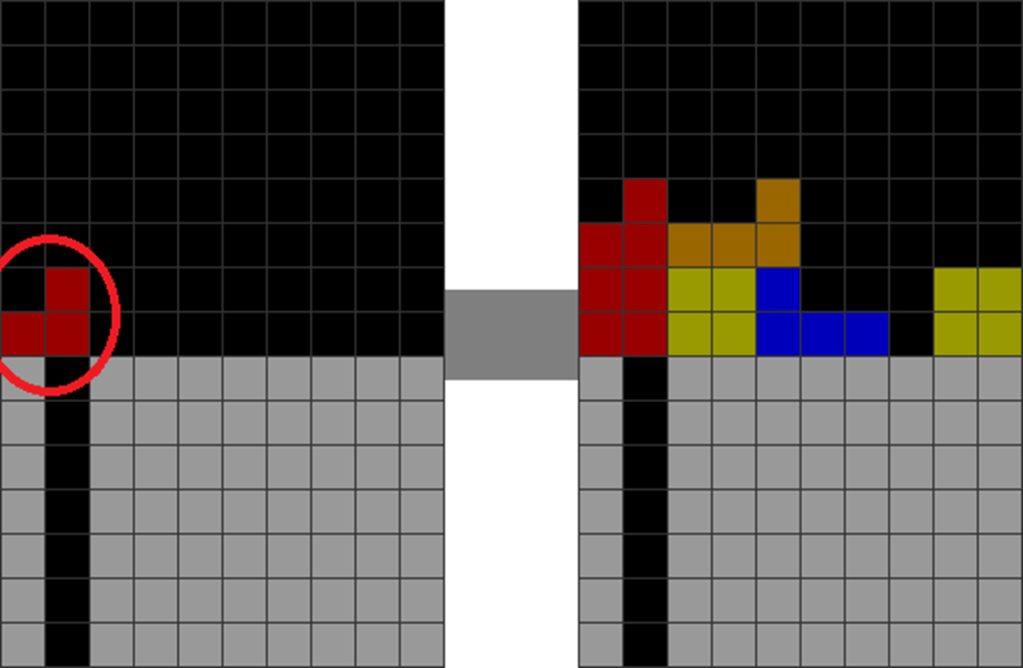
However, the remaining red block (in the red circle) obstructs the next garbage hole beneath.
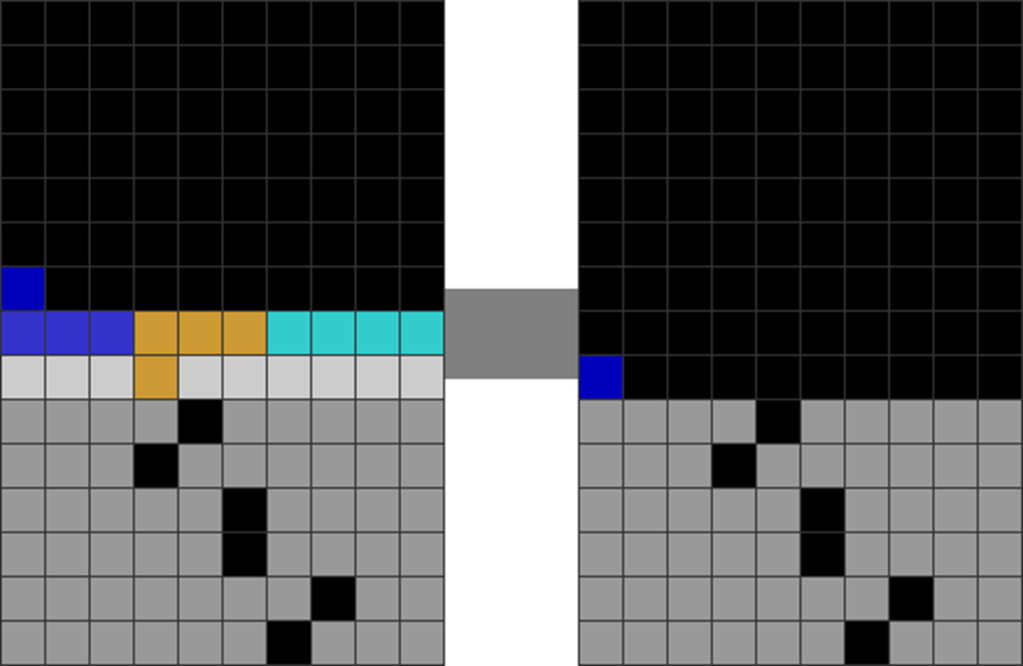
5
6
The player must then upstack a lot more.
He finally skims with an I piece, exposing the garbage hole in column 4.
Here, the downstacking takes many pieces and steps.
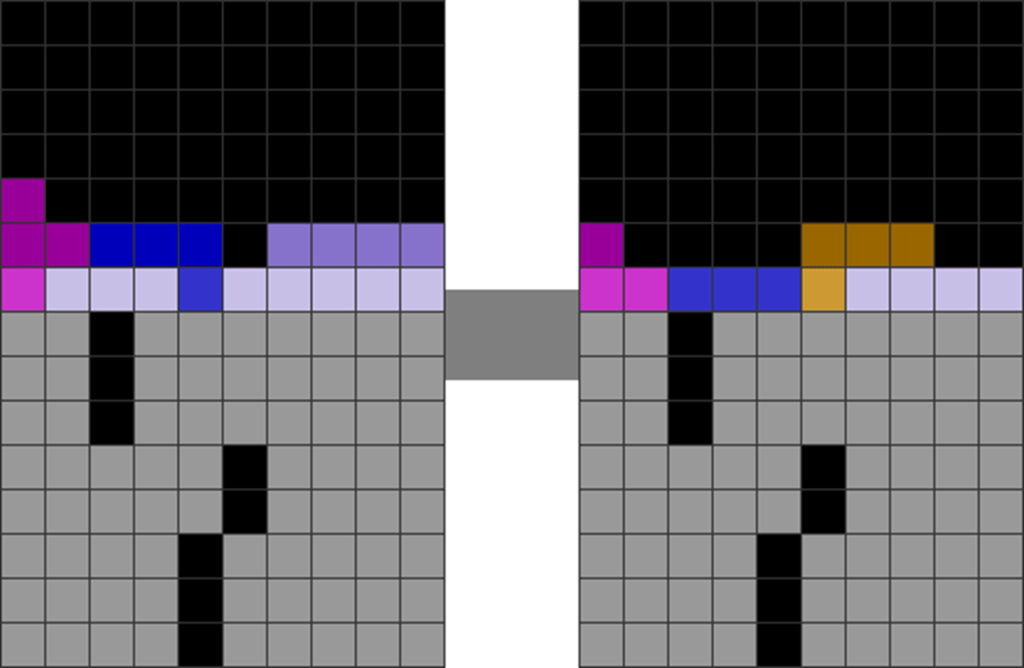
This can be avoided if a player properly fills cavities with other, safer options instead. The following uses a horizontal L to fill the cavity (J for mirrored setups):
Diagram Set 7-12
1
2
The same starting field from diagram set 7-10.
The player puts an L piece flatly.
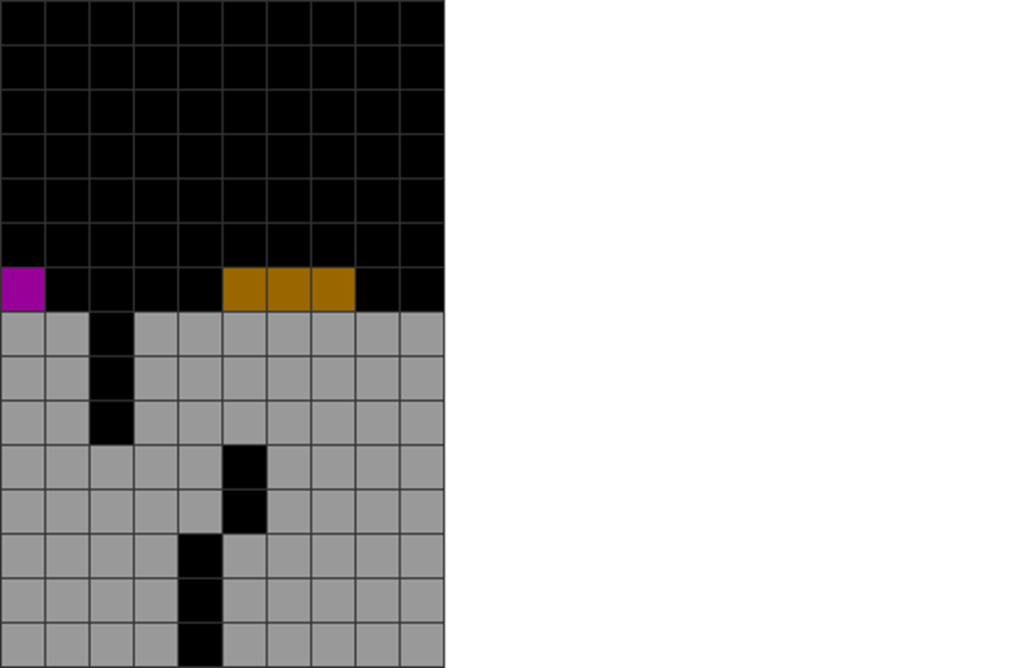
3
4
He skims with a T piece.
The next garbage hole is immediately and quickly exposed!
Another way to stabilize the cavity is to use horizontal T pieces:
Diagram Set 7-13
1
2
Starting field with a cavity on the left side.
Fill it with a flat T. This flattens the stack.
By prioritizing flat L, J, and T placements, a player minimizes overstacking. This means there are fewer top layers to skim off before getting down to the next garbage lines.
Another stable way of handling cavities is to place the T piece to create a U-shaped tapered well:
Diagram Set 7-14
1
2
A different starting field.
The player places T like this, leading to a U-shaped taper towards a well.
3
4
He skims with a J piece.
Then, with another L piece.
5
The next hole is exposed quickly!
From my experience, these practices alone maximize downstacking efficiency and boost survivability. They minimize the risk of getting stuck in game-breaking dead ends.
3. Joining the Field While Downstacking
A vital habit to follow is to join the field while downstacking.
This means continuing the combos while choosing piece placements that lead to an undivided field.
Doing this makes downstacking easier and increases combo power.
Here is how:
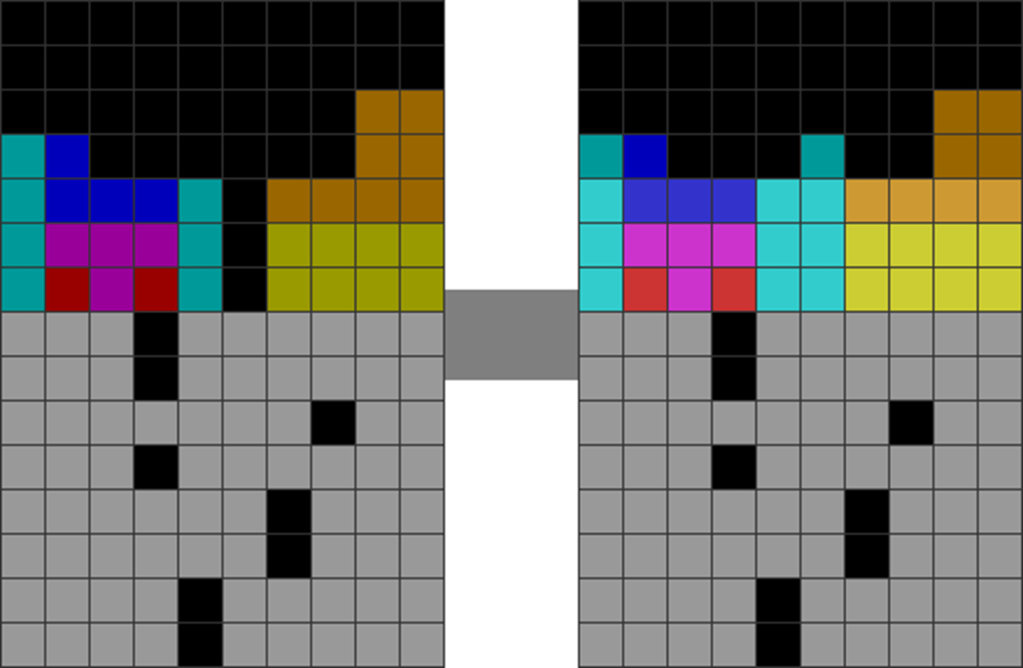
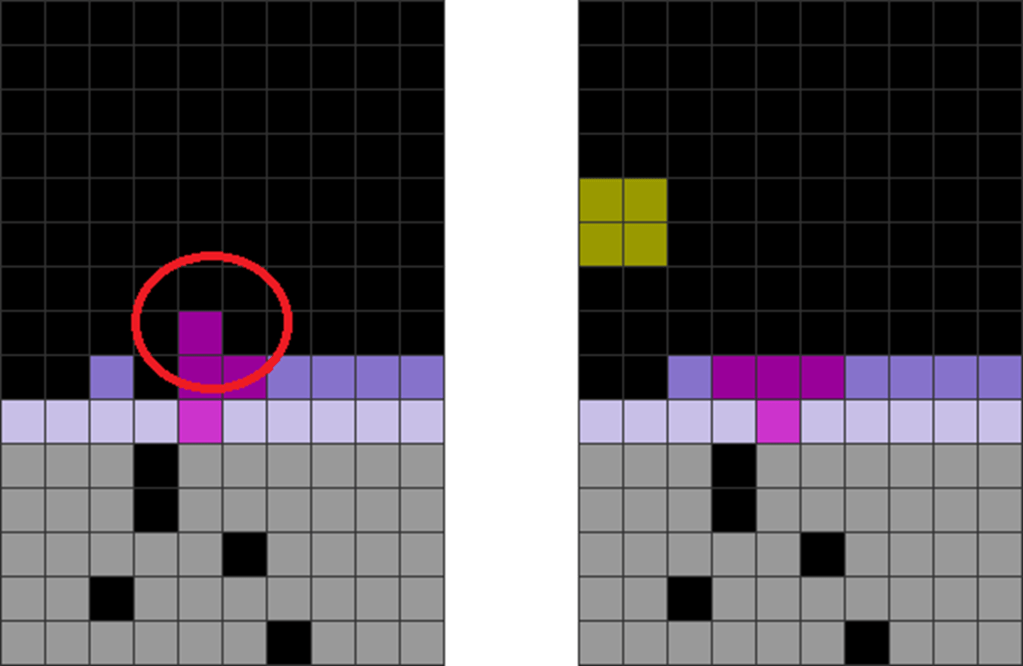
Diagram Set 7-15
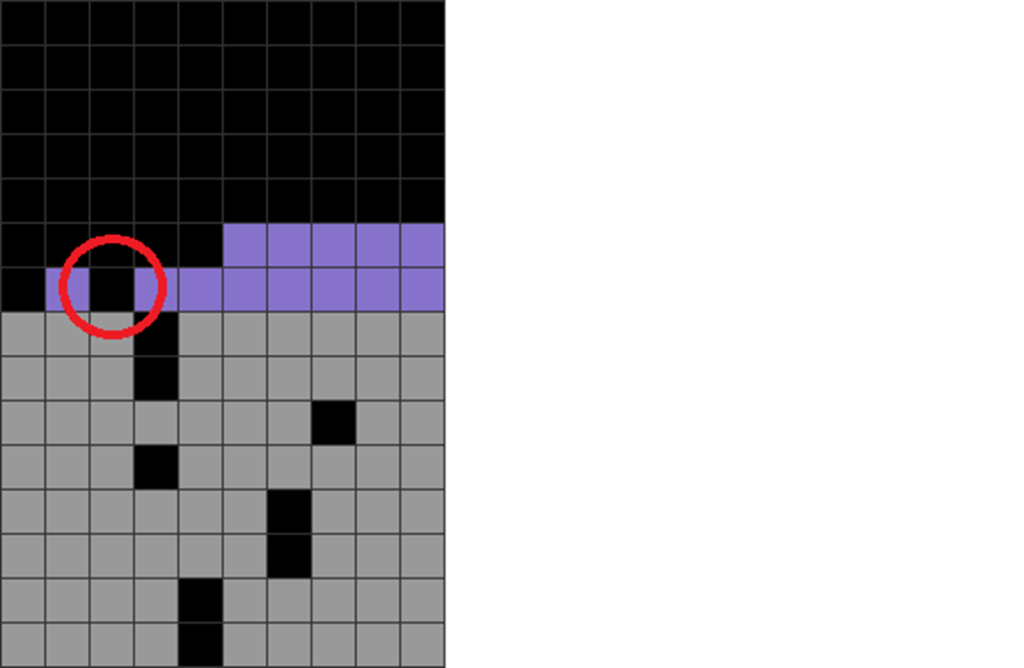
A
B
A leads to a jagged placement with the red-circled purple block. However, B leads to a flatter placement for smoother downstacks.
Here, in A, the player chooses a placement that leads to a jagged aftermath shape. In B, he chooses those that lead to a flatter aftermath.
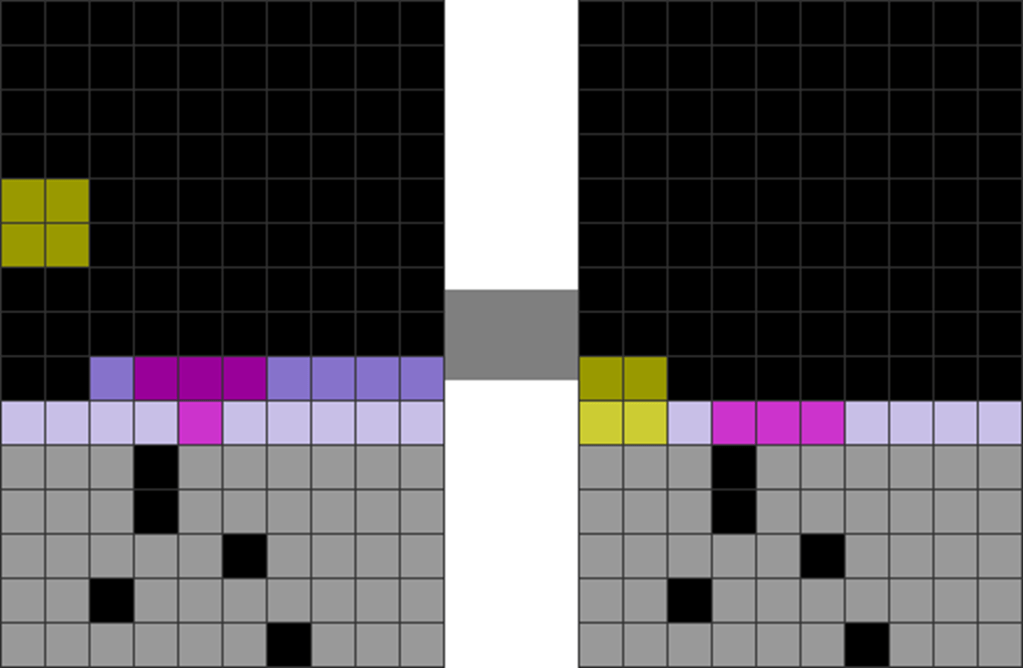
He then connects his attacks, making downstacking and combos easier, in the following:
Diagram Set 7-16
1
2
This is the last diagram set’s B.
The player continues the downstack combo with an O-skim.
3
4
He continues with an L-skim. Notice how he joins the field flatly.
He continues with a T-skim. The field’s flatness is flawless!
5
6
He continues again. The field is still very flat and clean!
He finally gets down to the last garbage hole with an S-skim.
By joining your field while downstacking, you increase your downstack combo chances, efficiency, and cleanliness.
4. A Tricky Predicament
Very often, you will get into this dangerous situation. Many casual players choke on this common mid-game scenario:
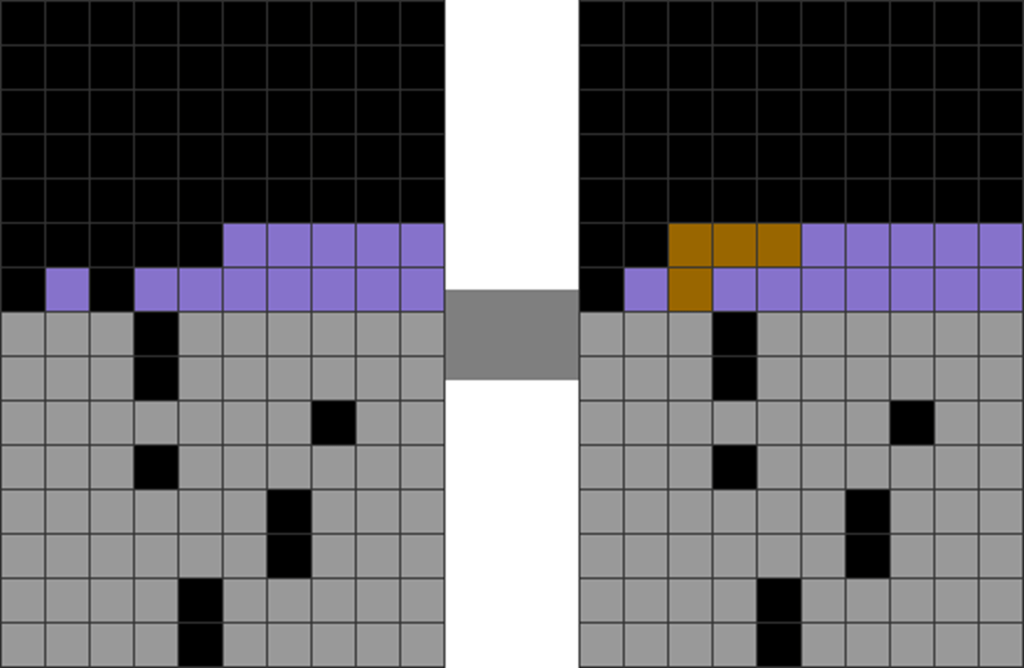
Diagram Set 7-17
A
A common mid-game situation.
Here, the next, next garbage hole is in column 2 (9 for a mirrored field).
Many casuals would deal with it by making the following catastrophic moves:
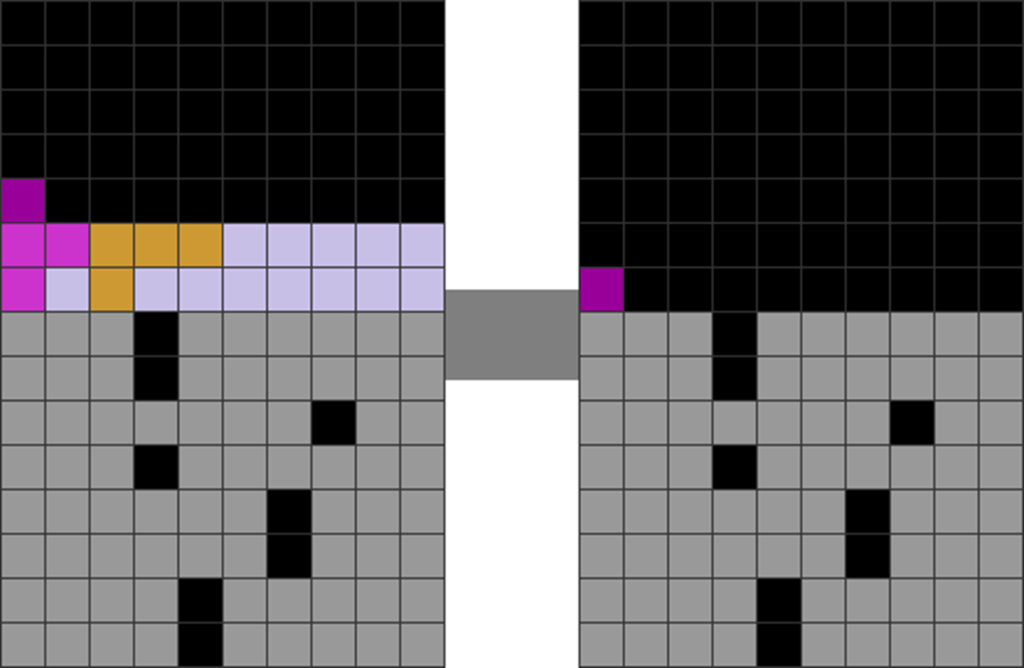
Diagram Set 7-18
1
2
The same starting field as the last diagram set.
The player skims with a Z piece.
3
4
This leaves the red-colored blocks (in the red circle), which obstruct the next garbage hole.
The player spends too much time trying to get down, but fails.
The player finds themselves in a situation where they cannot get down. They remain perpetually stuck on top until a deadly barrage of garbage from the opponent arrives to finish them off.
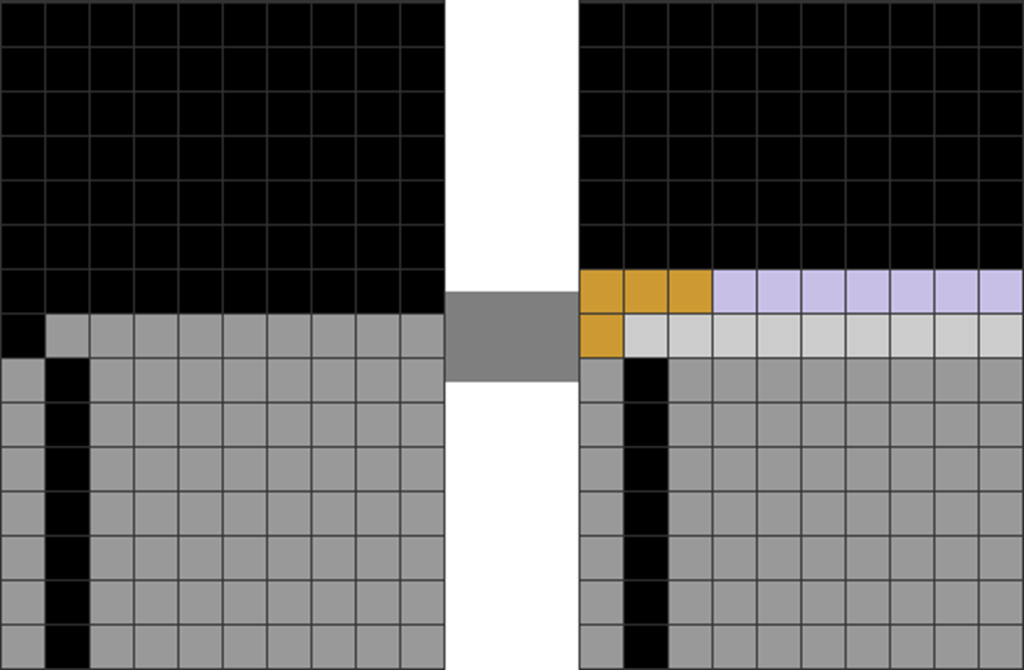
To prevent this game-ending scenario, here is a tested way to resolve it:
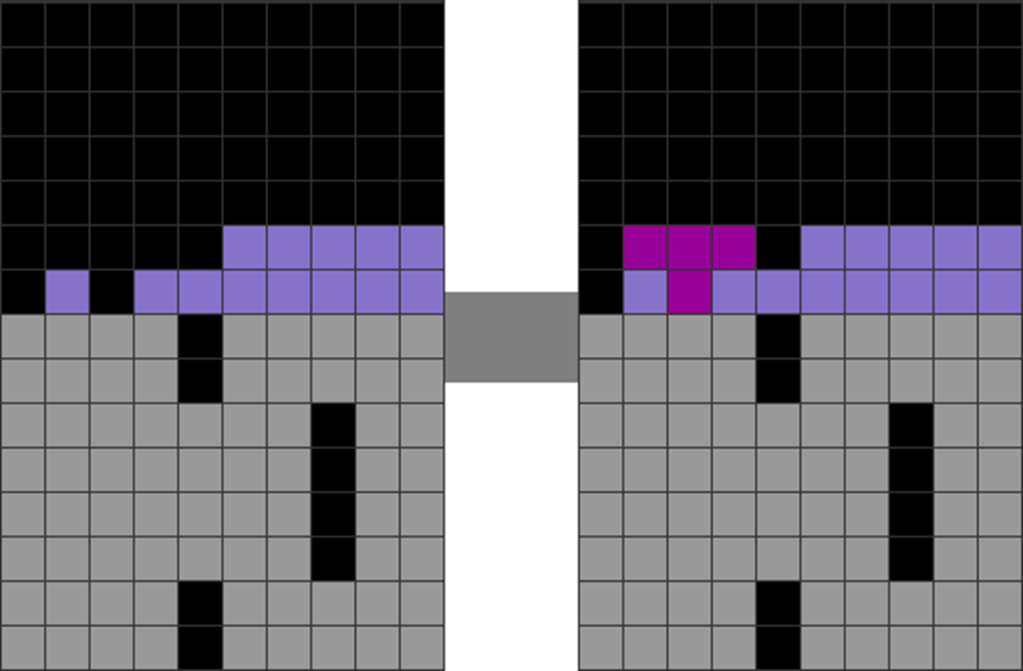
Diagram Set 7-19
1
2
Starting field.
The player upstacks a bit with the lavender blocks, then skims with an L piece.
The player uses horizontal L (or J, if mirrored) pieces to skim off the top hole.
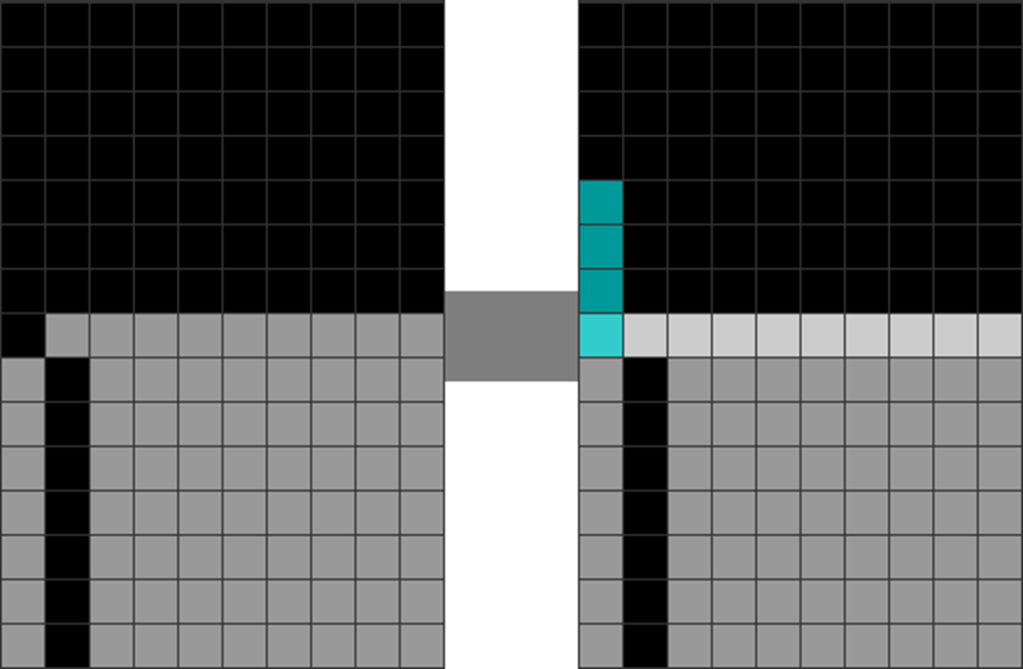
If this is not possible, using an I piece is also welcome. However, this is not always possible, and you wish to save up your I pieces to make defensive Tetrises instead:
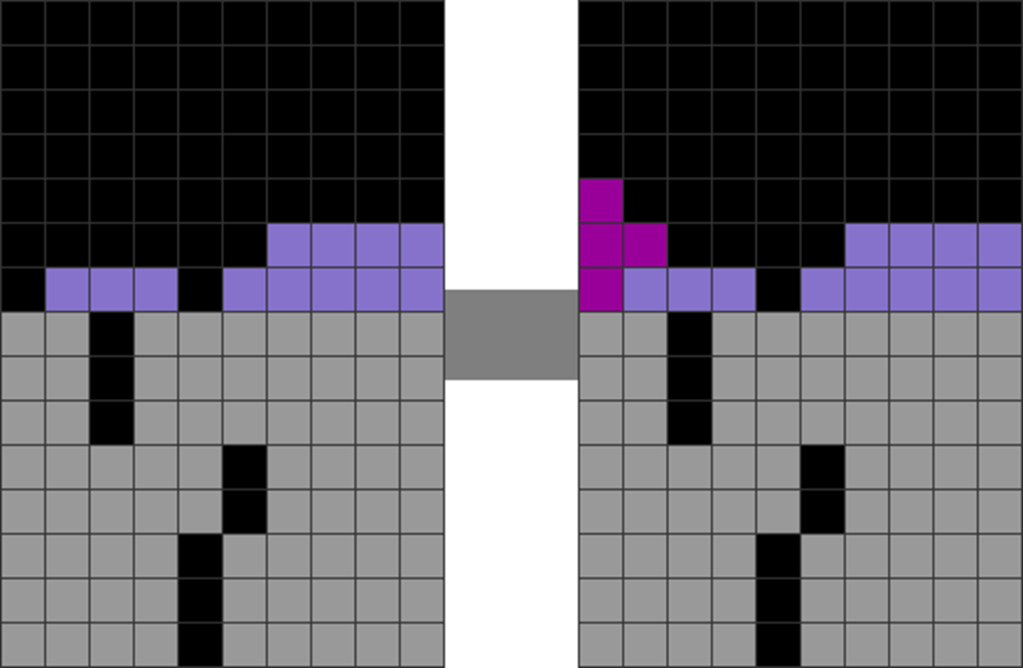
Diagram Set 7-20
1
2
Starting field.
The player skims with an I piece.
In a Nutshell
Downstacking is one of the most important skills in Tetris. It is slightly under proper stacking in importance.
When you can downstack well, you can turn your opponent’s garbage lines into ammunition. You can send back their attacks and rebound.
Hence, proper downstacking grants you greater survivability and offensive power, especially from combos.
Summary
Flatten cavities to improve downstacking smoothness. Connect your attacks while downstacking to maximize combos. Learn how to deal with the 2 main predicaments in this chapter: vertical S and Z downstacks, and when the next, next garbage hole is in columns 2 or 9.