Note: This is a truncated version of book 4’s field harmony chapter, which is nearly twice as long. The full book chapter contains more details and applications.
I have covered field harmony in Book 2 to show how one can use this novel concept to enhance stacking. However, I will explore the idea further in this chapter.
Field harmony refers to the extent to which the field’s shape is well-suited for maximizing stacking and downstacking continuations.
A well-harmonized field is typically characterized by these features:
Is parity-balanced.
Allows for flat and horizontal L, J, and O pieces to be placed.
Has minimal field divisions.
Has a rough, angular, squarish shape that is more than 1 block wide (I will elaborate in a while).
A poorly harmonized field is the opposite of most of the above clauses.
As explained in this book’s earlier chapters, maximizing field harmony significantly benefits many aspects of Tetris, boosting offense and defense. If you maximize just this aspect, your Tetris proficiency expands vastly.
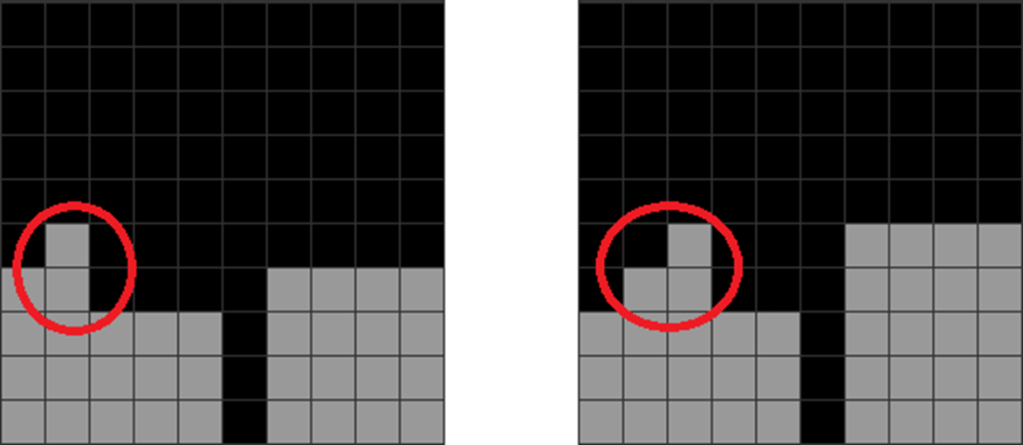
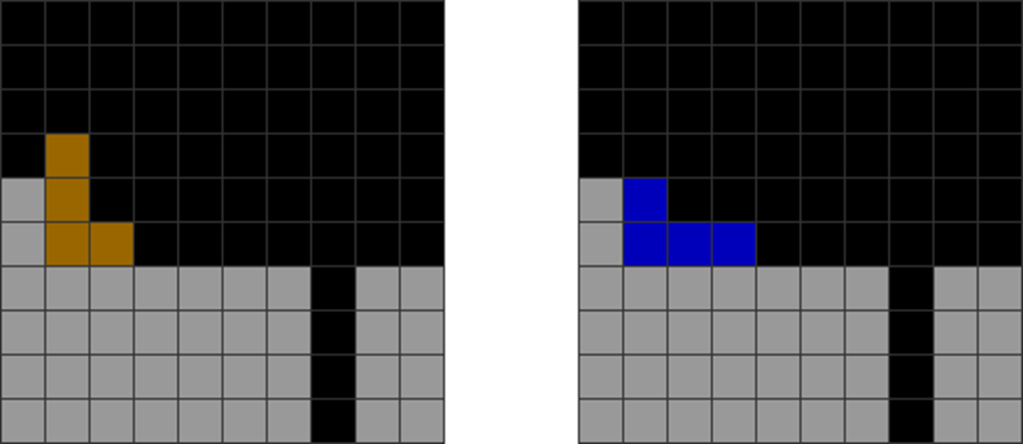
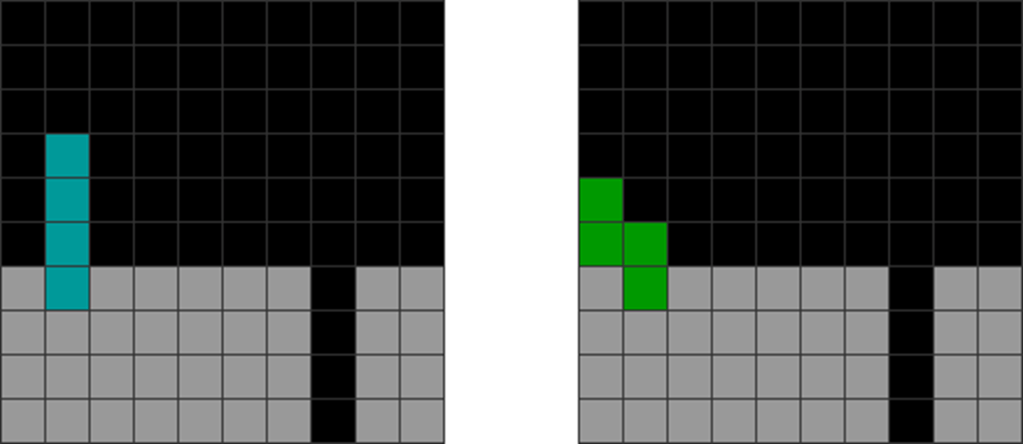
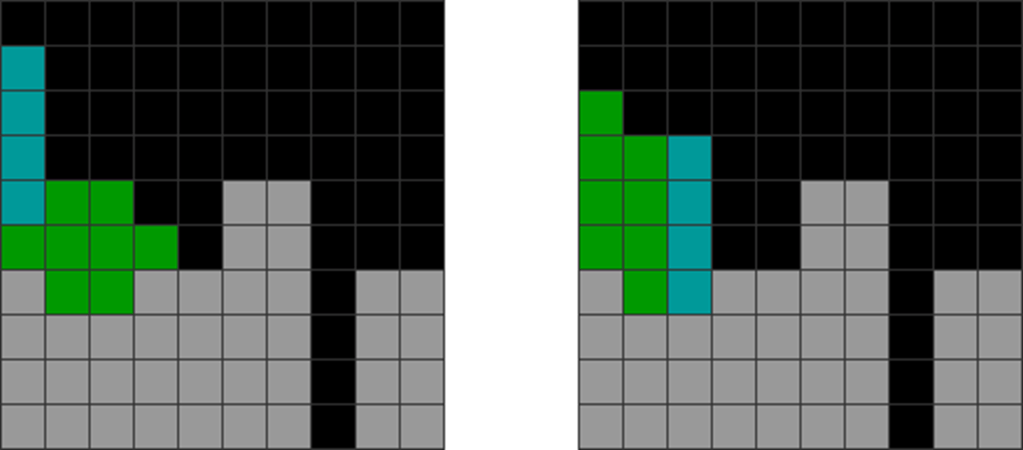
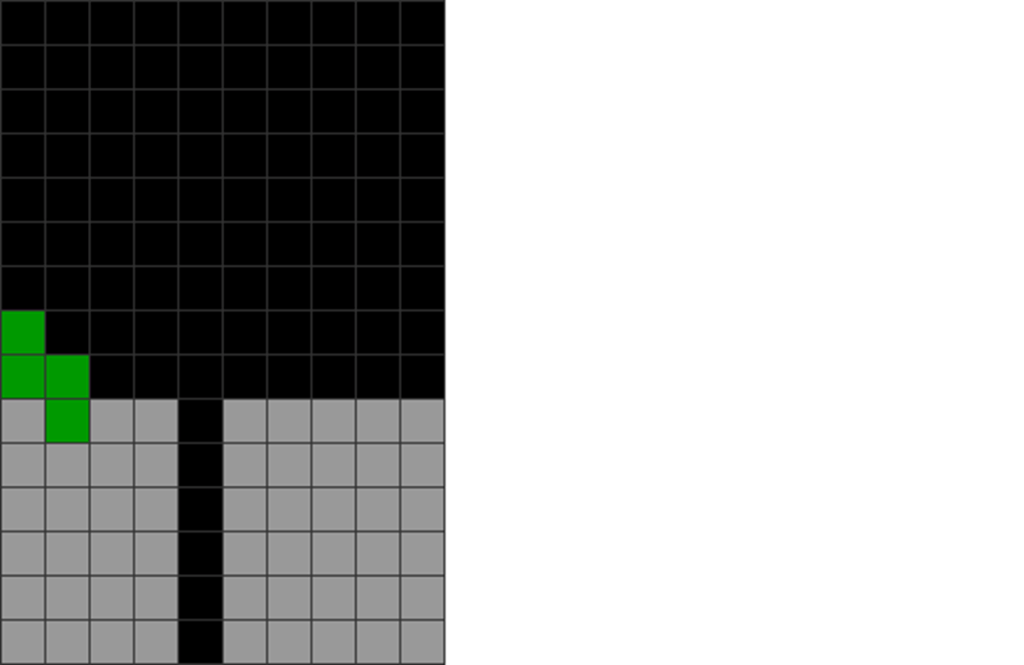
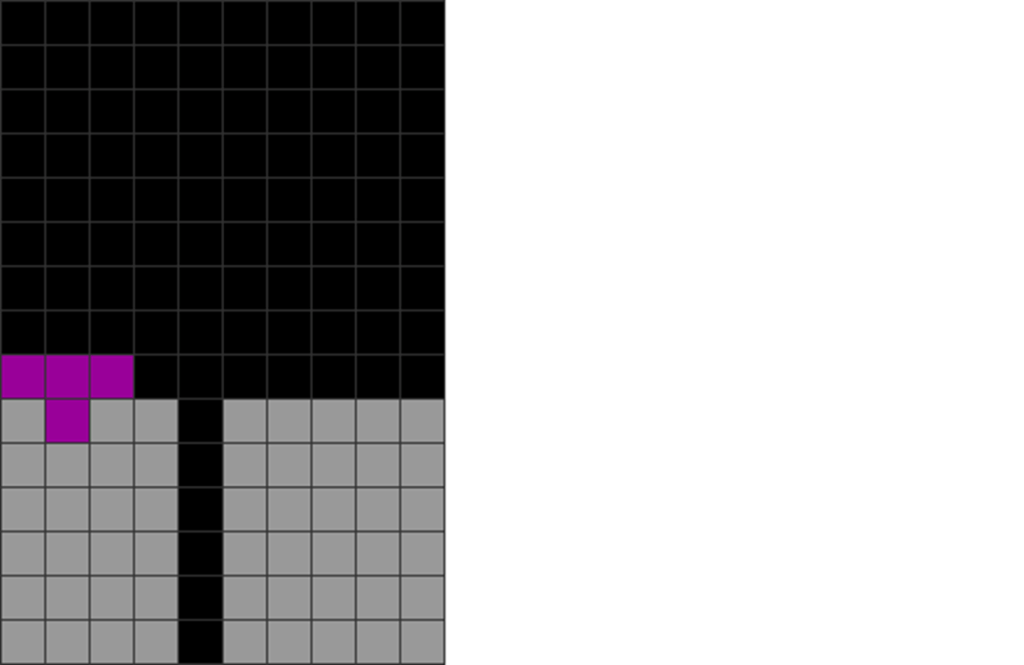
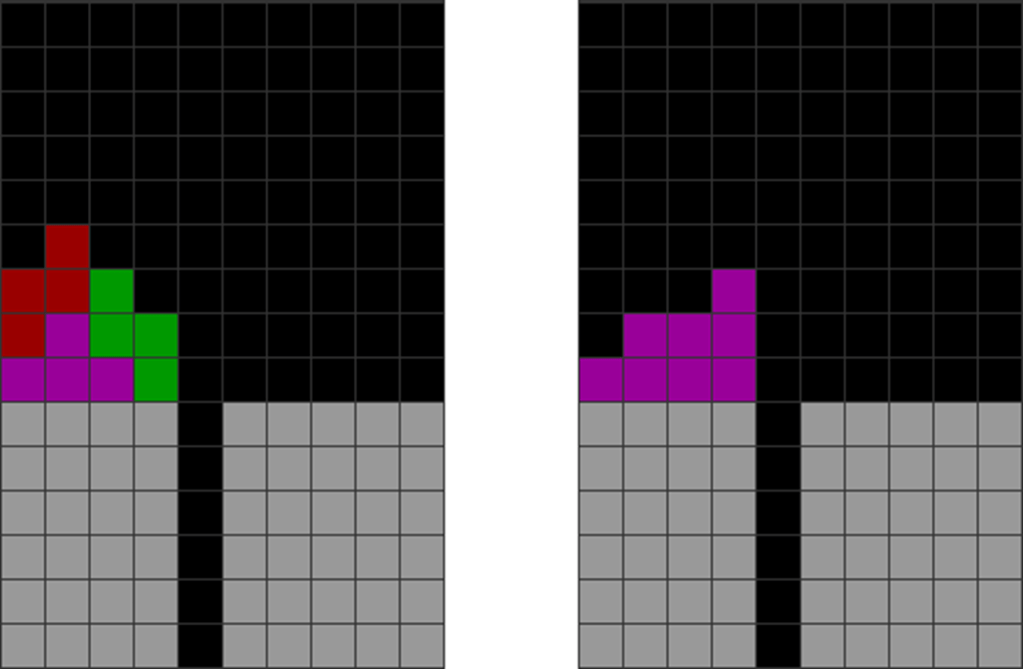
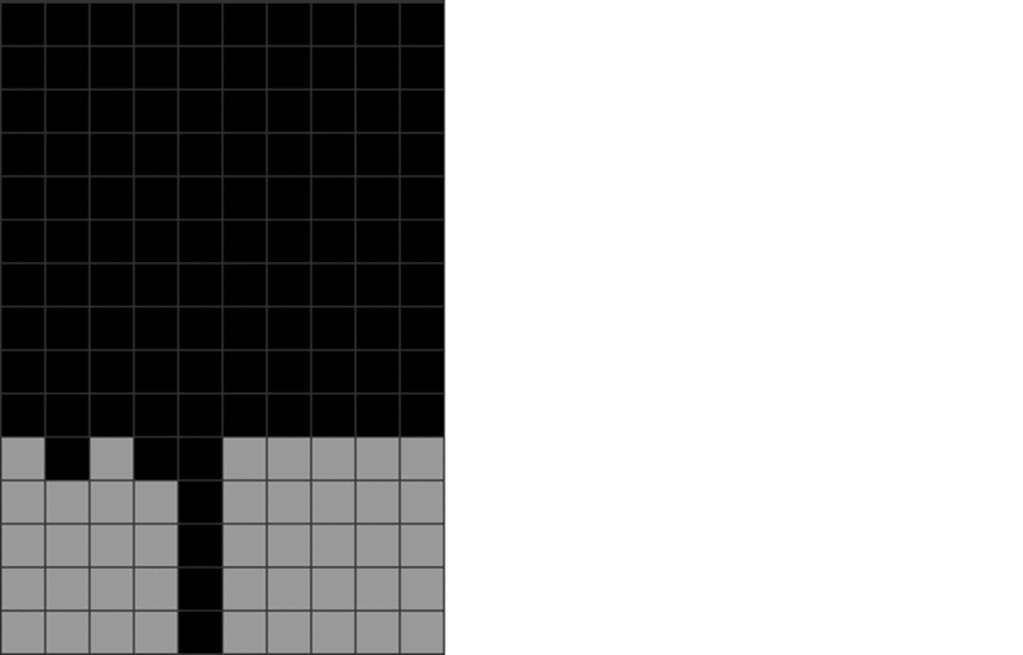
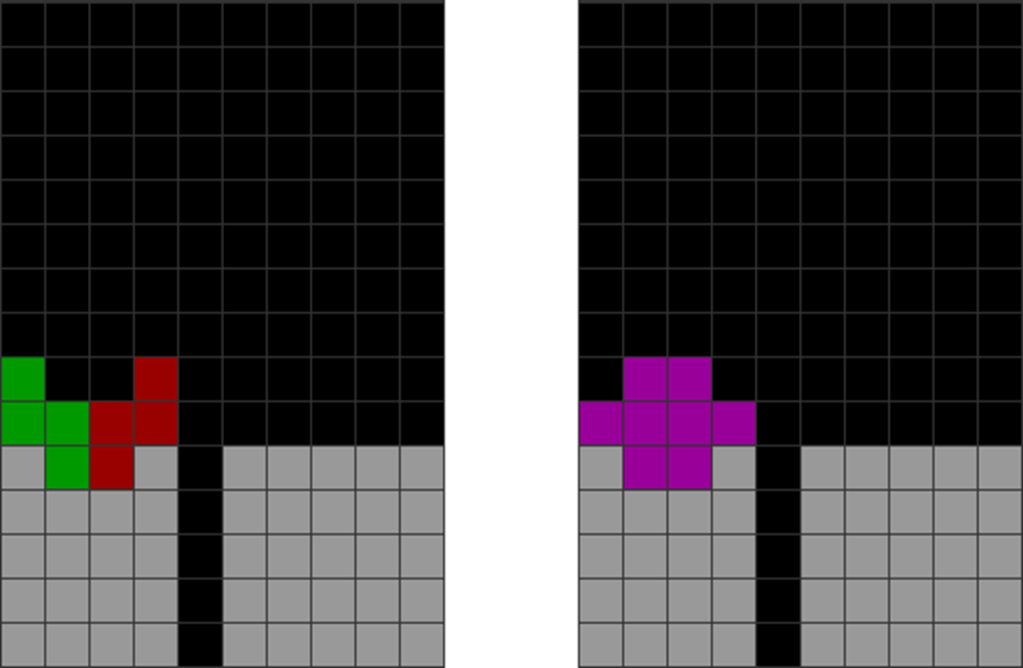
Here is an illustation of clause iv:
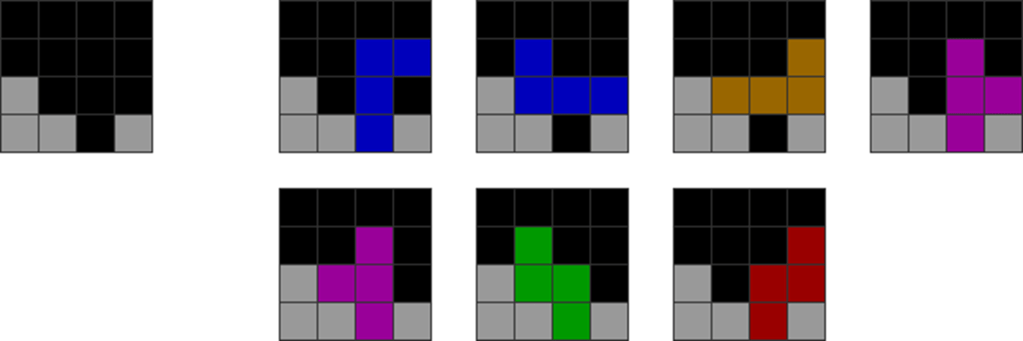
Diagram Set 4-1
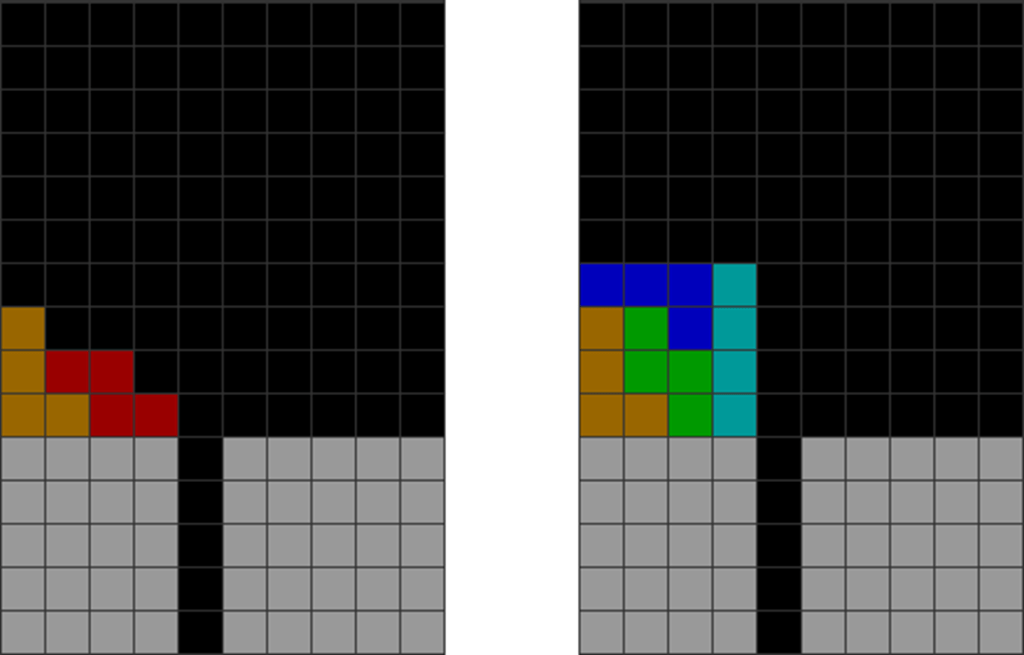
A
B
Jagged and divided.
Blocky, squarish shapes (see the squares of 2×2 dimensions in lavender) allow for flat L, J, and O placements.
A is poorly field-harmonized, featuring many jagged and sharp parts and gaps that are approximately 1 block thick. It is also significantly divided. You can only place mostly vertical S, Z, and I pieces into such a configuration, which contributes to over-stacking and worsens the field disharmony.
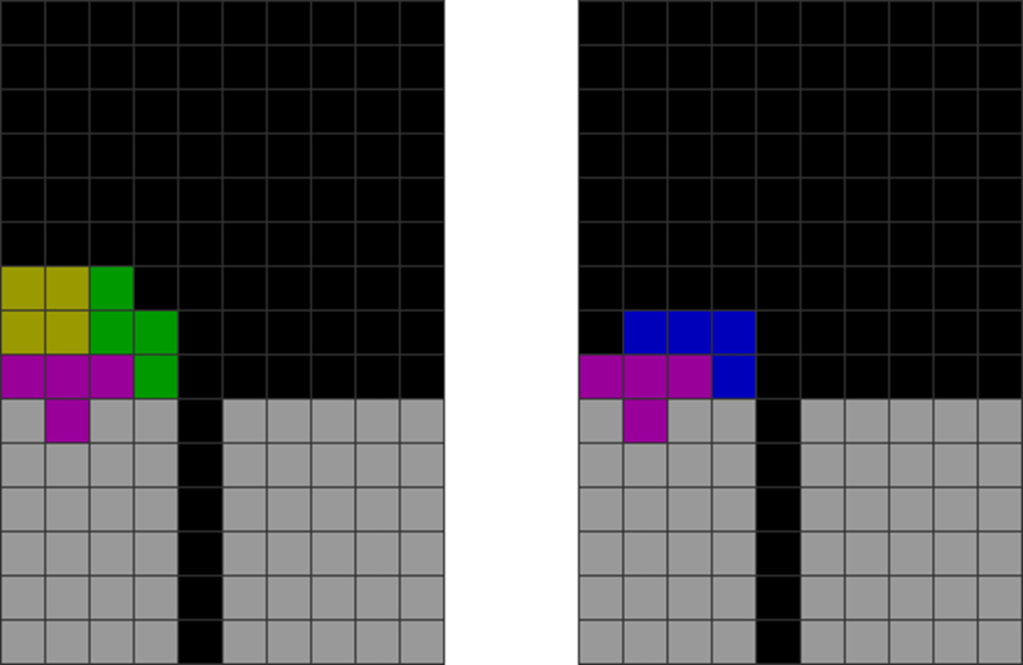
B is more field-harmonized. Although I cannot prove it mathematically, my experience suggests that such patterns are relatively flat, free of sharp cavities, and sometimes exhibit very thick and angular features.
Notice how B is “squarish,” but in the sense that the squarish parts are at least 2 blocks thick and flat? These kinds of patterns can more easily accommodate the most inflexible pieces, such as the O piece. They can also accommodate flat placements of many pieces, especially the angular L, J, and O pieces.
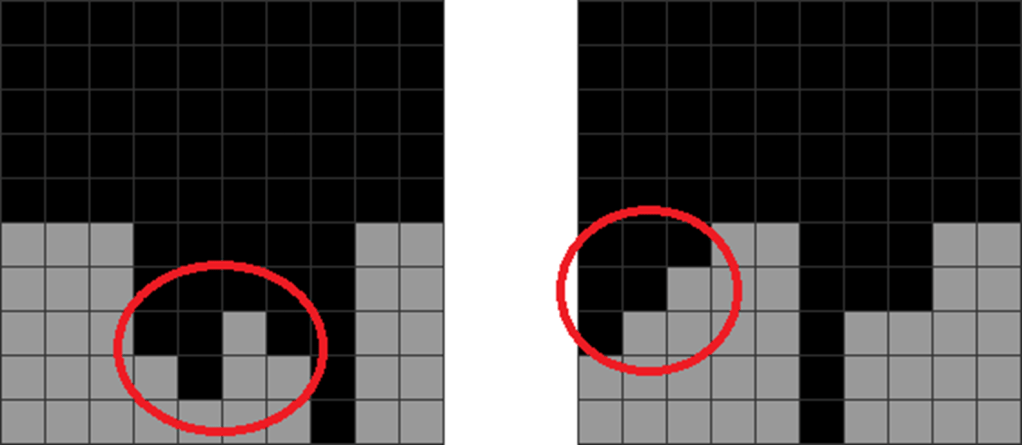
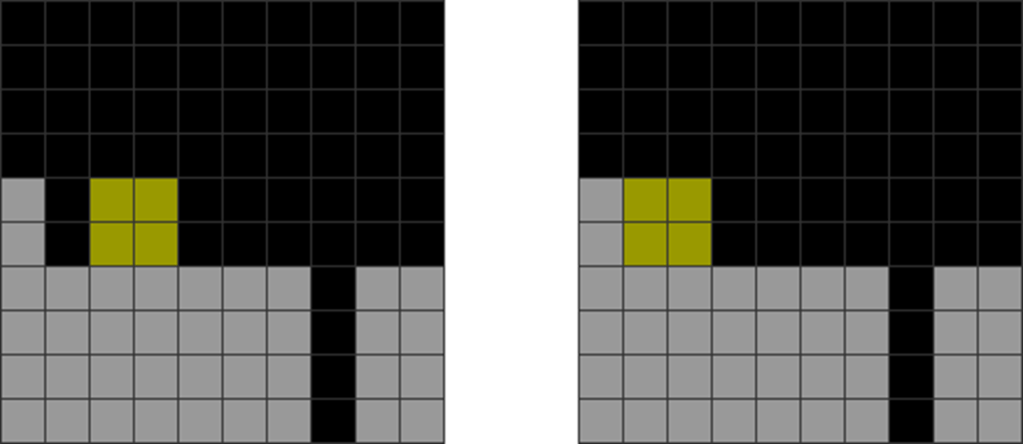
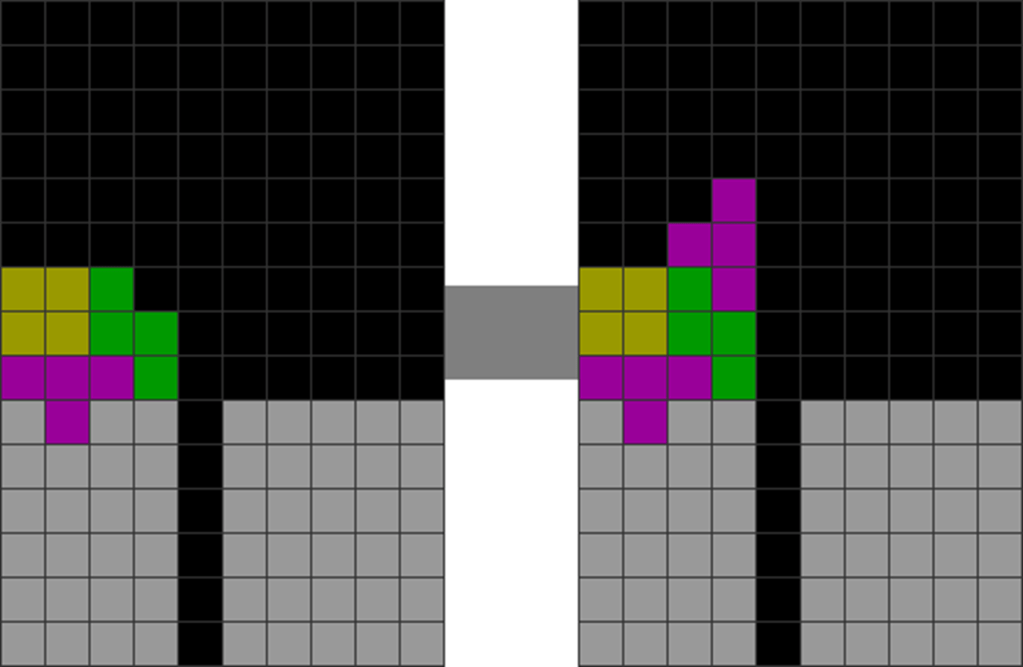
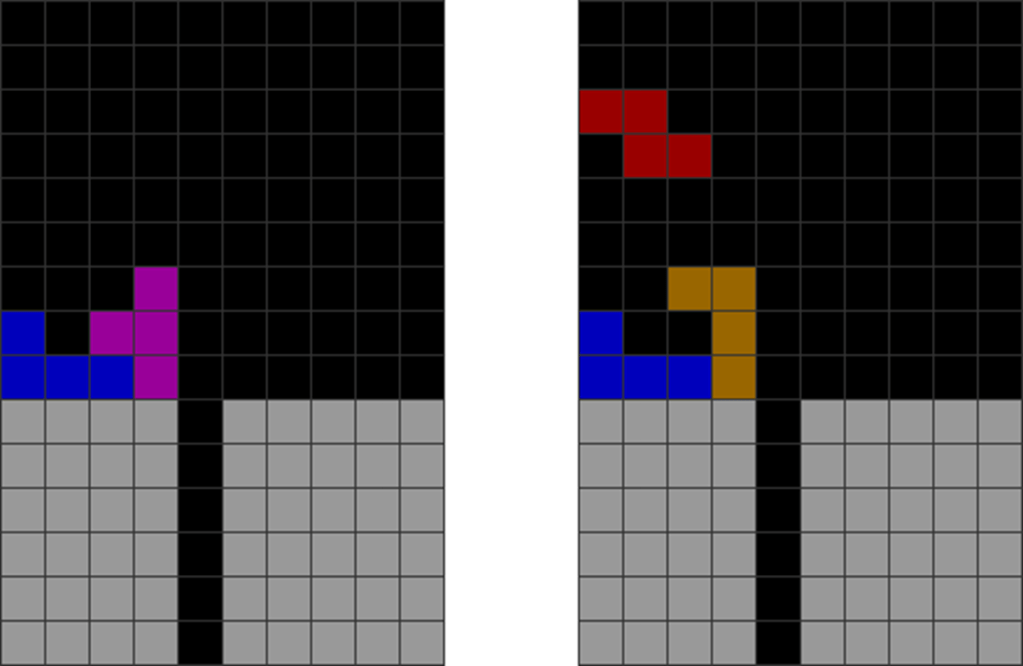
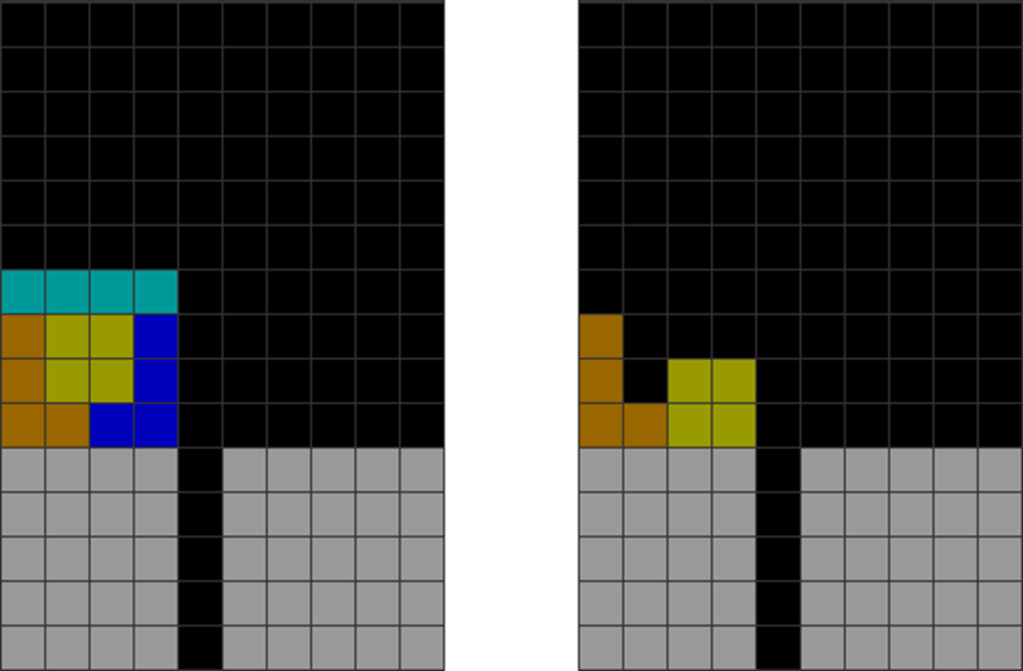
These kinds of patterns are more ideal as they have better stacking follow-ups. You should, however, avoid terrible field-harmonized patterns like these generic and most common patterns:
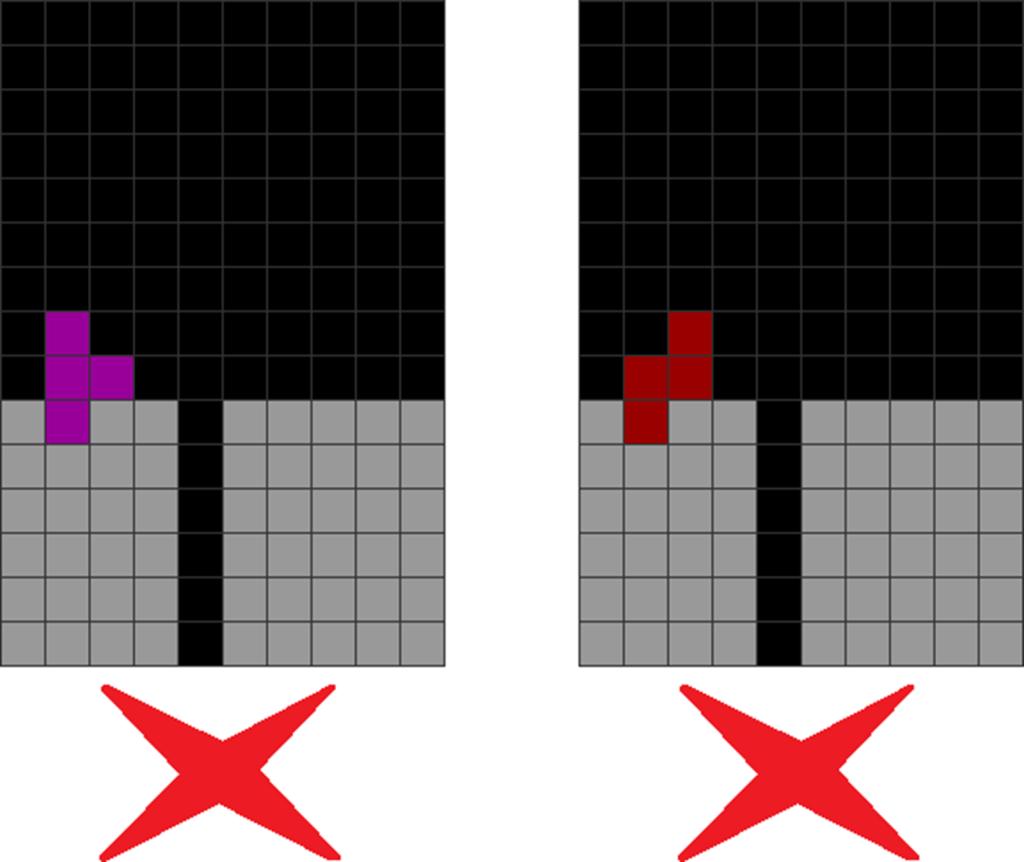
Diagram Set 4-2
Minimize creating the above shapes to improve your overall consistency in the mid-game. They are field-deharmonized.
Later, I will show you all how the 4-wide pattern solutions, as covered in Books 1, 2, and 3, can help improve your stacking consistency even further.
A) A List of Common Stacking Optimizations
Here, I provide an expanded list of stacking optimizations that can contribute to better field harmony. Here is how to read them:
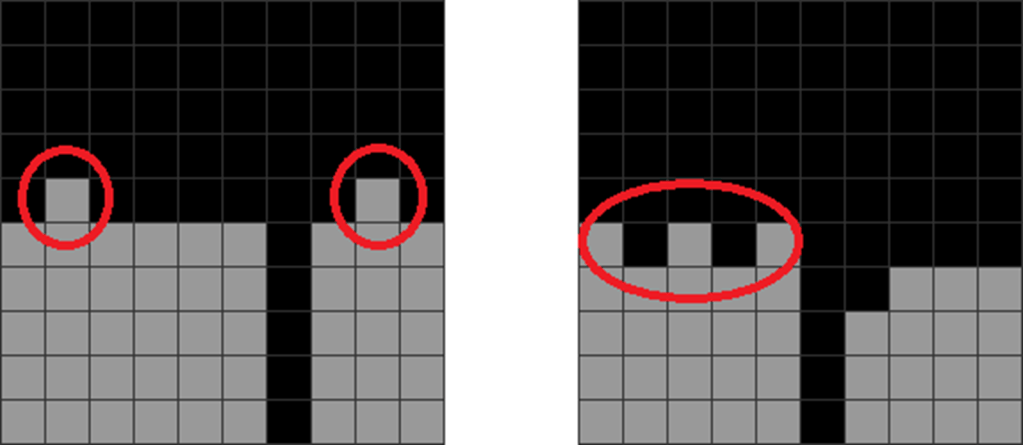
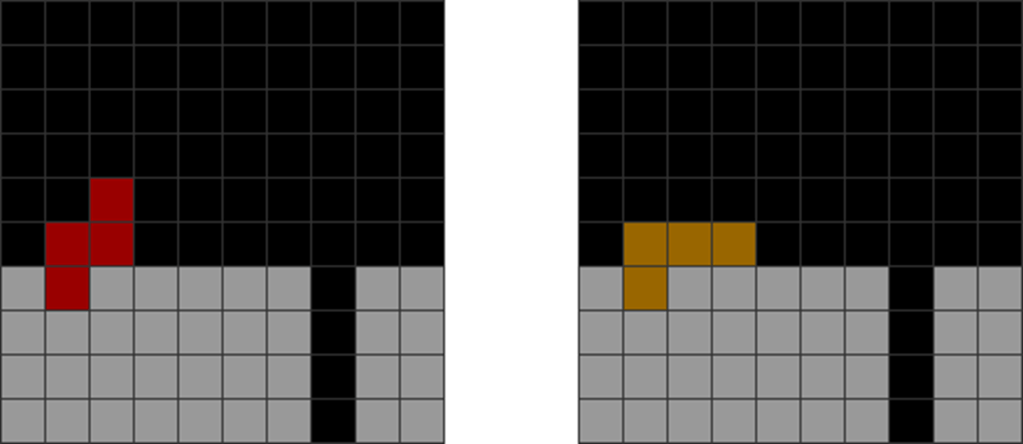
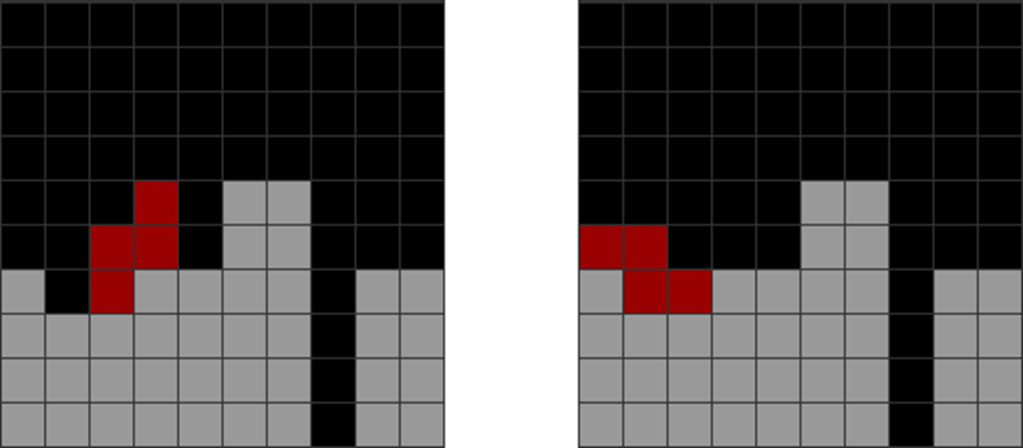
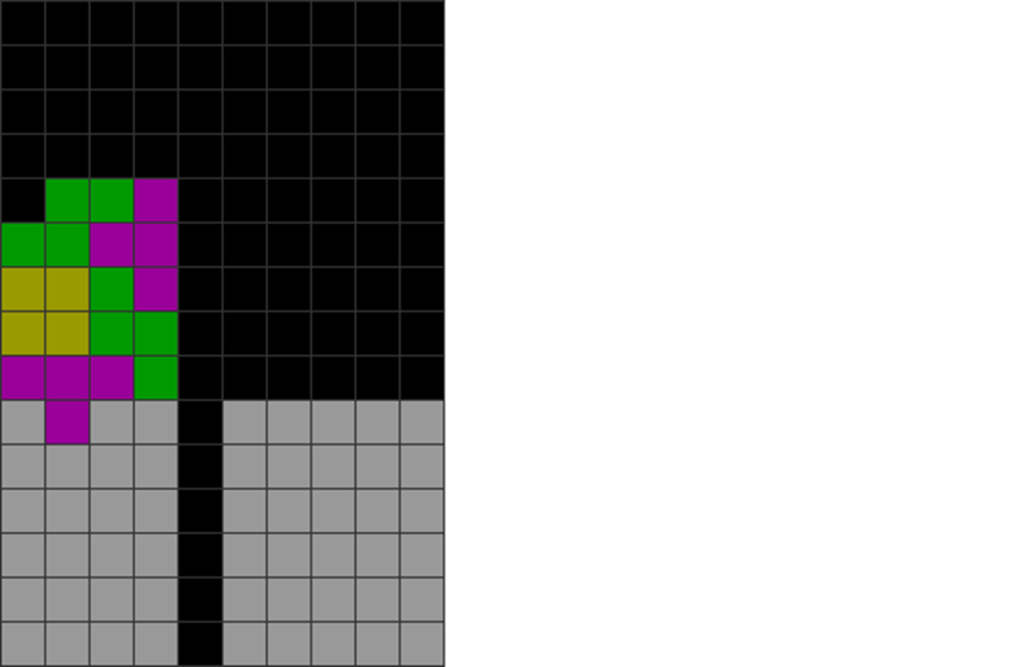
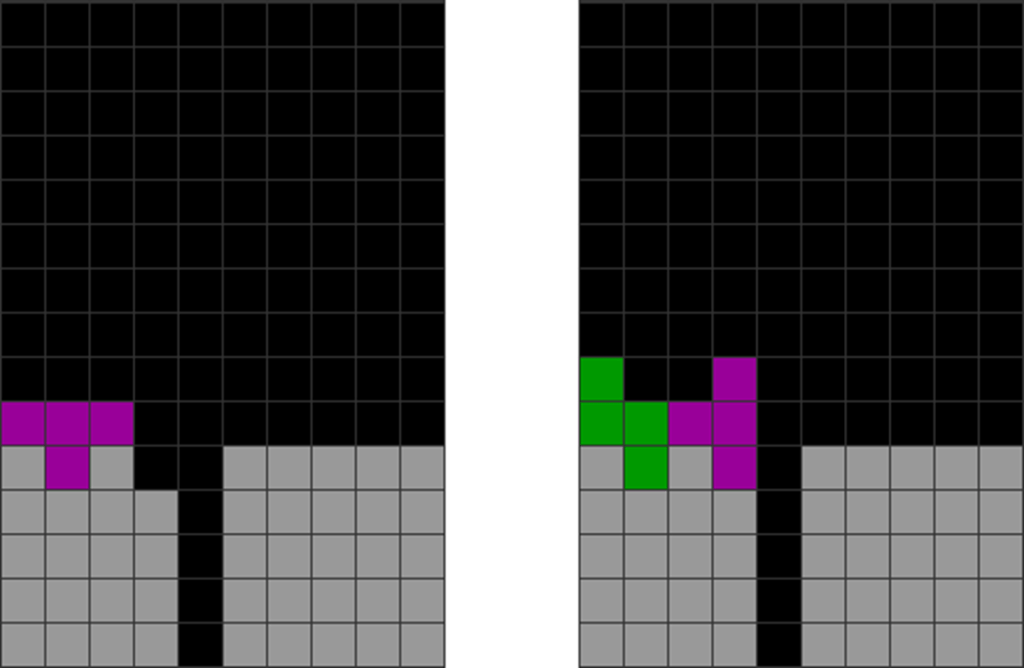
Diagram Set 4-3
A
B
A less field-harmonized stack.
A more field-harmonized field.
The pattern on the left, A, is less field harmonized. Observe the S and Z vertical placement. It leads to a jagged pattern on the left side. A more field-harmonized way to improve stacking is to place S and O on the left stack in B to create a better field-harmonized shape, where S and O connect the field.
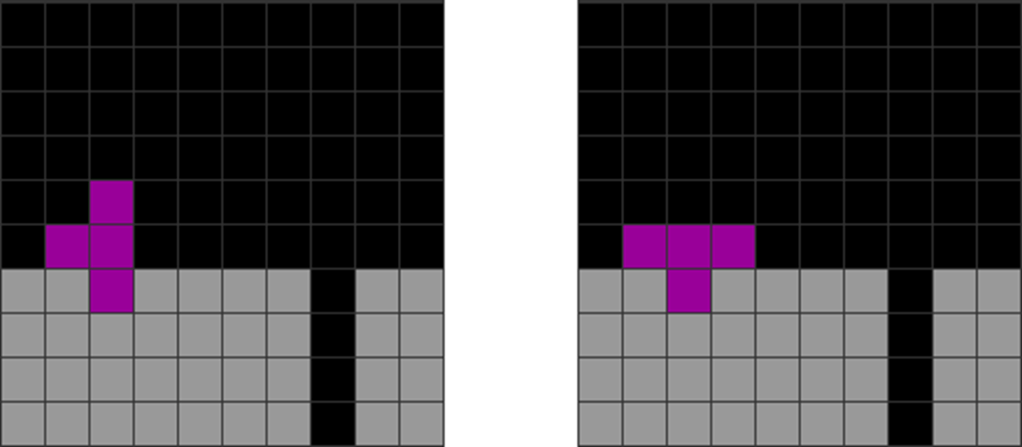
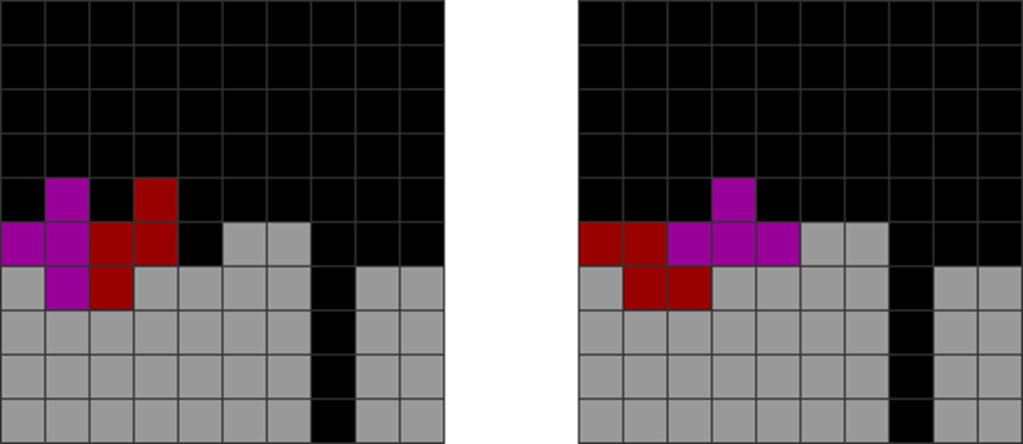
With this said, here are more mino placements that lead to poor field harmony (left patterns) versus piece placements that lead to better harmony (right patterns):
Diagram Set 4-4
Poor field harmony
Better field harmony
On a more advanced note, you can use chunking to improve field harmony:
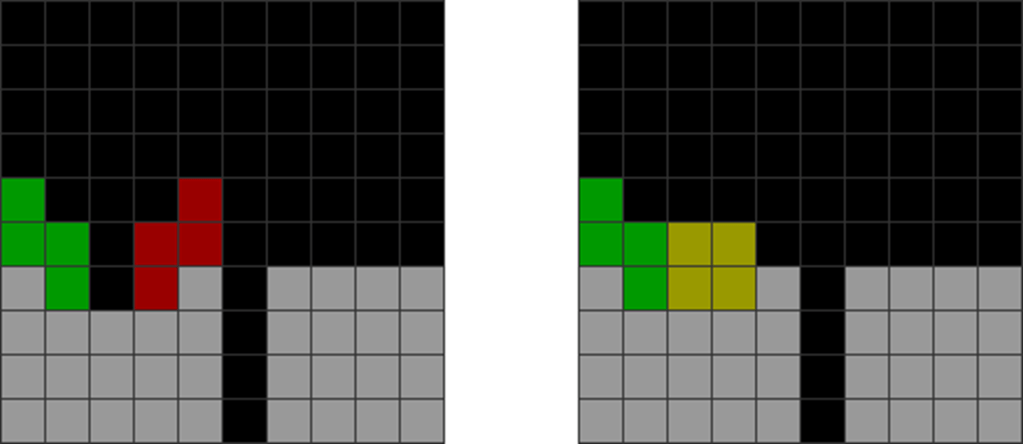
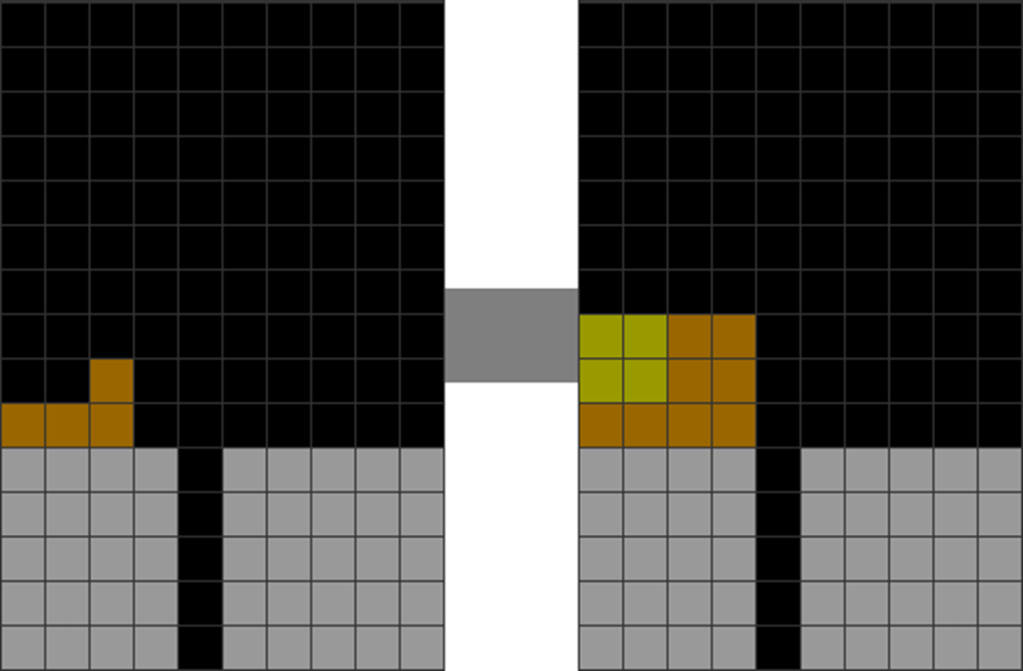
Diagram Set 4-5
A
B
Poorly field-harmonized.
Soft drop and spin Z into the cavity to make it field-harmonized.
In B, notice how you can chunk pieces into 1 gigantic piece of 3 to fill the cavity? Doing so can vastly improve stacking options and create better field-harmonized shapes.
B illustrates how you can use all-spins to enhance field harmony. This incurs a soft drop but provides you with more options. The player must balance greater field harmony with fewer soft drop penalties.
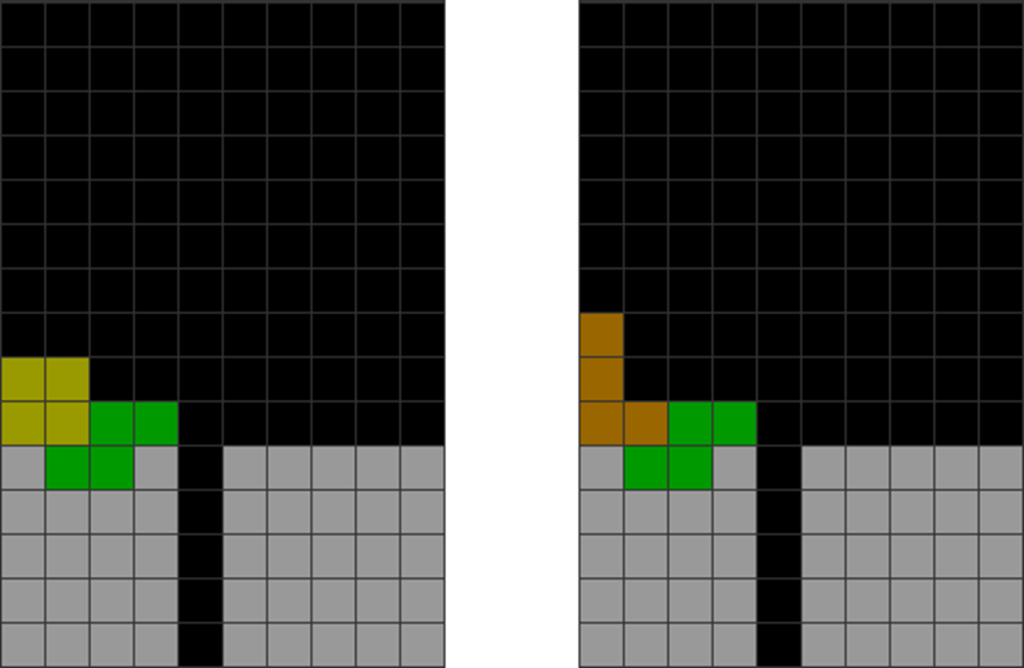
Let us illustrate what I mean by combining or chunking pieces:
Diagram Set 4-6
A
B
A’s left J horizontal placement leads to a jagged pattern that is locally parity imbalanced.
B shows how you can position the J vertically and combine it with an O.
Ordinarily, B’s initial J placement without the O is ill-advised as it leaves a divided stack. However, if you get the O right in time, you can combine J and O to stack the field in a more harmonized way.
This is what I meant by chunking: instead of planning for just individual minoes to make a field-harmonized pattern, see how 2 or more of them can fit together to make a single chunk of greater field harmony.
B) Using 4-Wide Patterns for Better Field Harmony and Stacking
I will now show a connection between 4-wide (using standard 3, 4, or 5 residues) and 5-4 stacking to enhance stacking mid-game.
This chapter largely assumes that the reader has a firm grasp of 4-wide combo theory from having read Books 2 and 3. If you have not, please refer to them.
This may sound abstract, but let us build on this slowly.
Here is a reminder of what 4-wide is:
Diagram Set 4-7
1
2
A 3-residue 4-wide opportunity.
The player starts a combo sequence with T, O, Z, and I pieces, respectively.
Step 1 shows a 4-wide opportunity in columns 4 to 7 with 3 blocks (hence 3 residues). You can start a downstack sequence without breaking combos in step 2. This uses standardized and established solutions, based on the 4-wide pattern solutions in Books 1 and 2. If you follow the solutions, you can easily maximize stacking continuations without stopping the continuous line clear sequence.
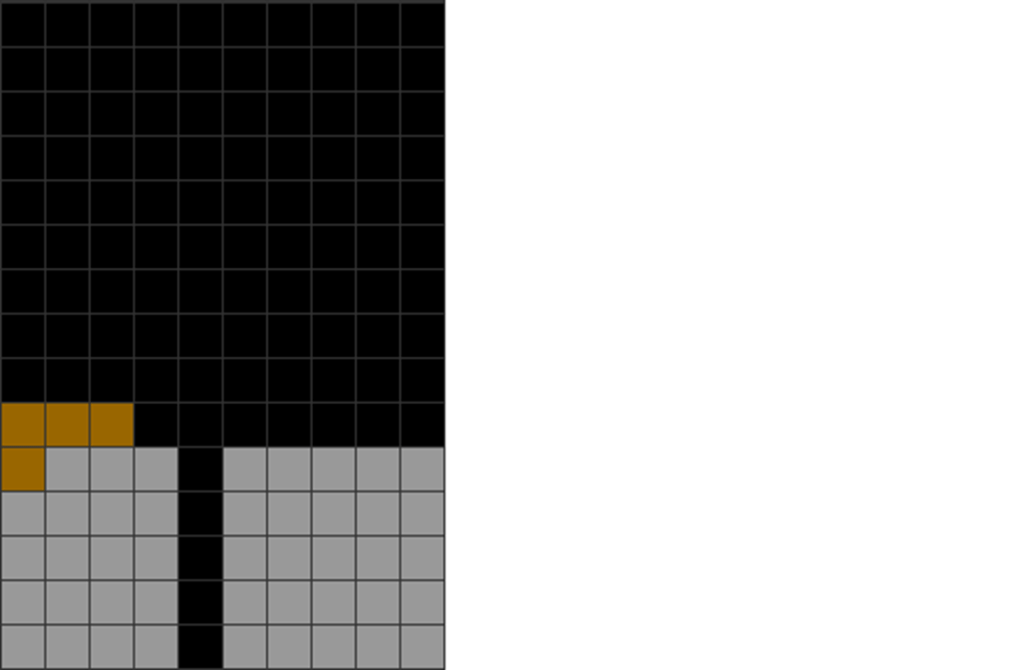
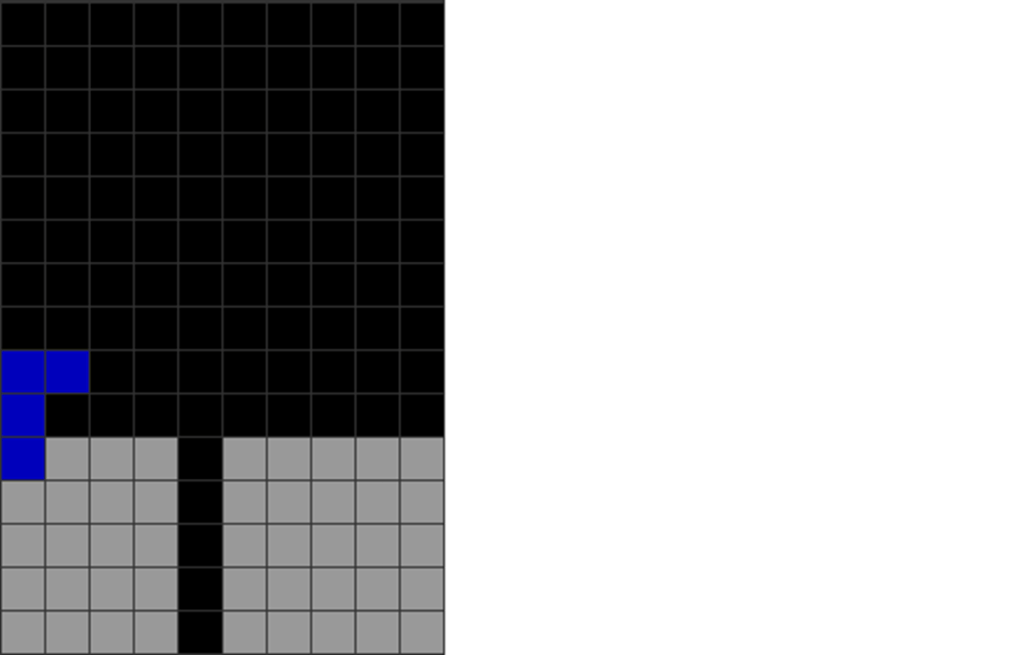
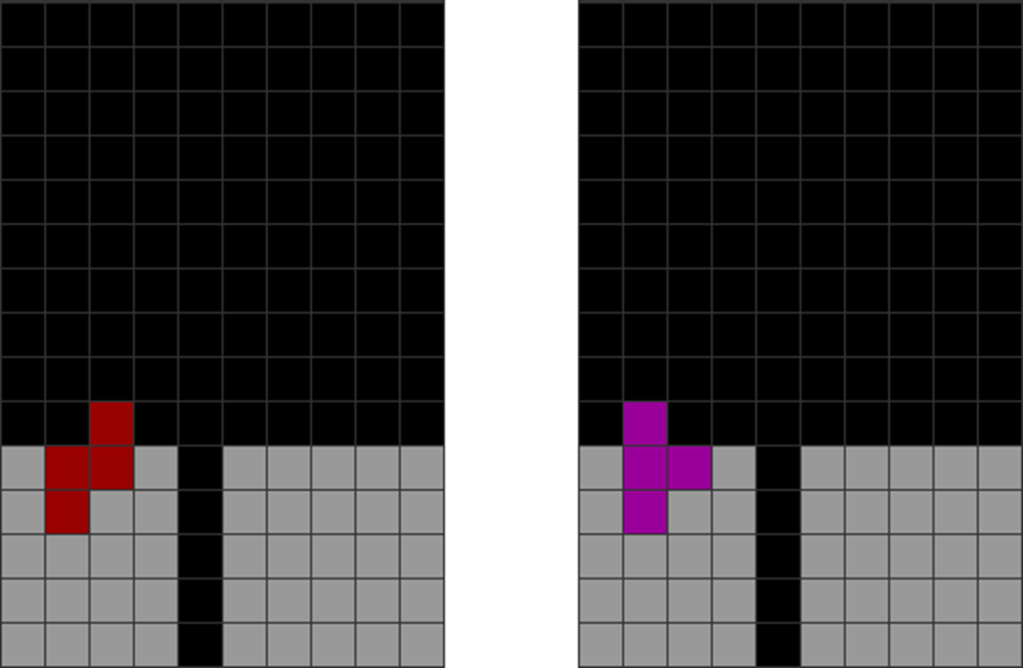
How is this related to 5-4 stacking? Let us first consider 8-1 stacking (the mirrored and structurally similar version of 1-8 stacking):
Diagram Set 4-8
1
2
Starting field with 8-1 stacking.
You can only put vertical Is in column 1.
In 8-1 stacking, with the Tetris hole in column 2, there is only one way to build up the left side, using vertical I pieces for stacking.
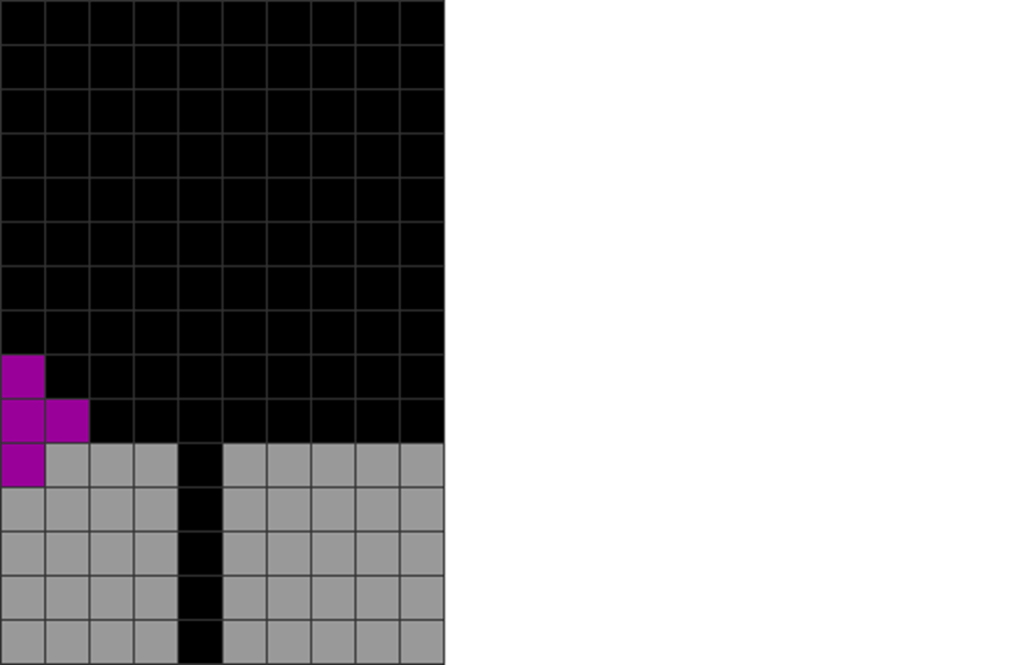
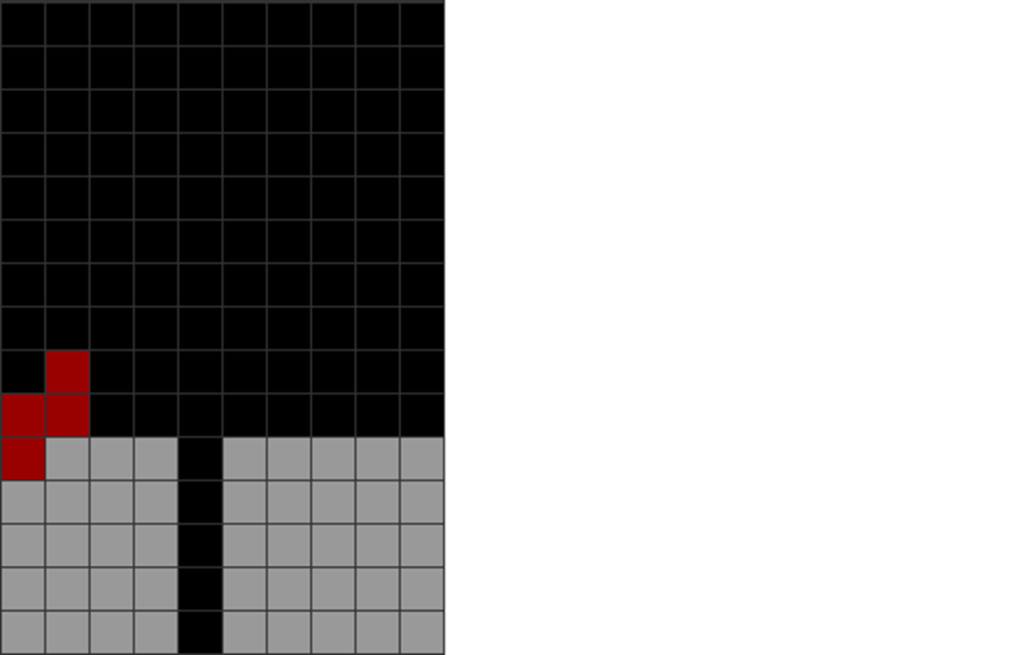
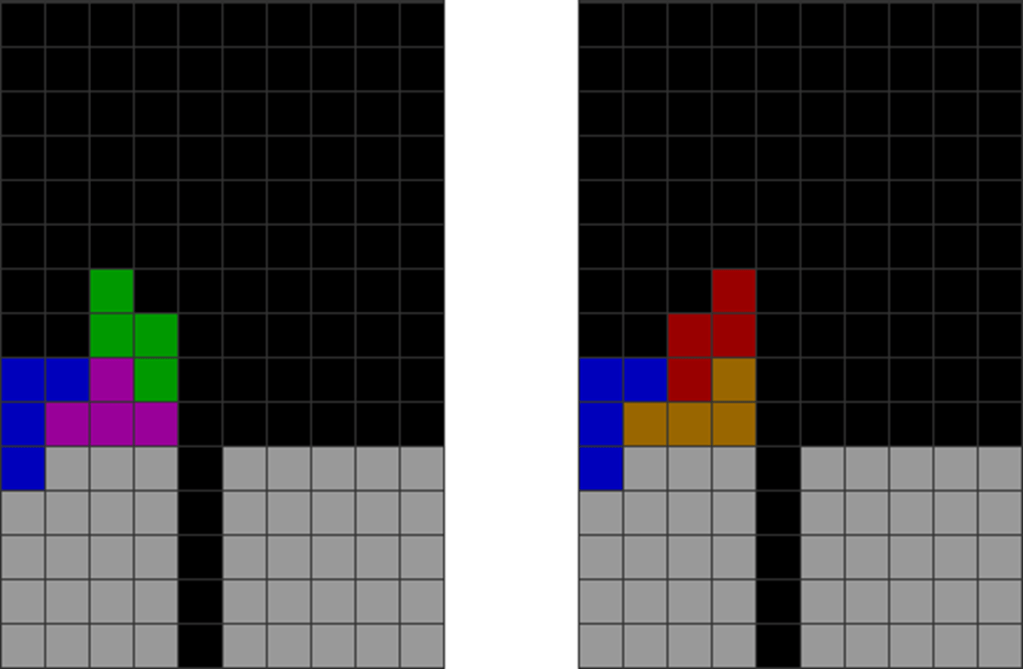
Now, let us consider 7-2 stacking (same as the mirrored 2-7 stacking in this context):
Diagram Set 4-9
1
2
Starting field with 7-2 stacking.
One way of filling columns 1 and 2 is to stack L, I, and J into rectangles.
Diagram Set 4-10
1
2
Another starting field with 7-2 stacking.
Stacking alternating S, T, and Z over columns 1 and 2 works.
For 7-2 stacking, with the Tetris hole in column 3, there are more permutations on how to stack the 2-blocks-wide left stack. However, it is finite and easily memorizable.
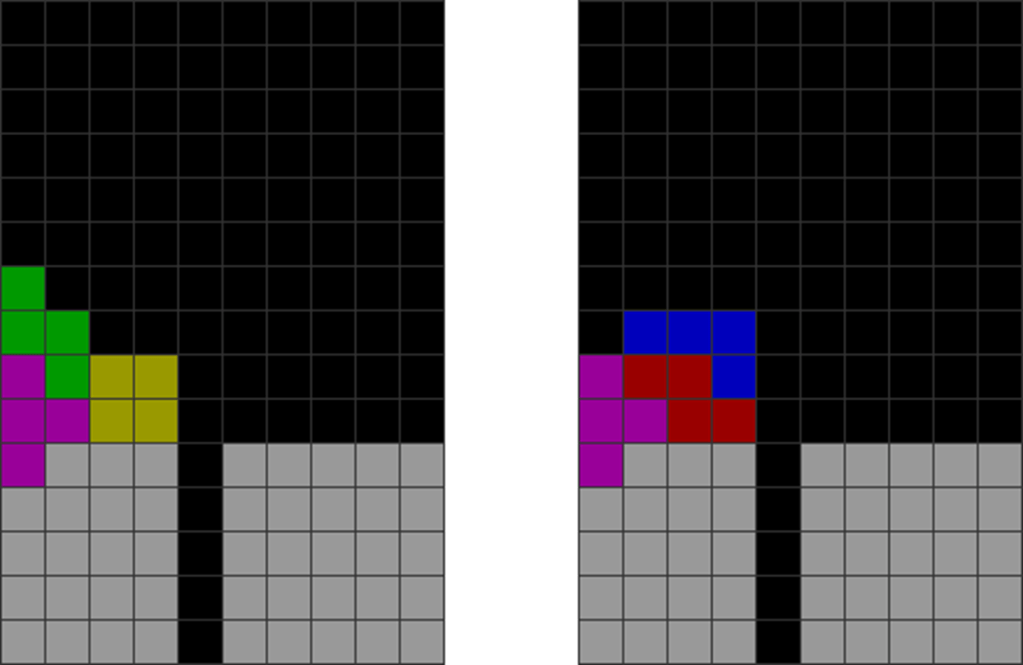
Now, we will consider 6-3 stacking (same as the mirrored 3-6 stacking in this context):
Diagram Set 4-11
1
2
Starting field with 6-3 stacking.
You stack 3×4 rectangles like this in columns 1, 2, and 3 (LSJ and TTL here).
As seen above, experts of 6-3 stacking will know that you can place 3×4 rectangles made of any finite combination, such as TTJ, TTL, OOI, LJS, LJZ, LLO, JJO, JZJ, LSL, etc., and stack them. This makes it easy to upstack the 3-block-wide stack on the left side.
Now, the big problem arises in 5-4 stacking (the mirrored version being 4-5 stacking), where the left stack is 4 blocks wide and has many more combinations. The following is 5-4 stacking (and its mirrored 4-5 stacking variant). Note the right diagram’s left stack, which is 4-block-wide:
Diagram Set 4-12
5-4 Stacking
4-5 Stacking
The left stack is 5 blocks wide.
The left stack is 4 blocks wide.
I will use 5-4 and 4-5 stacking interchangeably in the next section. What concerns us is how to correctly stack the 4-block-wide part in the right diagram.
This seems chaotic, and as such, many players forsake 5-4 sprinting as a viable strategy.
I am here to show you it is actually not so chaotic. If one applies 4-wide stacking patterns, one can stack with 5-4 stacking using easily memorizable patterns for maximal continuations and consistency. You will rarely run into dead ends.
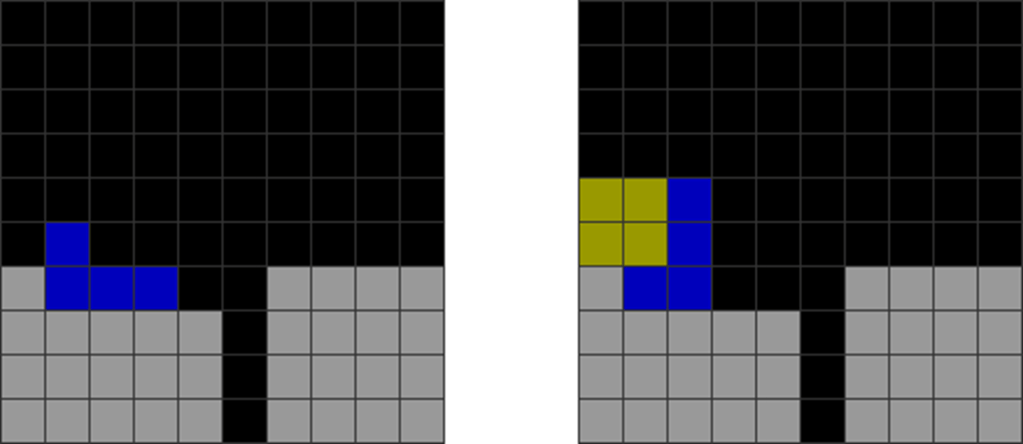
Applying 4-Wide Patterns to 5-4 Stacking
How have 4-wide combo solutions, as covered in Books 1 to 3, got anything to do with improving stacking? Surprisingly, there is a superb connection.
Let us consider how one can apply standard 3-residue 4-wide patterns to improve stacking in 5-4 stacking with 1 example.
I will illustrate with the first diagram set below:
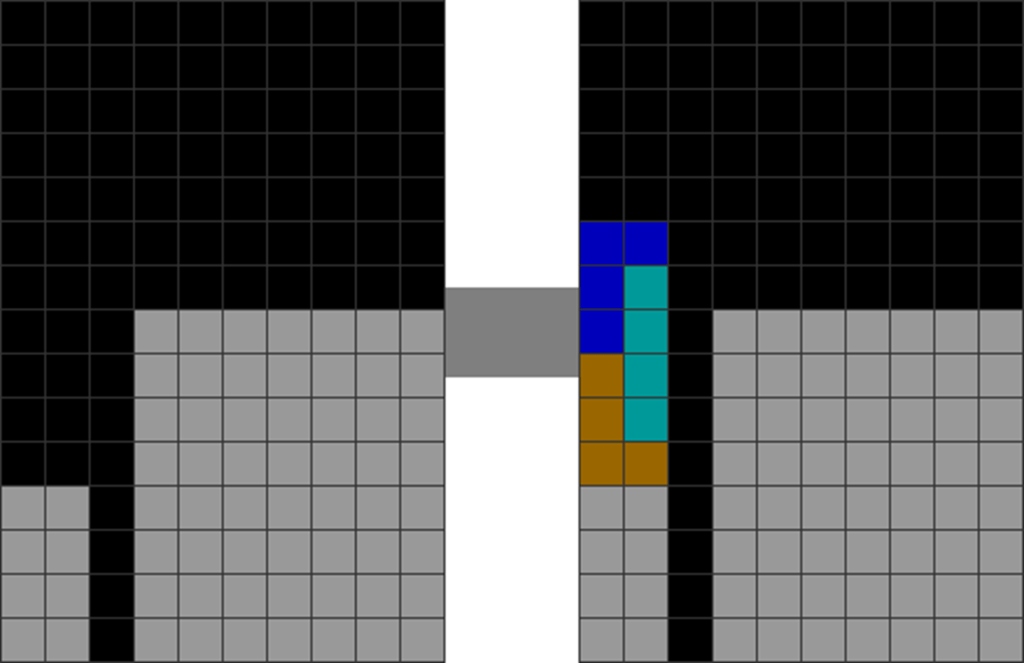
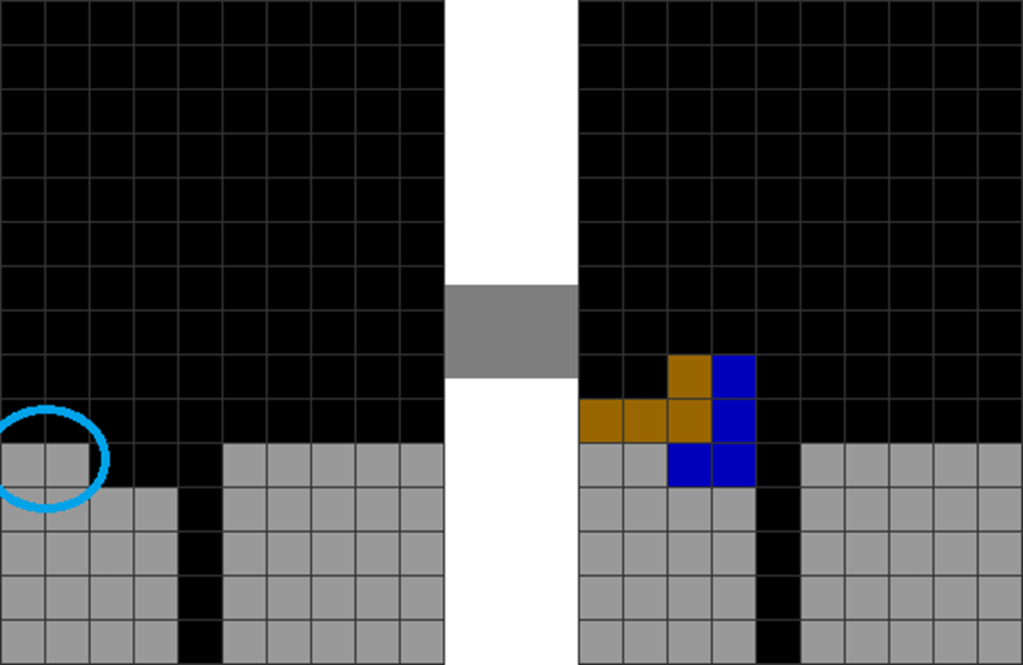
Diagram Set 4-13
Starting Pattern
The surface of columns 1 to 4 (blue circle) show 3 residues. This resembles one of the most common 3 residue 4-wide patterns.
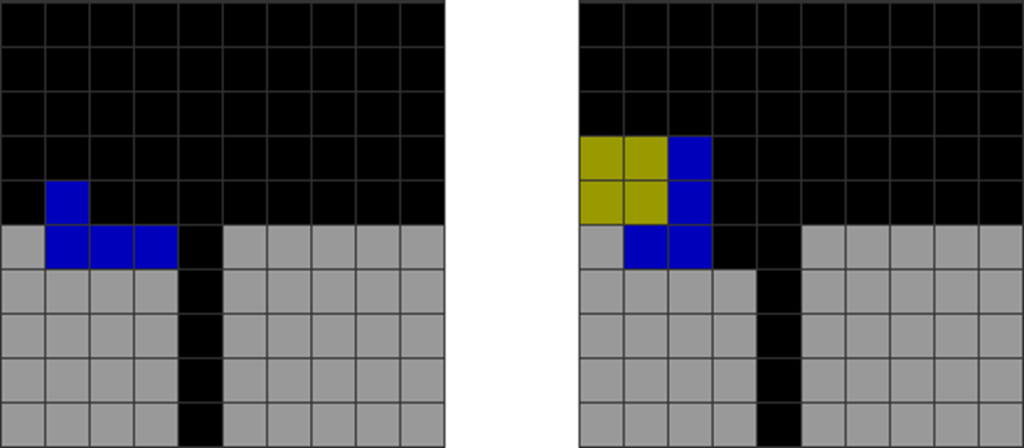
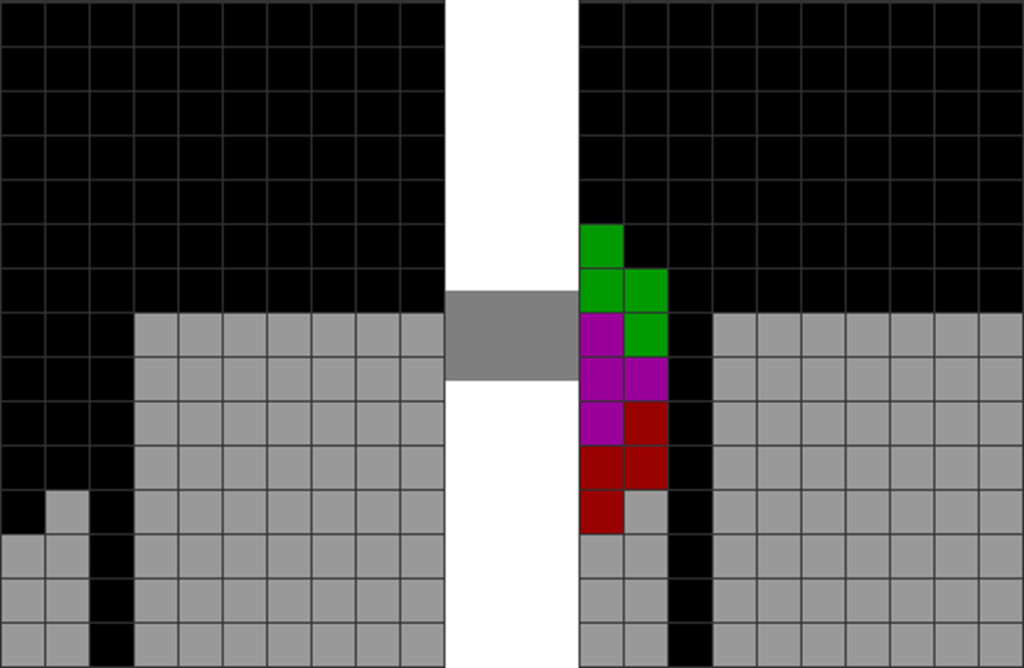
Diagram Set 4-14
First Piece Placed
You place S here, which is a common way of solving this 3-residue 4-wide pattern.
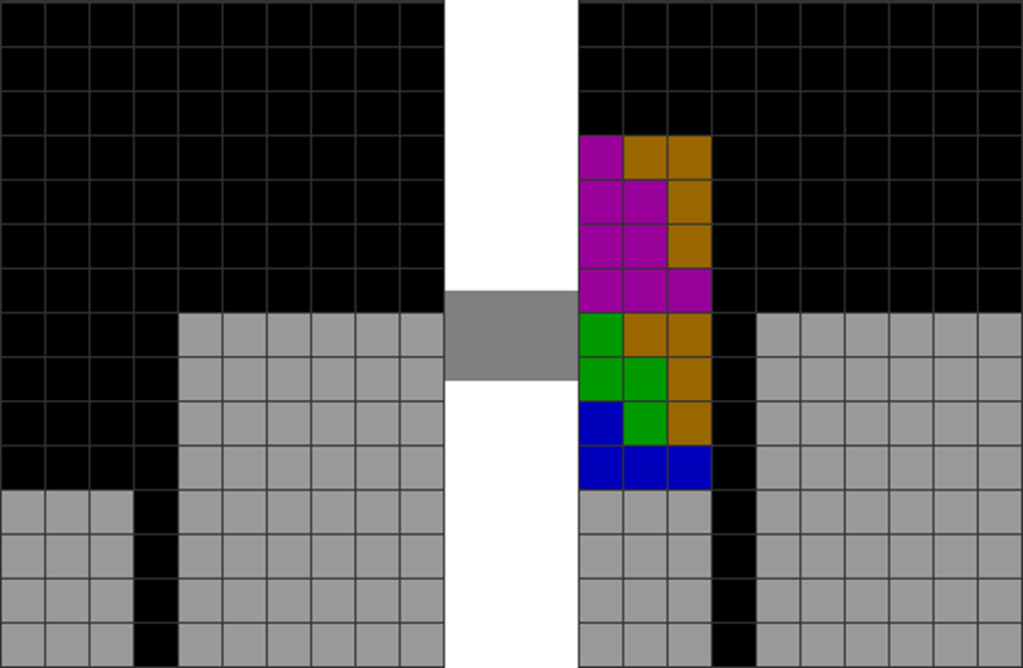
Alt. A
Alt. B
You can then continue with either of the 2 options above. This stacking parallels the 4-wide continuation solutions of 3-residue 4-wide.
In the above example’s “starting pattern” image, the 4-blocks-wide shape (in the blue circle) corresponds to a 4-wide residue pattern. It leads to many stacking continuations. Notice anything in how I stack over the cavity, using S in the “first piece placed” image?
They lead to the continuations in Alt. A and Alt. B.
Then, now look at some of the standard 3-residue 4-wide solutions in Books 1 and 2:
Diagram Set 4-15
Notice something? How I stacked diagram set 4-14 with the starting S piece corresponds to the solution in the mirrored version of row 2 in the above diagram (the fifth solution with the Z). For the reader’s convenience, it is this row here:
Diagram Set 4-16
Observe the diagram below.Step 1’s left side (columns 1 to 4) resembles the mirrored version of the above 3-residue 4-wide pattern. In step 1, I have placed a T, resembling the third solution in the above diagram (the one with the horizontal T placement in the cavity):
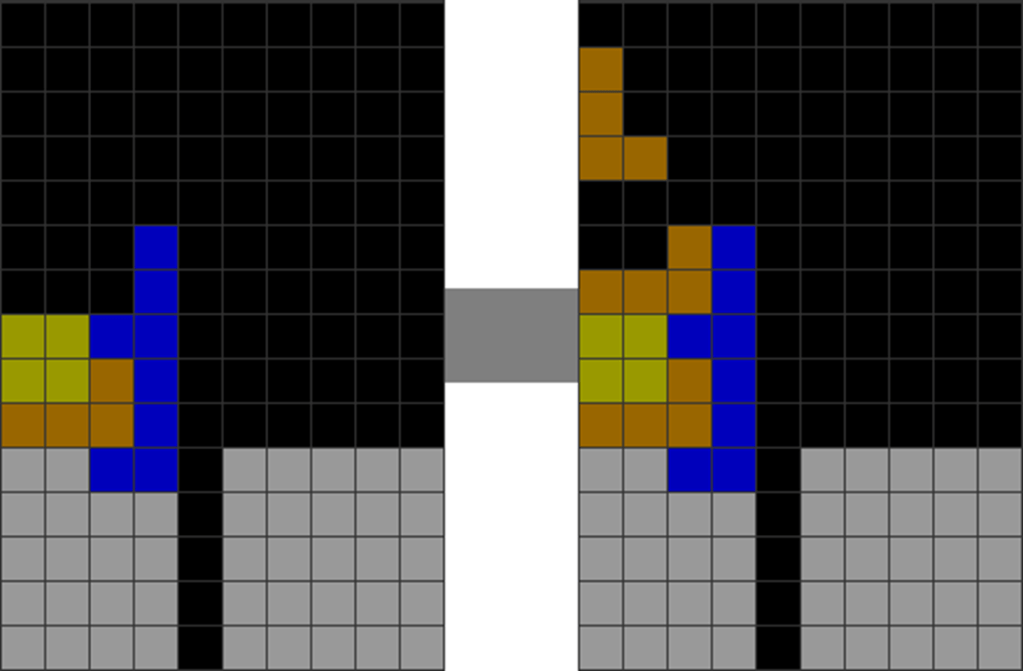
Diagram Set 4-17
1
2
Columns 1 to 4’s surface (blue circle) resembles a 3-residue 4-wide pattern. I put a T, resembling one of the 4-wide pattern’s solutions.
Stack with S. This emulates another solution to step 1’s 3-residue 4-wide pattern.
3
4
Continue with O.
Continue with T.
5
Continue with the S piece.
I then put S over it in step 2, like one of another solution set of the 4-wide patterns corresponding to this image here:
Diagram Set 4-18
Note the fifth solution in the above diagram involving the placement with the S. This is similar to how I placed the S vertically in the previous diagram set. Thus, I continue with the 4-wide patterns, placing an O in step 3 and T in step 4. Step 4’sT placement leads to a new set of solutions for the 3-residue 4-wide patterns. Here is step 4’s one, to illustrate:
Diagram Set 4-19
The sixth diagram above is the solution used in step 5, except that it is mirrored.
Do you see it now? Because the left stack is exactly 4 blocks wide, we can use 3-residue 4-wide continuations to stack it with remarkable consistency.
Users of 4-wide, especially of 3 residues, will know how consistent it is. It has a very high chance of securing a high continuous combo. This consistency, with numerous patterns you can consciously apply to avoid dead-ends, such as in the 4-wide chart, makes it applicable to 5-4 stacking to maximize stacking continuations.
Now, here are more examples, showing suggested piece placements that match the 3-residue 4-wide solutions to maximize stacking continuations:
Diagram Set 4-20
Starting Pattern
Diagram Set 4-21
First Piece Placed
Alt. A
Alt. B
Diagram Set 4-22
First Piece Placed
Alt. A
Alt. B
These choices below will break stacking continuations as they do not belong to any of the solutions in the 3-residue 4-wide charts in Books 1 and 2:
Diagram Set 4-23
A
B
Both break stacking continuations because there are no further solutions per the 4-wide charts.
Here is another typical mid-game pattern that occurs during 5-4 stacking:
Diagram Set 4-24
Starting Pattern
Diagram Set 4-25
First Piece Placed
Alt. A
Alt. B
Diagram Set 4-26
First Piece Placed
Alt. A
Alt. B
Diagram Set 4-27
First Piece Placed
Alt. A
Alt. B
Diagram Set 4-28
First Piece Placed
Alt. A
Alt. B
As usual, you apply the 3-residue 4-wide patterns to stack them with maximal continuations to avoid dead ends.
What about 4-wide patterns of other residues? We consider the following case:
Diagram Set 4-29
Starting Pattern
Diagram Set 4-30
First Piece Placed
Alt. A
Alt. B
Diagram Set 4-31
First Piece Placed
Alt. A
Alt. B
As seen above, the last 2 sets involve placing patterns that maximize stacking continuations after placing T and J on a flat field.
Let us investigate diagram set 4-31’s “First Piece Placed” image and observe its follow-ups, which perfectly mirror a 4-residue 4-wide pattern’s solutions, which I will soon bring up:
Diagram Set 4-32
1
2
3
4
5
Step 1’s blue circle shows a 4-residue 4-wide pattern. The player applies the 4-residue 4-wide solutions to make stacking continuations.
You notice that the top 2 rows of step 1 (with the horizontal J) correspond to a 4-residue 4-wide pattern as it has 4 blue blocks. I am going to cite my Book 2’s 4-residue 4-wide patterns solution chart:
Diagram Set 4-33
The vertical T placement of the previous diagram set’s step 2 corresponds to the above patterns, which are mirrored. Note the fourth solution with the vertical T placement.
Let us return to diagram set 4-32. You place T in solution 4’s vertical orientation to “solve it” with the same logic as the 3-residue patterns illustrated earlier in this chapter.
This then opens up a new 4-residue pattern, once you put S over it in step 3, the one here:
Diagram Set 4-34
Based on the above chart’s solutions, you notice you can put Z (the seventh solution above) to continue the 4-wide sequence, as was done in step 4 of diagram set 4-32. Continue with the same principle in step 5 onwards, using the other 4-residue 4-wide patterns to maximize stacking continuations.
However, note that 4-residue 4-wide has fewer continuations than 3-residue 4-wide.
Now, you can generalize it to 5-residue 4-wide patterns:
Diagram Set 4-35
Starting field
This blue-circled part has 5 blocks, making it a 5-residue 4-wide pattern.
The above diagram’sblue-circled part corresponds to a 5-residue 4-wide pattern. You can then continue stacking over it with the solutions that correspond to that pattern:
Diagram Set 4-36
1
2
The blocks above the pink line emulate a 5-residue 4-wide pattern (the blue circle).
You stack by “solving” it as you would for 5-residue 4-wide patterns.
Here is another example:
Diagram Set 4-37
1
2
The blocks above the pink line emulate a 5-residue 4-wide pattern (blue circle).
You stack by “solving” it as you would for 5-residue 4-wide patterns.
Note how the blue-circled rows in the last 2 diagram sets correspond to 5 residues as there are 5 blocks?
I do not have the charts for 5-residue 4-wide in any of my books, as it contains an impossible 5 times the number of solutions as either 3 or 4 residues.
2-residue 4-wide patterns are also applicable here:
Diagram Set 4-38
1
2
Columns 1 to 4’s surface layer resembles a 2-residue 4-wide pattern (blue circle).
You stack it by using the 2-residue 4-wide solutions.
3
4
Continue. This can be freestyled.
Until the continuation breaks.
The number of solutions for 2-residue 4-wide is so few that you do not even need to memorize them. Just freestyle them like in the above diagram.
In cases where 4-wide patterns do not apply, you just freestyle them, stacking openly to maximize stacking continuations and minimize dead-ends like this:
Diagram Set 4-39
First Piece Placed
Alt. A
Alt. B
Alt. C
Alt. D
Combining pieces into 1 huge chunk can resolve field disharmony issues:
Diagram Set 4-40
1
2
This is not field-harmonized.
However, if you can do this, the field can be harmonized. However, this has high piece dependencies.
It is vital to avoid this combination:
Diagram Set 4-41
A
Alt. A is unstable unless you have another S to field-harmonize it (left as an exercise for the reader).
The above A shows a “dead-end” pattern. Typically, this pattern, based on my experience, minimizes the stacking of continuations. If you do not have the right incoming pieces, you are in trouble.
The other major dead-end pattern, as shown earlier, is this one:
Diagram Set 4-42
A
This breaks 4-wide continuations as it divides the field. There are no visible 4-wide pattern “solutions” to continue it.
Minimize this as far as possible!
For most other cases, you just freestyle:
Diagram Set 4-43
Starting field
Alt. A
Alt. B
Diagram Set 4-44
Starting field
Alt. A
Alt. B
Alt. C
Alt. D
Alt. E
Alt. F
Diagram Set 4-45
Starting field
Alt. A
Alt. B
Diagram Set 4-46
Starting field
Alt. A
Alt. B
Alt. A and Alt. B are interesting, rare case where putting a T or Z leads to the same pattern, even though putting T alters parity, but putting Z does not.
Note how Alt. A and B are interesting, as they show how putting a T functionally makes it the same shape as putting a Z. Despite altering parity, it does not change the field’s shape compared to Alt. A.
You can also try converting freestyle cases to 2, 3, 4, 5, or 6 residue 4-wide patterns to maximize stacking continuations like this:
Diagram Set 4-47
1
2
3
This shows how a freestyle pattern in step 1 is transformed into a 2-residue, 2-wide pattern, which is then “solved” in step 3.
Hence, if you do not see a 4-wide pattern, you can place a few pieces to alter the shape until it becomes a 4-wide pattern. Then, you can stack using the 4-wide pattern solutions of various residue types for optimal stacking continuations.
C) Using Freestyle Stacking for Better Field Harmony and Smoother Stacking
This sub-section will be in the actual full chapter in Book 4.
D) Downstacking and Field Harmony
This sub-section will be in the actual full chapter in Book 4.
Summary and Conclusion
I have now completed a comprehensive theory of stacking and field harmony.
This chapter primarily shows how to improve 5-4 stacking and beyond with determinate forms by applying the 4-wide stacking theory to overall stacking. This removes the most troublesome aspect of 5-4 stacking, namely that it is typically believed to be a chaotic and indeterminate stacking form.
With this, the stacking theory is finalized, allowing players to use this knowledge to gain a comprehensive understanding and apply it to enhance their stacking.
With greater field harmony management, as I have explored in Books 1 and 2, you are more likely to get more:
Stable T-spin continuations.
Stacking continuations.
Downstacking and skimming ease, and thus, survival.
More downstack combo continuations.
Fewer dead ends.
Greater parity management and lower T wastage.
Concept
Summarized Rules-of-Thumb
Flow
Apply 4-wide stacking patterns for maximal stacking follow-ups in 4-block-wide patterns. Flatten cavities with horizontal L, J, and T placements as far as possible. Lower working memory requirements by stacking in chunks. Select field-harmonized options while downstacking to maximize smoothness and efficiency.
Form
Choose field-harmonized patterns to maximize long-term stacking continuations. Break broad surfaces into smaller chunks to deal with each part more easily. Minimize dead end patterns as they disrupt 4-wide stacking continuations.
Balance
Do not force 4-wide stacking patterns if they do not arise. Instead, freestyle what you can. You can convert between 4-wide stacking patterns of various residue numbers.