Two kinds of mishaps happen in a game: Misdrops and dead-end situations. Recovering from them is called mistake and field recovery, respectively.
A misdrop is an accidental tetromino placement. They are annoying as they can disrupt the flow of a well-planned attack sequence. Yet, they are irreversible.
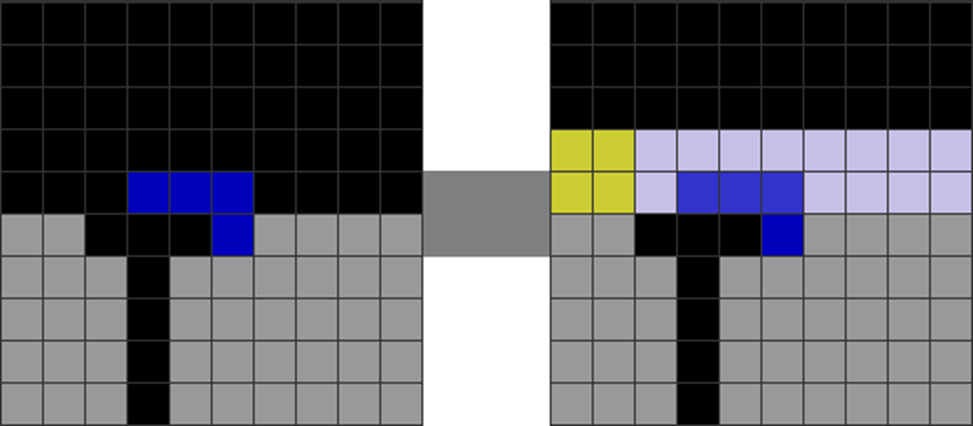
| Diagram Set 15-1 |
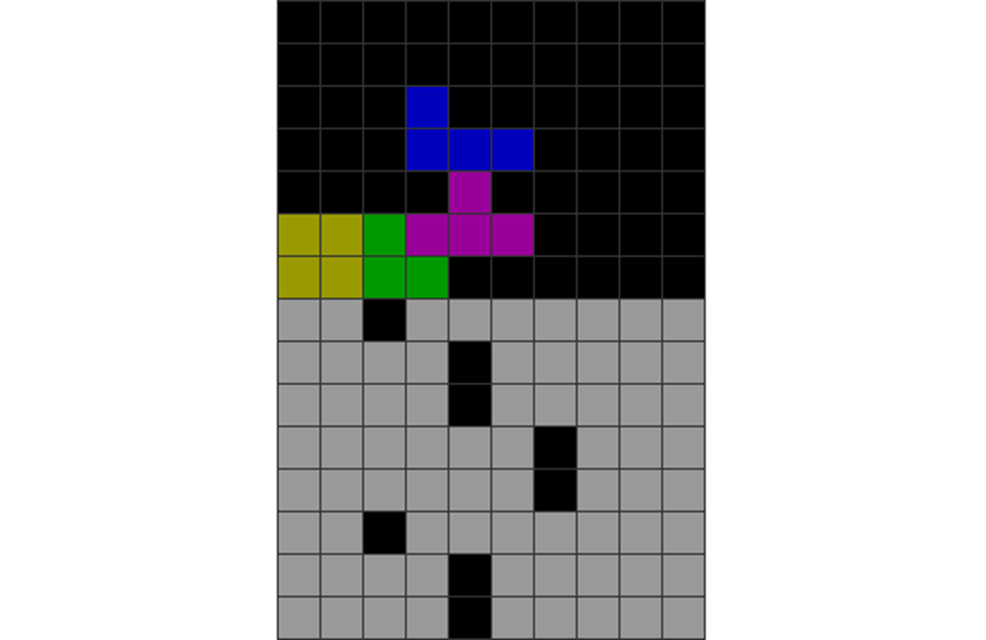
| A misdrop with J and T pieces. |
Misdrops happen to the best of us. Thus, recovering from misdrops is vital to maintain pressure and avoid losing.
Dead-end situations are when you overstack or stack in a way that leads to extreme jaggedness, lack of T-spin or Tetris opportunities, breaking back-to-back bonuses, or stacking over holes too much. The following are examples that lead to such situations:
When misdrops and dead-end situations happen, your field’s chances of making clean line clears are reduced or removed. This reduces continuations, flow, and garbage lines sent to your opponent. It also makes downstacking harder and less clean or fluid.
A) General Principles to Fix Misdrops
When you get a misdrop, the first thing to do is to discipline yourself not to get frustrated, angry, or anxious.
Afterward, apply the following general misdrop-fixing principles:
1) Filling Cavities
Cavities should be filled as far as possible if one cannot spot a safe clean-up, such as a T-spin, Tetris, double, or triple. Doing so allows one to skim through the damaged parts with greater ease. Ensure there are as few upstacks over holes as far as possible.
| Diagram Set 15-2 | |
| 1 | 2 |

| The player misdropped, resulting in this inconducive shape with a cavity. | To fix it, one can tuck an O under the cavity to fill it. |
The reason for this is simple: cavities must always be filled before you can skim any of the lines formed by colored blocks.
2) Skimming
It is better to skim off the top layers first if you cannot fill cavities because of the inability to spin in a piece like these below:
| Diagram Set 15-3 | |
| 1 | 2 |
| A misdrop causes this cavity-ridden shape. | One uses a J piece to cleanly skim off the top layer, exposing the lower layers. Stacking can then continue normally. |
| Diagram Set 15-4 | |
| 1 | 2 |
| A misdrop causes this vicious shape, requiring subtler skills. | A skilled player places the L this way, then skims off the top two layers with an O piece. |
Thus, the player should be astute and learn to see less apparent skims.
Skimming allows you to avoid over-stacking over holes and substantially makes you cleaner.
What about the following lethal misdrop?
| Diagram Set 15-5 | |
| 1 | 2 |
| The player makes a near-lethal misdrop that seems impossible to deal with. The J is suspended over the garbage hole below. | A skilled player merely upstacks with L, J, I, and the top 2 lavender layers to skim off the top two rows. |
The taller the suspended misdrop, the more critical it is to skim it off rather than to use soft drops to tuck into the cavity beneath. This is because the latter will incur too many soft drops when you try to fill the cavities below the ‘ceiling’ caused by the misdrop.
From my experience, L, J, and I pieces are the best for repairing misdrops through skimming. This is largely because they can clear 3 to 4 lines simultaneously. The extreme number of orientations of L and J pieces also allow for more fixes.
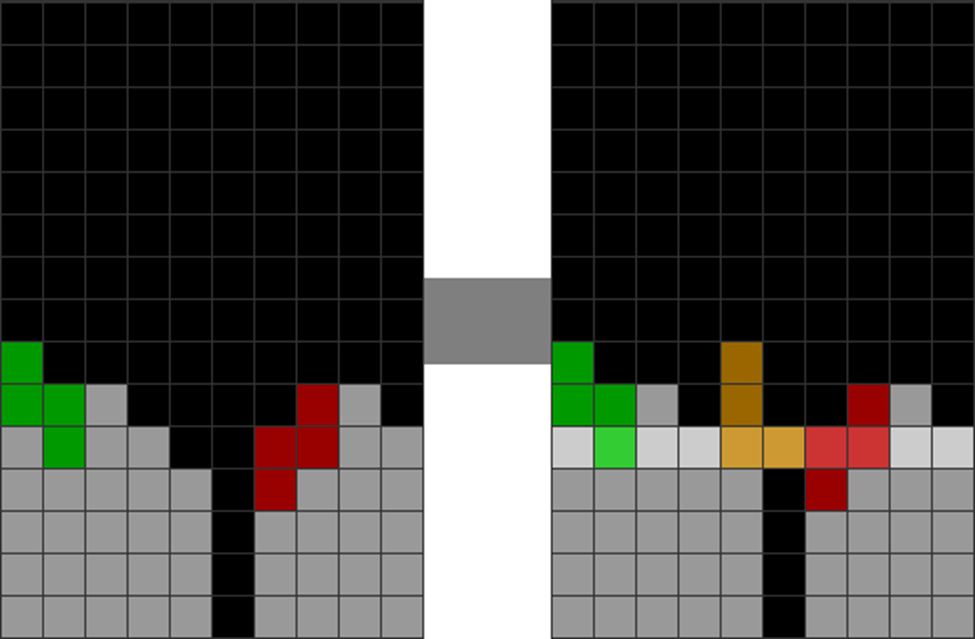
| Diagram Set 15-6 | |
| 1 | 2 |
| The player upstacks the lavender area and makes a clean triple with a J skim. |
| Diagram Set 15-7 | |
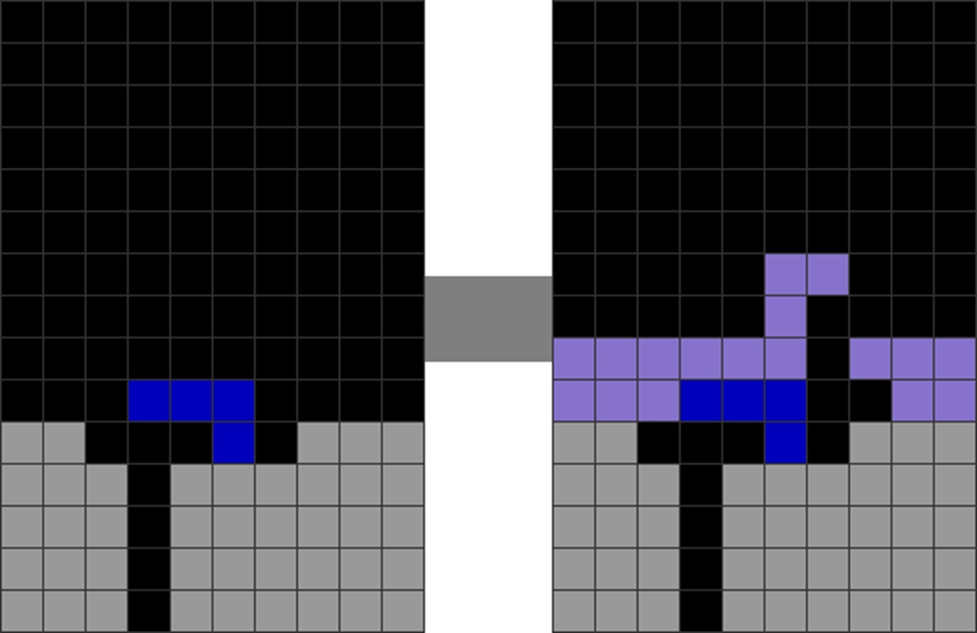
| 1 | 2 |
| The player upstacks the lavender areas and makes a clean triple with an I skim. |
L, J, and I pieces are the best for skimming off misdrop issues. I suggest upstacking more first before skimming to reduce line clear delays and generate more garbage from non-singles. The above two sequences generate two lines of garbage to defend oneself further.
3) Turning Misfortune into Opportunities
One can turn misdrops into T-spin chances. The more experienced a player is, the more one can spot T-spins to fix the misdrops. Below are misdrops turned into T-spin or Tetris opportunities:
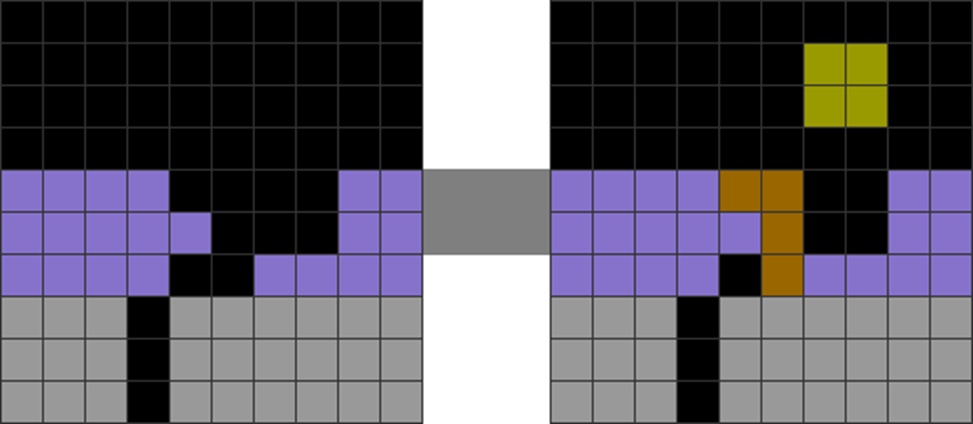
| Diagram Set 15-8 | |
| 1 | 2 |
| The player turns the misdrop into a partial T-spin triple (a T-spin double). |
| Diagram Set 15-9 | |
| 1 | 2 |
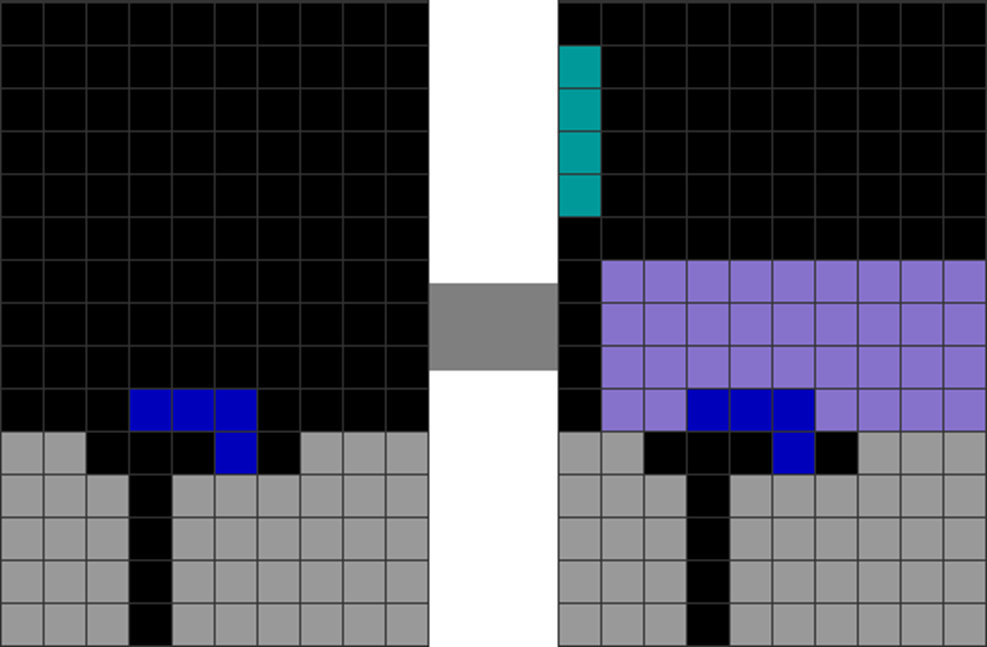
| The player skillfully makes a clean Tetris and cleans off the top layer while sustaining back-to-back bonus. |
One can also turn misdrops into downstack combo chances. I give an example below:
| Diagram Set 15-10 | |
| 1 | 2 |
| The player makes an unfortunate misdrop with the Z piece. | He upstacks the left-most column with two I pieces. This creates left and right towers. The Z piece is placed in the middle 4-wide well to make a three residue 4-wide opportunity. |
| 3 | 4 |

| He starts the 4-wide combo with Z and O pieces. | This continues, leading to a lethal downstack combo for offense and defense. |
Misdrops, therefore, sometimes give many chances for downstack combos. Stack up the sides to create a well for greater combo chances.
4) Keeping Up the Pressure
Whenever you misdrop, don’t stop – keep up the pressure!
Sustain back-to-back T-spins as much as you can before skimming. Do this only when it is safe.
Here are several mid-game examples of how to keep up the pressure during misdrops:
| Diagram Set 15-11 | |
| 1 | 2 |
| Here, the player makes a misdrop that results in the strange shape in the first step. However, he did not stop; instead, he created a Fractal to get two back-to-back T-spins. |
Even if you can’t make a T-spin, even a double skim is better than nothing:
| Diagram Set 15-12 | |
| 1 | 2 |
| Here, the player misdrops, but makes a double, sending one line of garbage instead of panicking and freezing. |
Every second of stopping is an opportunity cost incurred. Even if you cannot clean up a part cleanly, try to upstack to at least a double or triple to generate garbage for the opponent.
5) Using Non-linear Tucks to Avoid Dead-ends
Non-linear tucks involve placing blocks that open up more stacking opportunities later. Here are some examples:
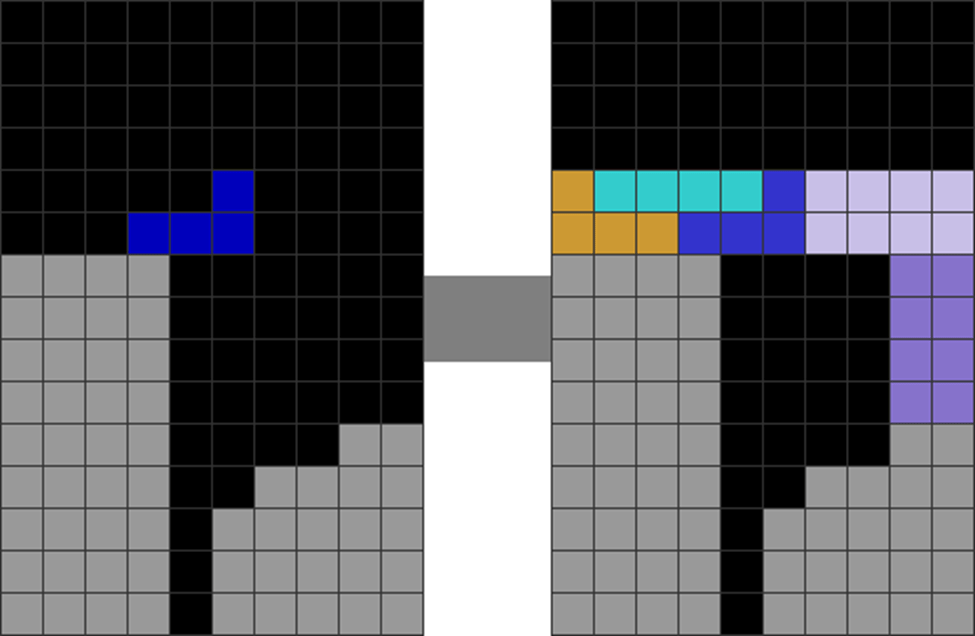
| Diagram Set 15-13 | |
| A | B |

| This L placement leads to I-dependencies. There is no other place to put L cleanly. | The player places L this way, and soft drop tucks the J under the L piece. With another J, the player can sustain back-to-back bonus without skimming. |
| Diagram Set 15-14 | |
| 1 | 2 |
| The player gets an immediate Z and O. If he puts Z vertically, he can’t put the O. Thus, he places the Z this way. | He soft drops the O under the Z, then upstacks with a J. This leads to a Tetris. |
Non-linear tucks sometimes let you soft drop a piece under another, which prevents you from getting into dead-ends. Although it requires a soft drop, it can sometimes be worthwhile.
B) List of Dead-end Situations and Dealing with Them
Dead-end situations are avoidable if a player is more skilled. They typically occur when a player makes terrible decisions and gets into them. However, when you get into them, there are many ways to resolve them:
1) Severe Piece Dependencies From Wells
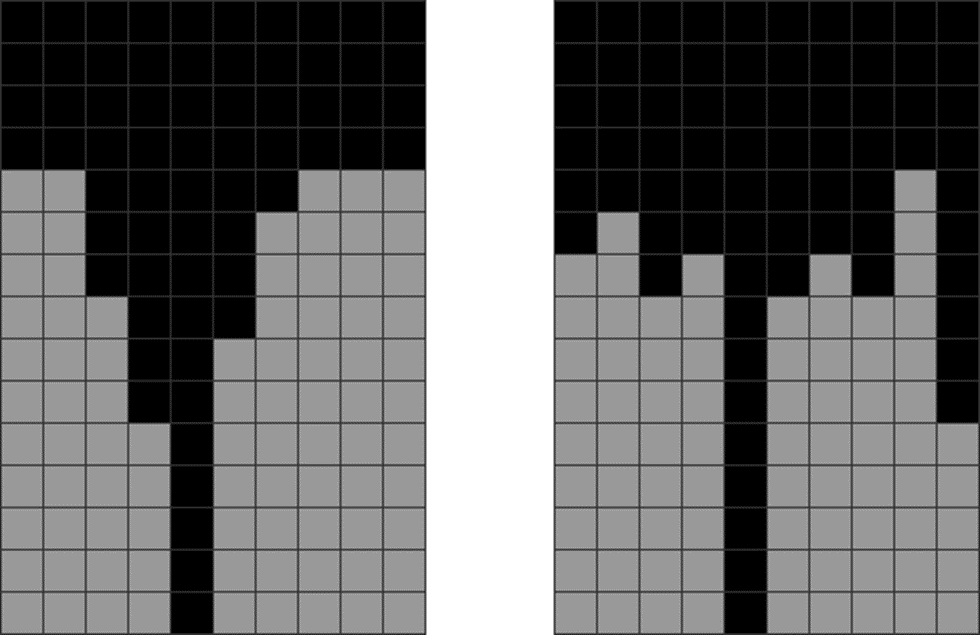
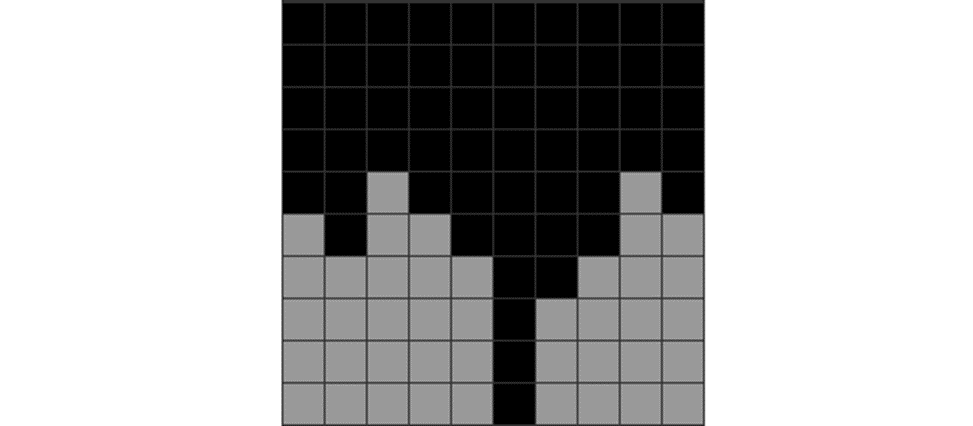
“Well” situations have a depression leading into the center, like this:

Such situations are sometimes not ideal because, from my experience, they significantly reduce the chances of making a T-spin. You also need over 1 I piece to balance both sides; you may not see T-spin opportunities even with it. The well may sometimes be at the corners, not at the center.
I present two solutions:
Solution 1: Filling the Well
| Diagram Set 15-15 | |
| 1 | 2 |

| Upstack and fill the well with L, O, and I until it gets even so you can continue making T-spins or Tetrises. |
Solution 2: Create a Downstack Combo
| Diagram Set 15-16 | |
| 1 | 2 |
| Upstack into two towers at the sides and use the well to downstack combo through it. |
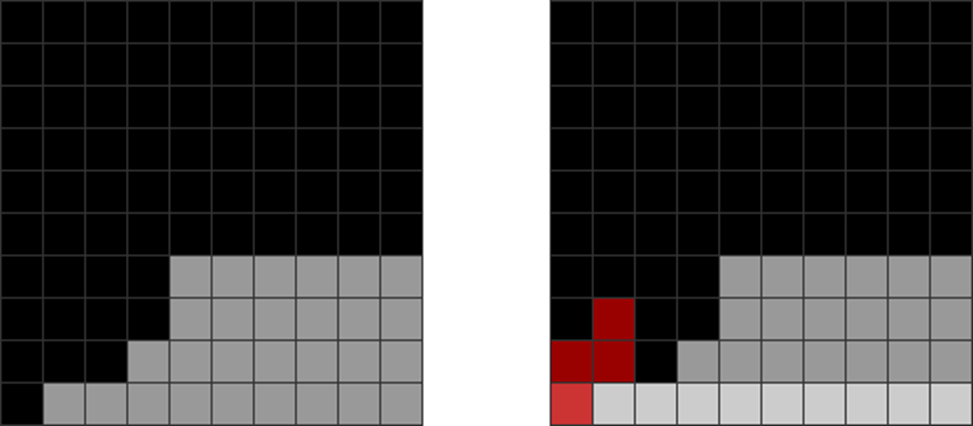
2) A Well at the Corners
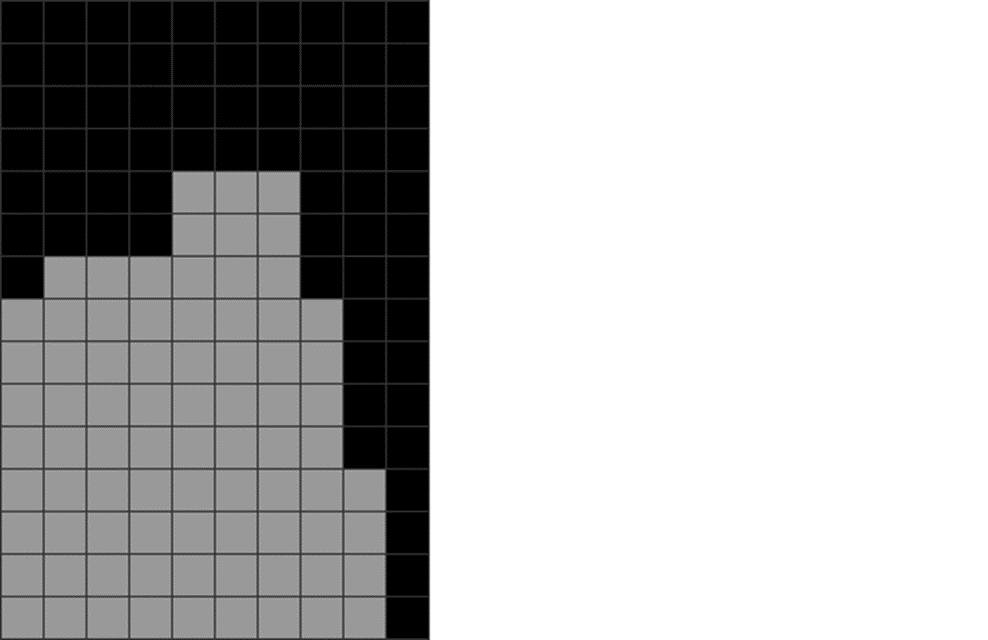
You can sometimes encounter this situation where the well descends into the corners:
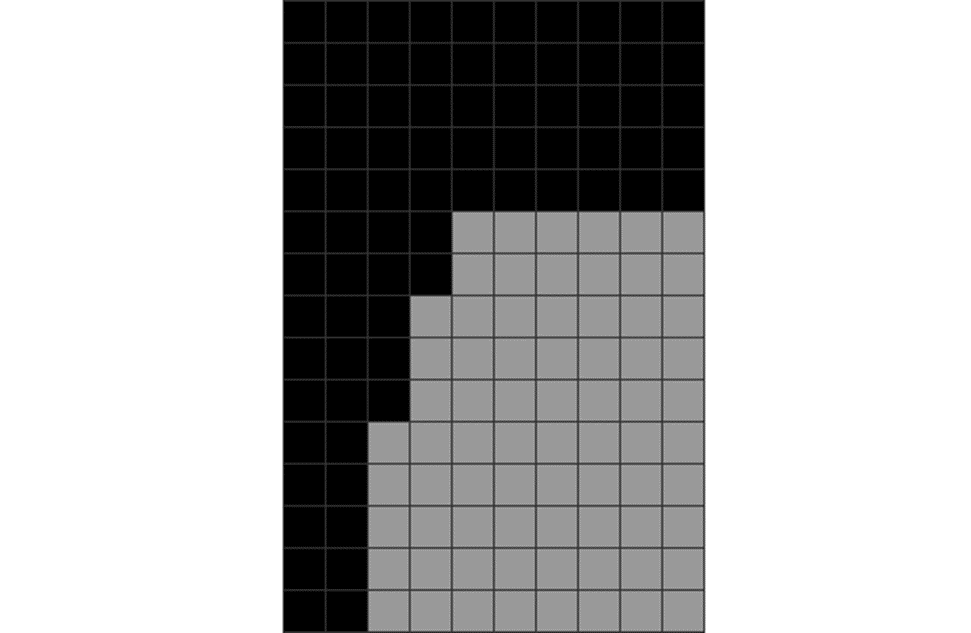
In such situations, you overstacked the sides. Typically, most situations like these prevent the formation of new T-spins.
Proper stacking resolves this:
| Diagram Set 15-17 | |
| 1 | 2 |

| Fill the area and clean it with back-to-back Tetrises. |
This is the cleanest and most consistent method, offering a sizable amount of pressure to defend yourself.
3) Severe Jaggedness Issues
If you have studied the chapter on Managing Jaggedness well, you’ll now understand why that chapter is essential here.
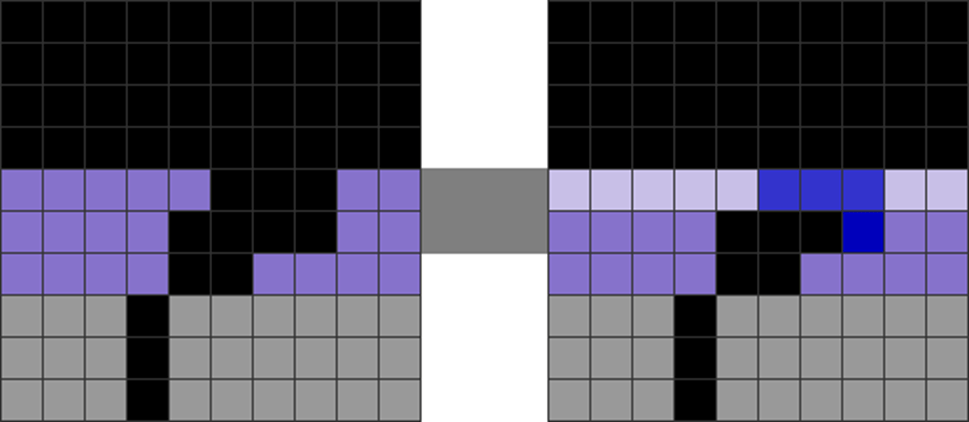
An inexperienced player can often get into parity-imbalanced situations like these:
| Diagram Set 15-18 |
| In such situations, you may get a very jagged and divided field that cannot cleanly force out T-spins or downstack combos. |
There are three solutions for this:
Solution 1: Create T-spins!
Jagged situations have ample chance for T-spins, so create them if possible!
| Diagram Set 15-19 | |
| A | |

| The player makes a T-spin triple out of a jagged situation. |
Solution 2: Putting Ts in the Stack
This method involves putting Ts to resolve jaggedness.
| Diagram Set 15-20 | |
| A | |

| One places a T to fix jaggedness in the stack. He then upstacks and uses tetrises to clean up and sustain back-to-back bonus. |
Solution 3: Use Strategic Line Clears
| Diagram Set 15-21 | |
| 1 | 2 |
| The player uses a single to flatten a jagged stack. The second step is less blocky than the first. |
See how much flatter step 2 is?
Single and triple line skims resolve jaggedness.
4) Unfilled Columns in the Extremes from a Mound
Beginner players often get into this situation:
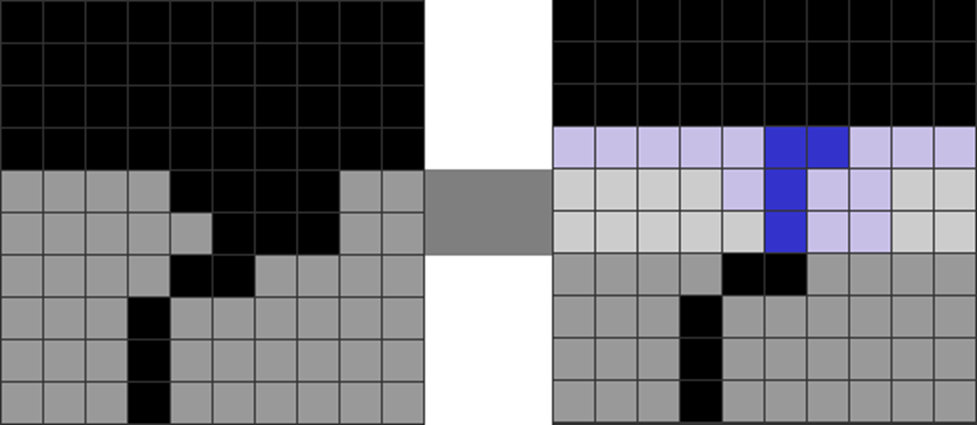
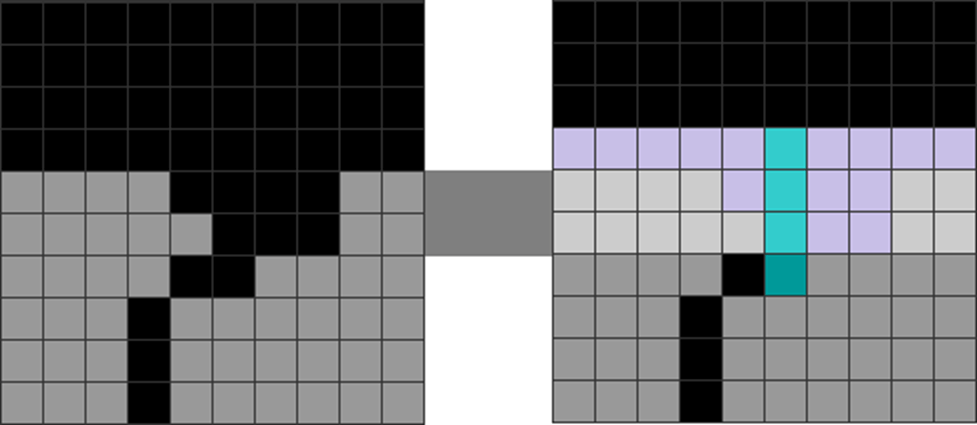
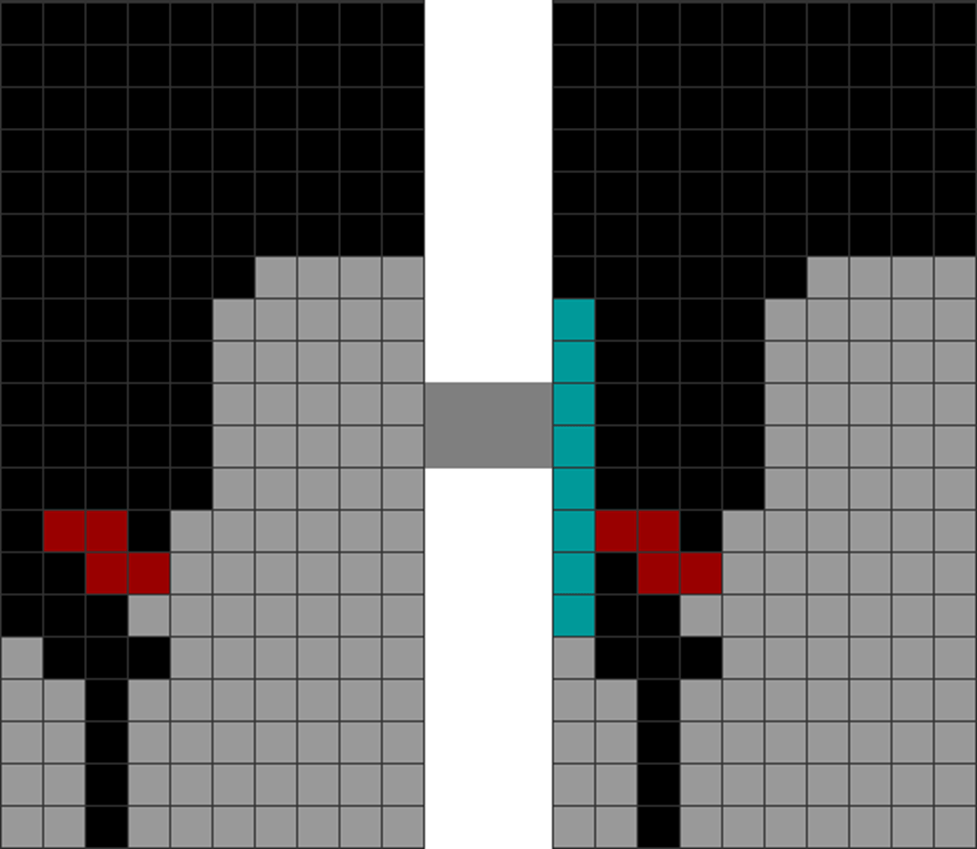
| Diagram Set 15-22 | |
| A | B |

| The player gets into two piece dependencies (often I, L, and J to fill the holes) on the far left and right sides (red circles). | The player creates a mound-like pattern in columns 2 to 4. This leads to piece dependencies in the two red circles. |
I suggest avoiding such situations as they can reduce stacking continuations. You can only stack between the extreme, unfilled columns, worsening the stacking. You can sometimes get two I dependencies on the two extremes.
Therefore, the solution is to fill the corners as soon as possible to increase stacking possibilities.
5) A Common Dead-end
This is another prevalent pattern that occurs:
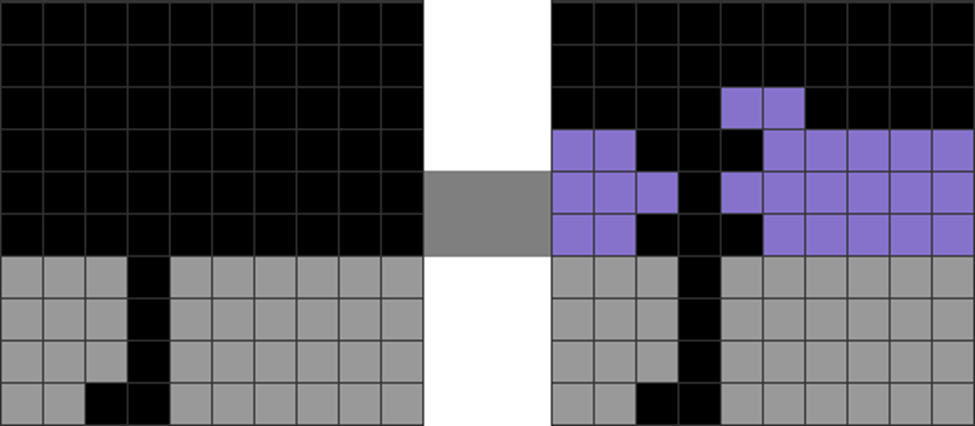
| Diagram Set 15-23 | |
| 1 | Alt. A |
| This is the starting field. | This is the worst stacking choice, leading to a problematic follow-up pattern (requiring another Z or T to fill the cavity, which jags the field. |
| Alt. B | Alt. C |

| This is cleaner, using composite J and Z pieces to make a perfect 4-high rectangle for a clean back-to-back Tetris. | Using a J skim to lead to a T-spin but breaking back-to-back bonus is also good. |
Summary and Conclusion
The difference between two evenly skilled players boils down to two crucial differences: endurance and recovery.
By learning to recover from misdrops, you gain an advantage over a player who cannot. Even the most talented players get into dead-end situations. When you see them, you can deal with them. However, it is best to have avoided them.
| Concept | Summarized Rules-of-Thumb |
| Flow | Fill cavities to minimize dead-ends. If you misdrop, go fast – don’t slow down! Keep upstacking for firepower! Avoid poor stacking patterns that lead to dead-ends and slow you down. |
| Form | Make clean skims to get rid of the top misdropped layers. Memorize all common ways to deal with dead-end situations. Use non-linear tucks and soft drops to avoid dead-ends and stack better, if needed. |
| Balance | Make T-spin chances out of misdrops! Avoid well-like situations unless you wish to make a downstack combo (like 4-wide) out of them. Skim if no other clean placements are available to make the field flatter and safer. |
