Spamming Tetrises is one of the core skills in this game. Experts can often chain one Tetris after another to smash their opponents with a heavy Tetris barrage.
Each Tetris sends 4 garbage lines.
If you chain one Tetris after another, you maintain a back-to-back bonus. Hence, each subsequent Tetris line clear sends 5 garbage lines instead of the usual 4!
Clearing 4 Lines at a Time
I will teach you the most appropriate situations to spam Tetrises.
1. The Good Old 9-0 Stacking
Spamming Tetrises while stacking such that only the extreme right column of the field is empty is the most iconic way to play Tetris:
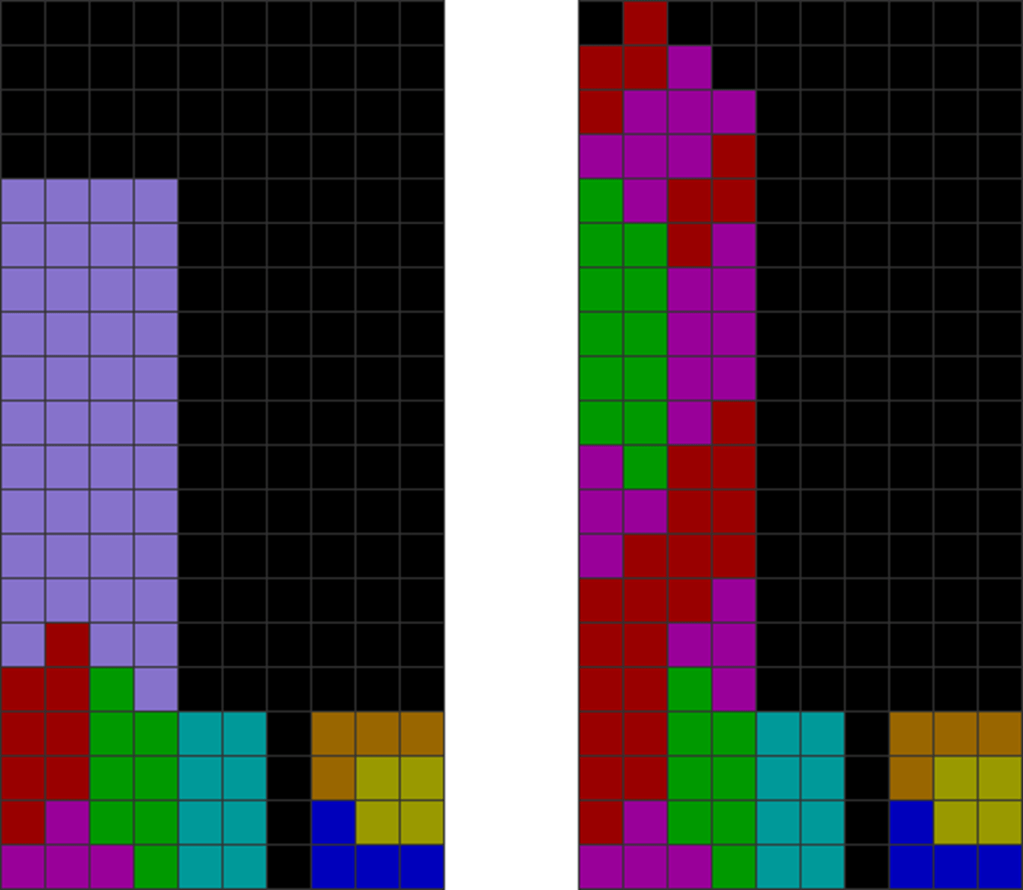
| Diagram Set 5-1 |
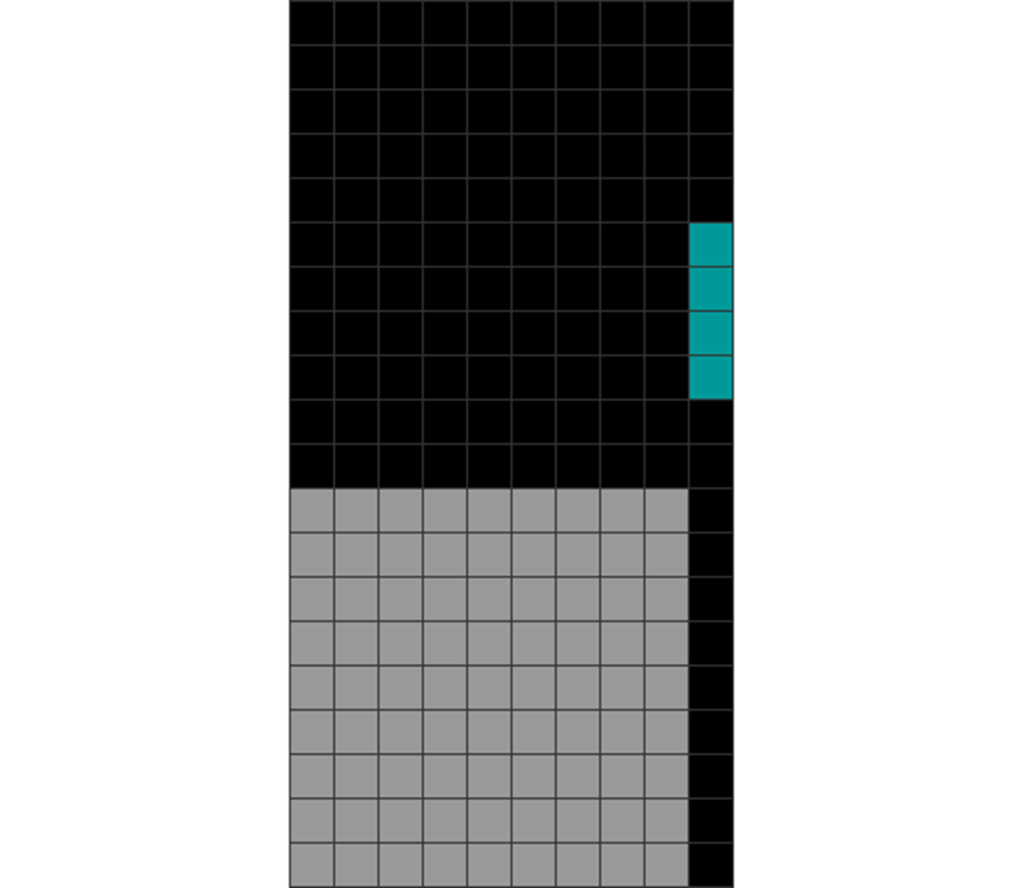
| The empty hole is in the 10th column for the Tetris. The other 9 columns are filled. |
This setup, of placing the main Tetris hole in column 10, is called 9-0 stacking.
Although less common, some players place their main Tetris hole in column 1, on the extreme left. This mirrored version is sometimes called 0-9 stacking and is functionally like 9-0 stacking.
Stacking the left side (the broader side) of 9-0 stacking fields follows the general stacking guidelines from the earlier Stack Smarter, Not Harder chapter.
The simplest Tetris game is called 40-line sprint.
One simply clears 40 lines (often with 10 Tetrises) as quickly as possible to get their score.
2. A Twist with 6-3 Stacking
I now introduce you to a twist to spamming Tetrises: 6-3 stacking.
Here, you place the main Tetris hole in column 7, like this:
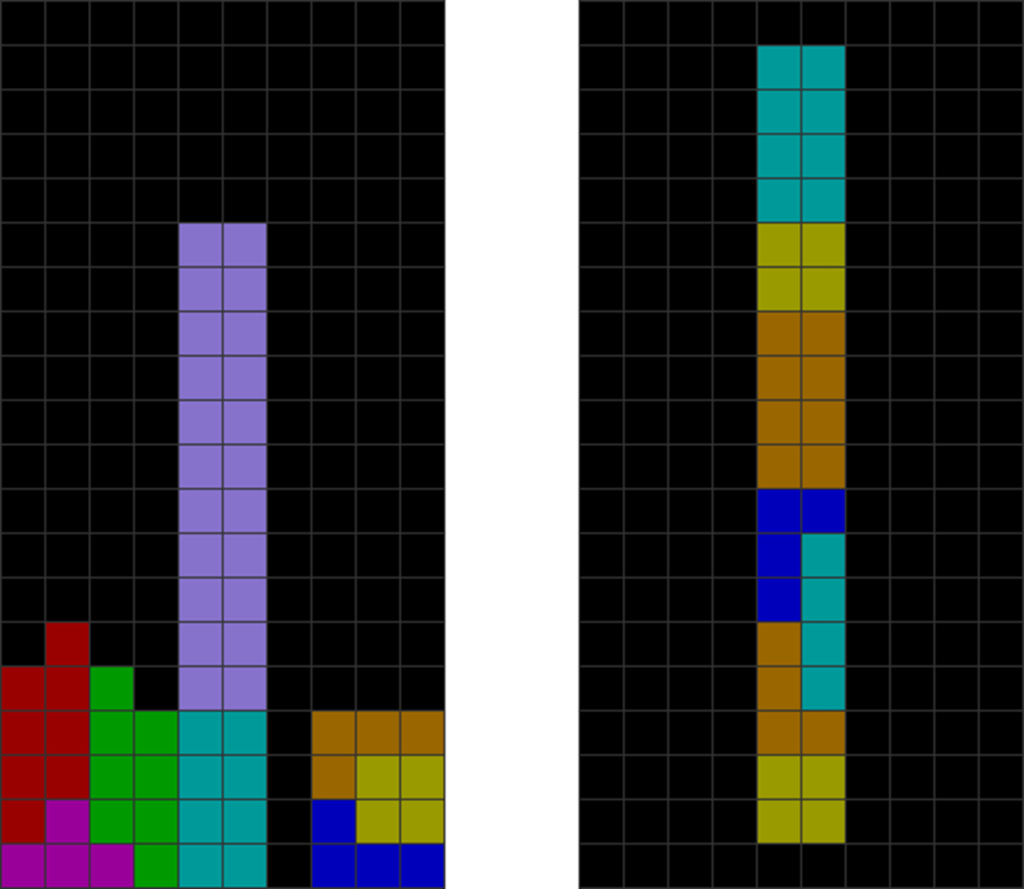
| Diagram Set 5-2 |

| The main Tetris hole is in column 7. |
One may wonder: why should I place the hole in column 7 when I can put it in column 10, which is simpler?
The answer: it is because 6-3 stacking reduces placements that need one to press “move right” twice, such as:
| Diagram Set 5-3 | |
| 1 | 2 |
| These pieces spawn in these columns. | To move them to these positions, you must press “move right” twice. |
This hence slightly increases one’s speed.
However, the trick to stacking it properly is far more challenging compared to 9-0 stacking.
Regardless, here is a trick to help you out, easily learned in just 15 minutes!
First, stack the first bag of 7 pieces like this (starting from an empty field):
| Diagram Set 5-4 | |
| A | B |
| 2 recommended openers for 6-3 stacking. |
Then, divide the field into 3 parts:
| Diagram Set 5-5 | |
| 1 | 2 |
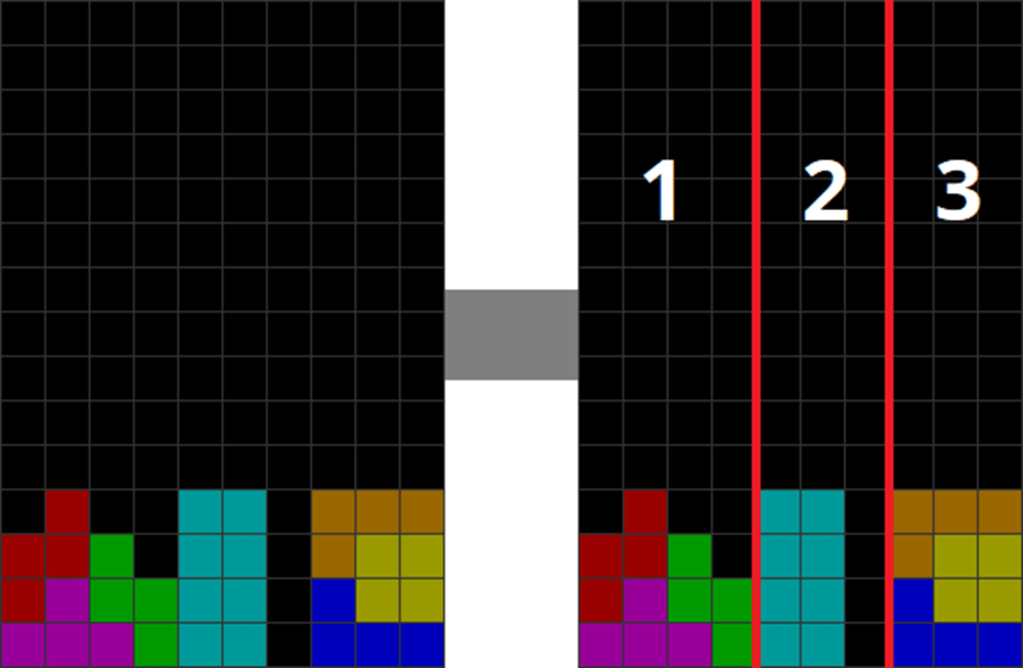
| The first bag of 7 pieces and an additional I piece have been placed. | Divide the field into regions 1, 2, and 3, divided by the red lines. |
The leftmost side is 4 blocks wide. The middle stack is 2 blocks wide. The farthest stack is 3 blocks wide.
Here lies the IQ 200 trick: you stack each one individually using memorized forms!
Here is how:
| You want to properly stack the first 4 columns (lavender blocks). | This can be done using S, Z, and T pieces in the configuration here. |
For the leftmost stack, place S, Z, and T pieces alternatively. After a while, the pattern will repeat. Try it! It does not need to be 100% precise; some freestyling is expected.
Now for the middle stack:
| Diagram Set 5-7 | |
| A | B |
| The middle 2 columns in lavender (columns 5 and 6) can be stacked as shown in B. | See how O, L, J, and I can be stacked in a spammable and repeatable pattern. |
For the middle stack, place L, J, O, and I until they repeat with tall rectangular shapes. This is super-easy. Now for the finale:
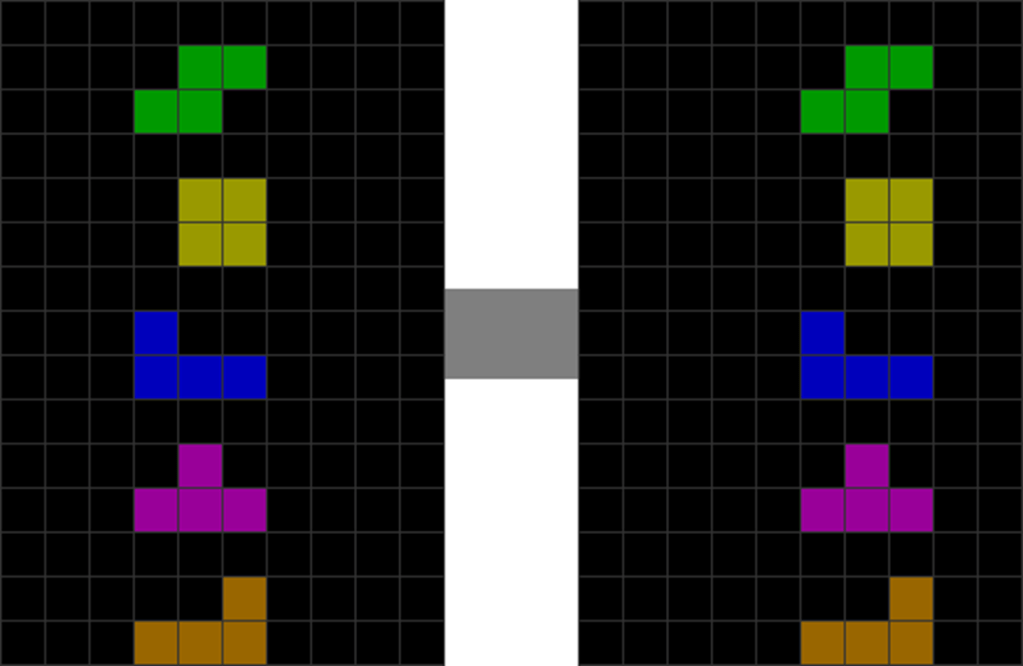
| Diagram Set 5-8 | |
| A | B |
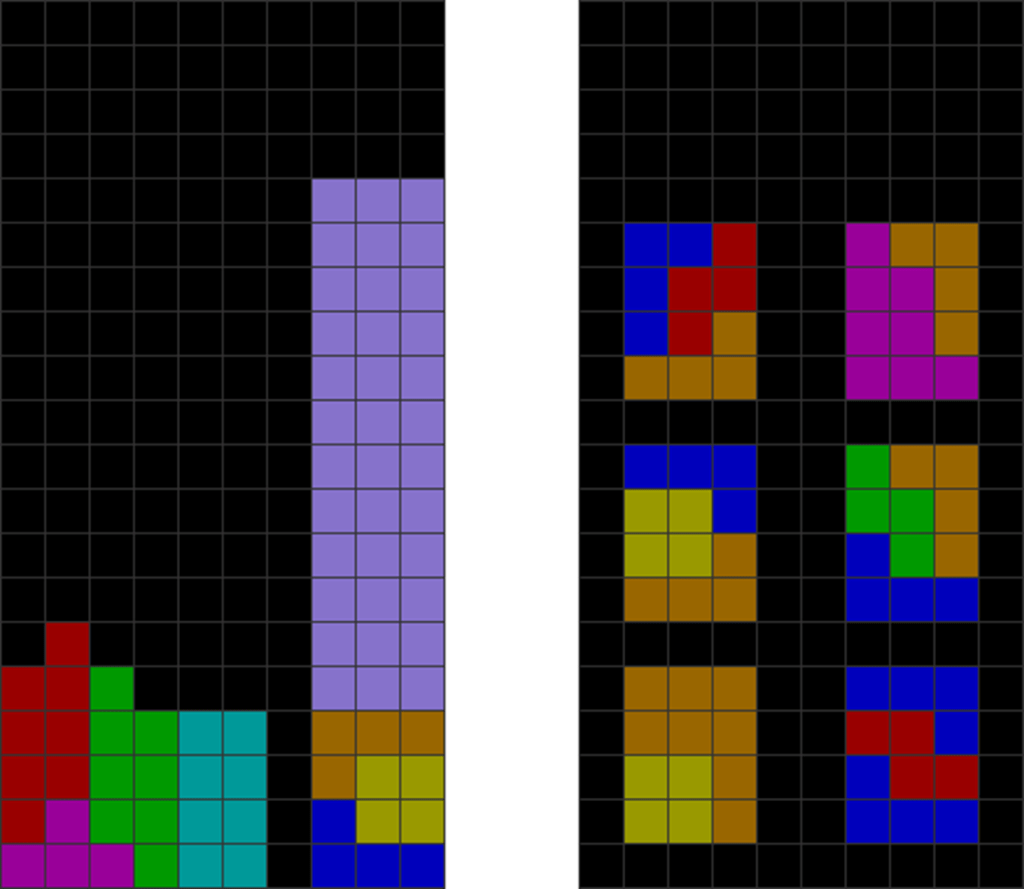
| The patterns on the far right’s 3 most columns comprise pieces that make 3×4 rectangles like LOJ. You can stack them in the lavender areas. | Here are 6 ways to configure 3 specific pieces to make 3×4 rectangles each. |
Last, for the rightmost stack, combine 3 specific pieces to make 3×4 rectangles. Many combinations exist. The above are just some examples. Be creative and experiment with it!
With enough practice, you can stack ultra-quickly and get a super high sprint score!
If the pattern breaks, just freestyle and stack normally.
3. Stacking in Fours Cleanly
The next level of Tetris mastery comes from making Tetrises clean.
Here is what I mean:
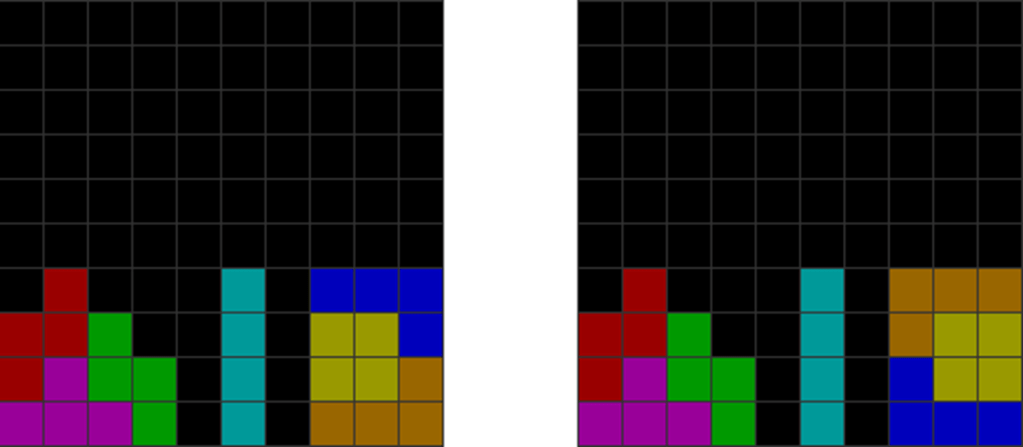
| Diagram Set 5-9 | |
| 1 | 2 |
| The player has a Tetris ready. | He makes the Tetris line clear. |
| 3 |
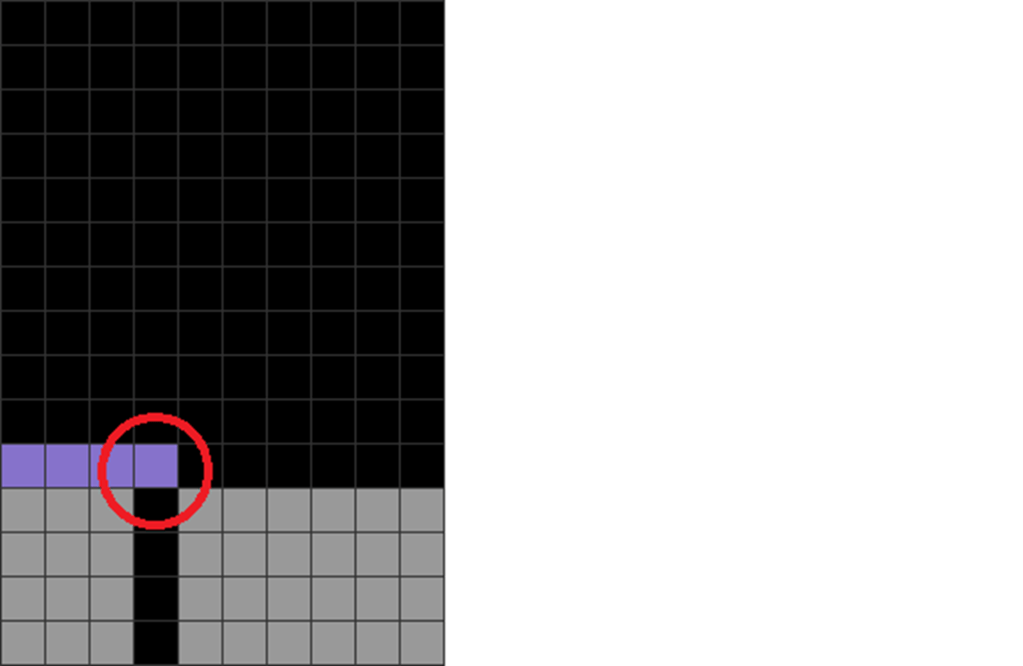
| After the Tetris line clear, the red-circled block will obstruct the next hole. The Tetris is hence dirty. |
This example shows a dirty Tetris. After the Tetris line clear, the red-circled blocks remain. These can block the next garbage hole, reducing your survivability.
This, below, however, shows a clean Tetris. It clears precisely 4 lines and leaves no upstacked blocks over the next garbage hole:
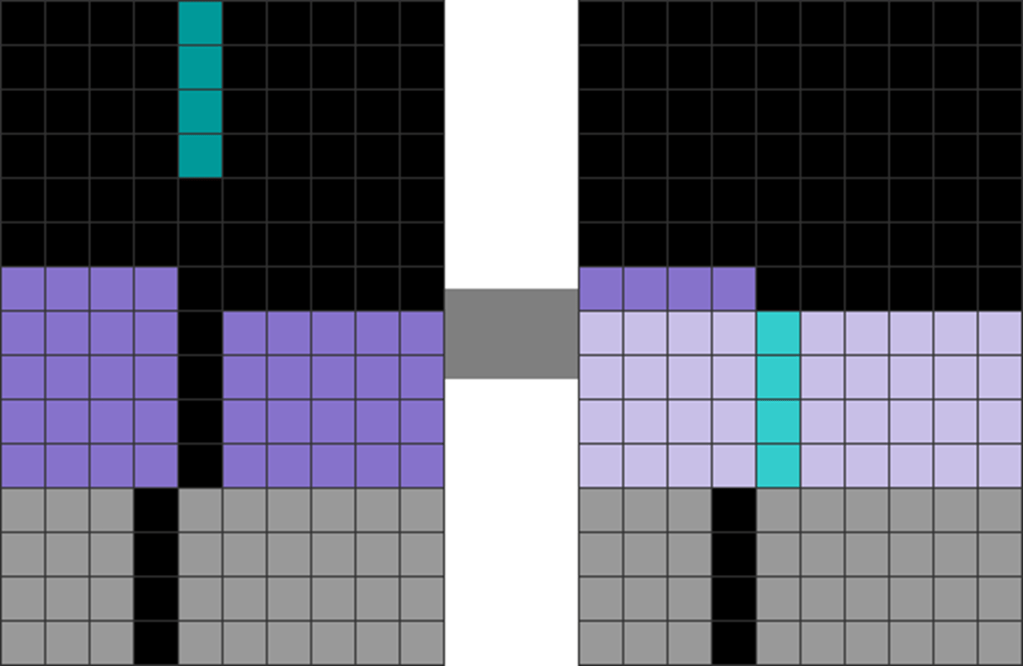
| Diagram Set 5-10 | |
| 1 | 2 |
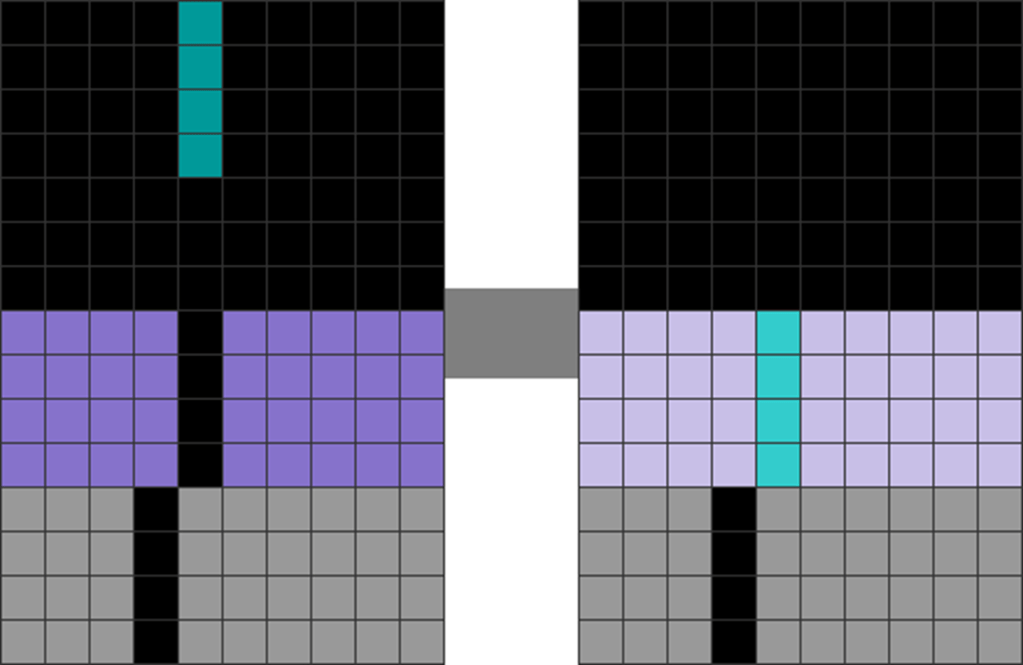
| After the Tetris line clear, the next garbage hole is cleanly exposed. |
Making these kinds of clean Tetrises open up more options, boosting one’s defenses and offenses, which will be covered in my more advanced Tetris books.
The following are ways to freestyle the 4-blocks-high Tetrises mid-game cleanly:
| Diagram Set 5-11 |
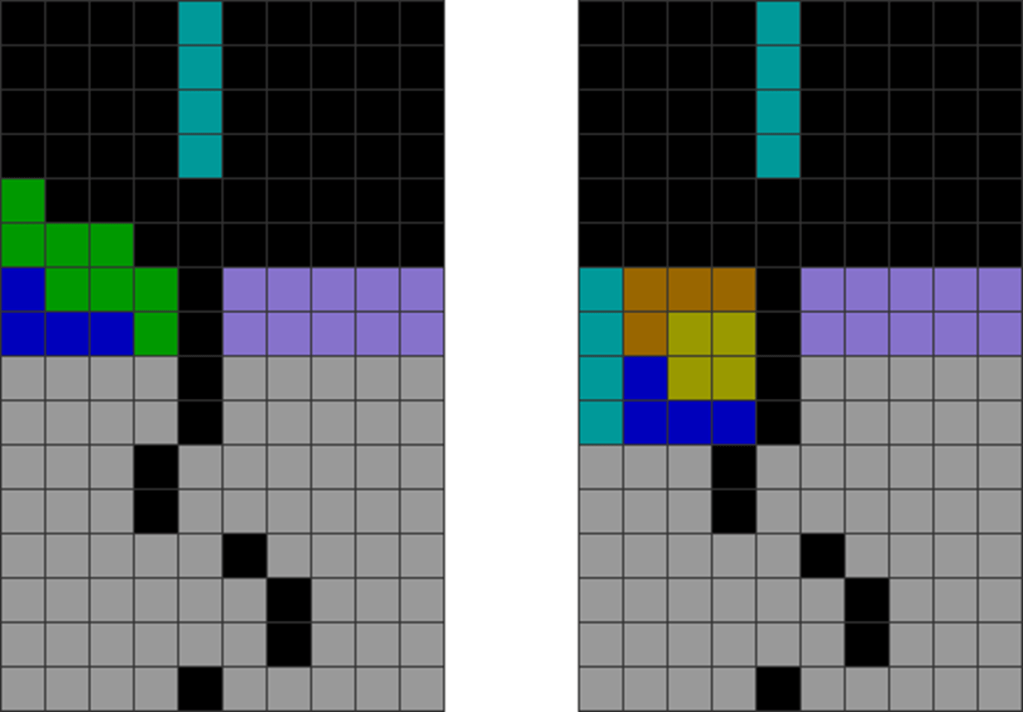
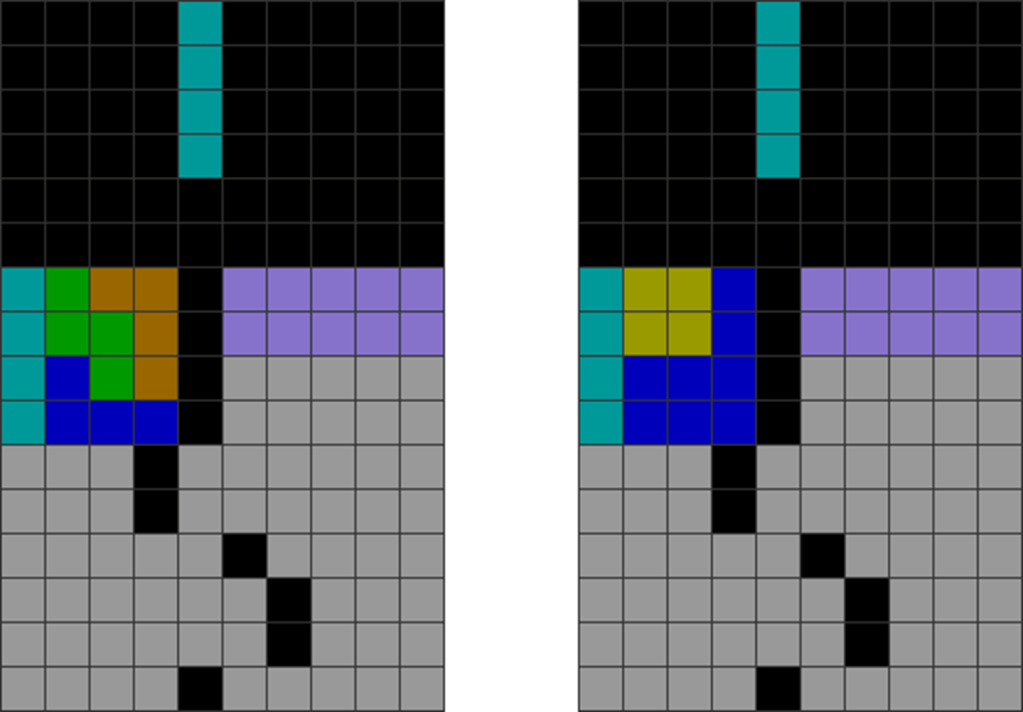

| These mid-game Tetrises are clean. After the line clear, they expose the next garbage hole. |
As you get more proficient, you can create more of these easily mid-game.
In a Nutshell
Most casual players likely believe that Tetrises can only be formed with the garbage hole on the far, extreme right.
I have now opened your eyes to a greater variety of means to make Tetrises mid-game.
If you are fast enough, spamming Tetrises become deadly. Some players sometimes overwhelm their opponents with sheer speed using Tetris spamming.
| Summary |
| Apply the previous chapter’s stacking guidelines to 9-0 and 6-3 stacking. Cheat with 6-3 stacking using the determined and memorizable method in this chapter. Make your mid-game Tetrises as cleanly as possible. |
