The greatest stumbling block (no pun intended) of most casual Tetris beginners is jagged, dirty, or overly tall stacking.
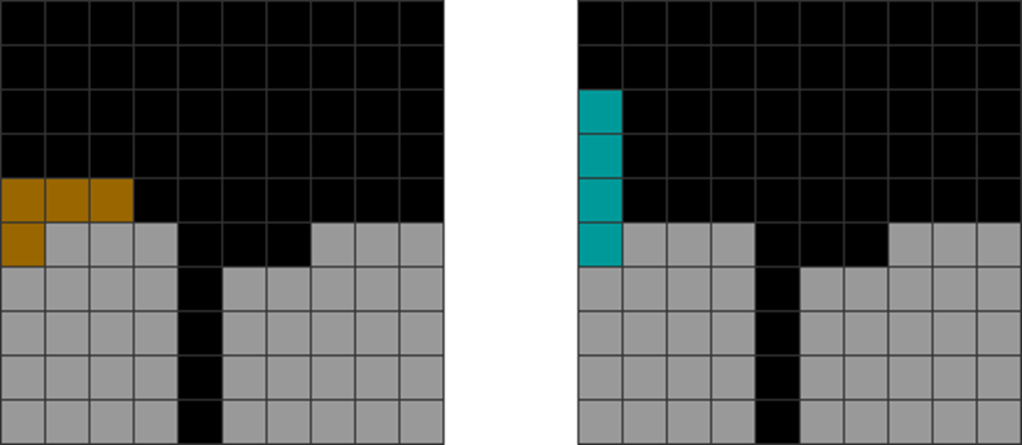
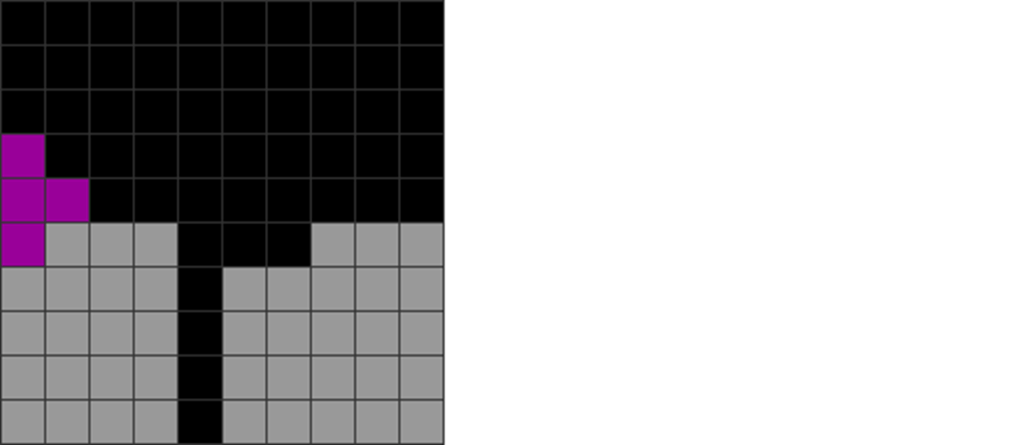
Here are typical field shapes that casuals get into:
| Diagram Set 4-1 | |
| A | B |
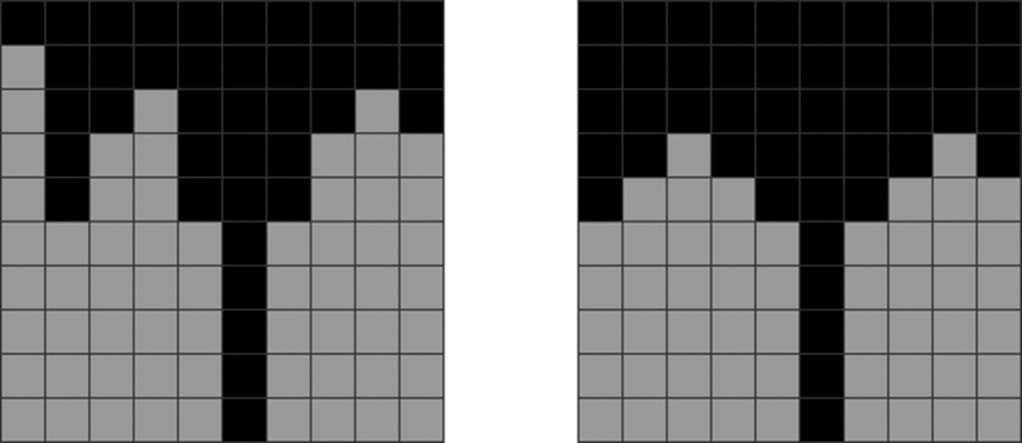
| A divided field. | An extremely jagged field. |
| C | D |
| Stacking pieces dirtily over holes. | Overstacked middle part with I-piece dependencies on the left and right columns. |
These fields face the problem of overstacking, jagged stacking, and stacking dirtily over holes.
These should be minimized, as they reduce efficiency and lead one into unresolvable dead ends that endanger oneself.
The super-casual player may wonder whether it takes some rocket science to avoid such terrible stacking.
The truth is, you do not need a NASA degree or a Mensa membership. You only need 15-20 minutes to read this short chapter.
The Art of Smart Stacking
Smart stacking comprises the following easy-to-follow habits. They are so simple, so fundamental, and so easy to learn that they can be applied instantly.
1. Join the Stack Flatly
The number one rule for proper stacking is to join the stack flatly.
This means stacking to minimize field division, especially by minimizing too many vertical piece placements.
This is what happens when you make too many vertical piece placements, especially of the taller S, Z, and I pieces:
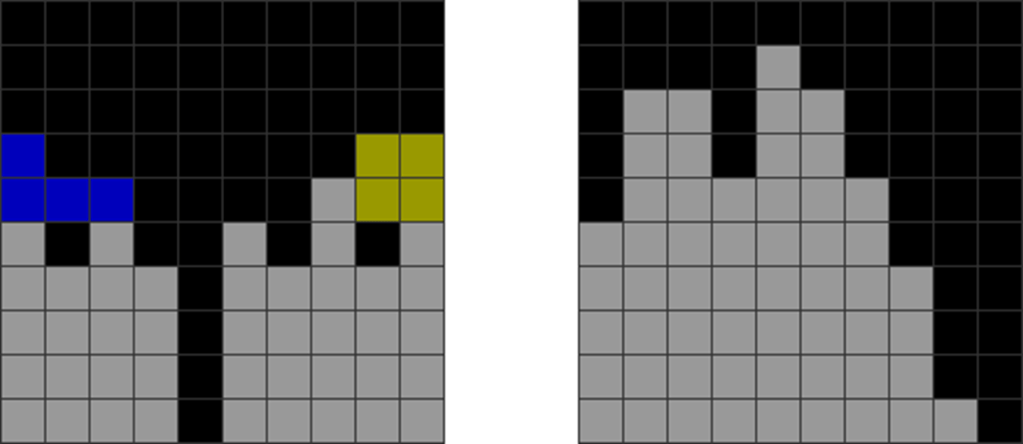
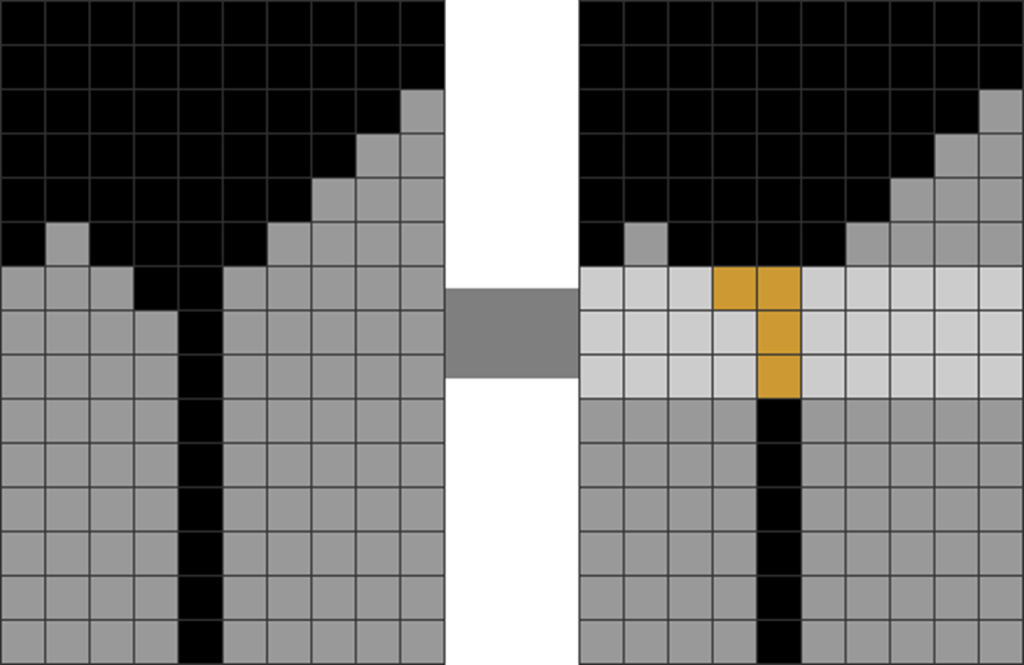
| Diagram Set 4-2 | |
| 1 | 2 |
| Starting field. | The player stacks with the vertical orientations of many pieces, such as the S, Z, I, and L minos. |
Here, sharp parts of the tall placements will jut out vertically, dividing the field. The result is a highly divided field that leads to even more jaggedness.
Always remember this:
Jagged overstacking leads to even more jagged overstacking.
Hence, to resolve the issue, prioritize flatter, horizontal placements of tetrominoes, such as in the following:
| Diagram Set 4-3 | |
| 1 | 2 |
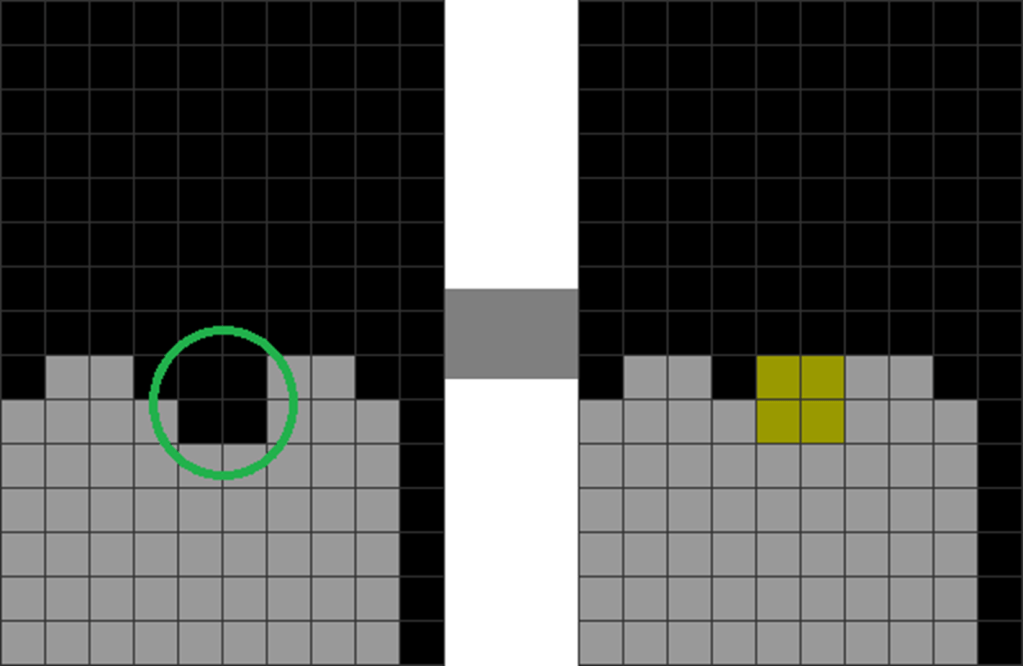
| Starting field. The green circle shows a 2-block-wide gap. | A 2-block-wide O piece fills it perfectly. This joins the stack. |
| 3 | 4 |
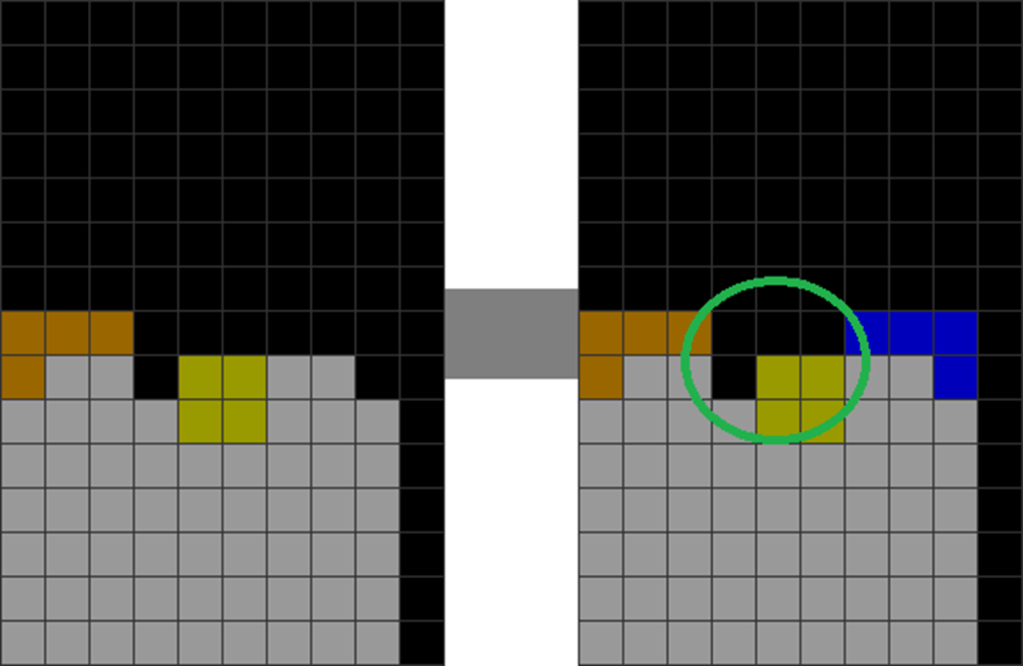
| The player puts an L piece. | He places another J. This creates the 3-blocks-wide L-piece dependency in the green circle. |
| 5 | 6 |

| The player fills it with an L. This joins the stack smoothly. | He places the I piece flatly instead of vertically. |
Notice how I placed each piece sequentially to join the field? Whenever there is a 2-wide gap, I place O, L, and J pieces to fill the 2-wide part (because their bases are exactly 2 blocks wide).
I do this to fill 3-wide gaps, too, using the 3-block-wide parts of L, J, S, Z, and T pieces.
Whenever I place a piece, its resultant shape joins the remaining stack, creating an elegant, flat, and continuous form, as shown in steps 5 and 6.
Other similar continuous field shapes are like these:
| Diagram Set 4-4 | |
| A | B |
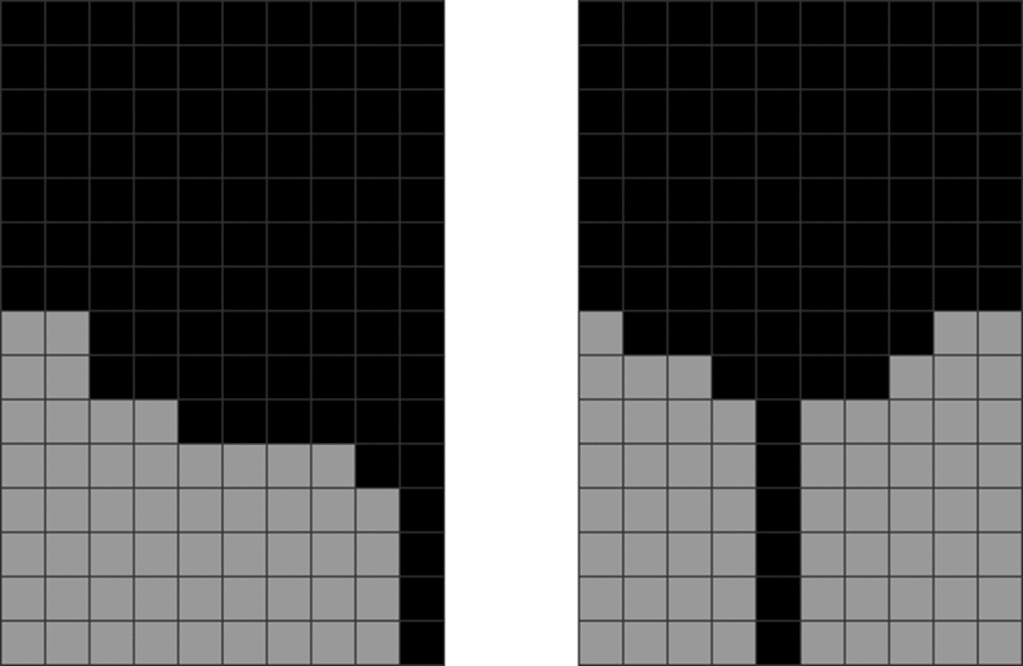
| Relatively flat and continuous field patterns are what one should strive for. |
These are field shapes that the player should prioritize as they lead to better stacking continuations and fewer dead-ends. Generally, join the stack flatly, create a tapered structure towards the middle, and ensure that the stack is not overly divided or jagged.
Conversely, please avoid stacking like this:
| Diagram Set 4-5 | |
| A | B |
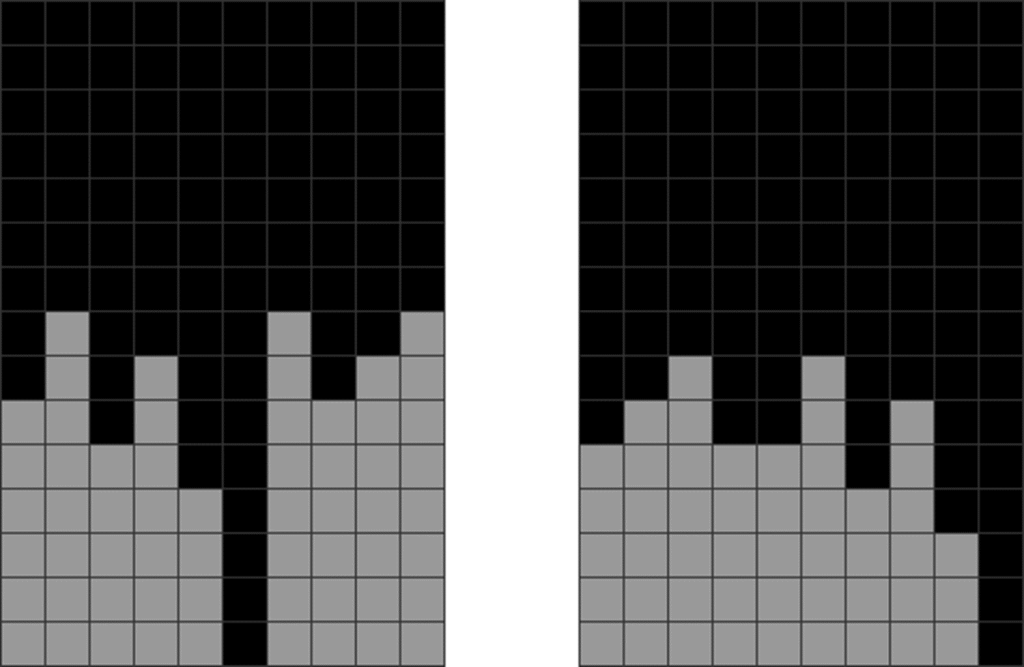
| Very jagged, divided, and overstacked field shapes that one should minimize. |
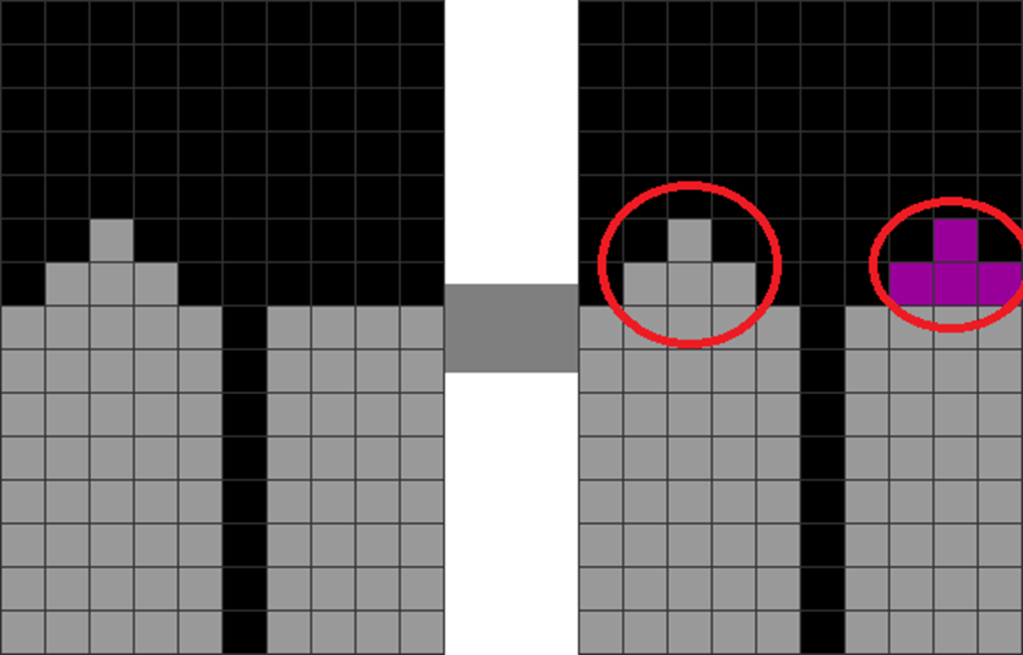
2. Filling Corner Cavities Flatly
Here is another trick that I have learned from my 3000+ hours of stacking experience. Following this alone increases your stacking, downstacking, and setup consistency.
It involves filling corner cavities correctly.
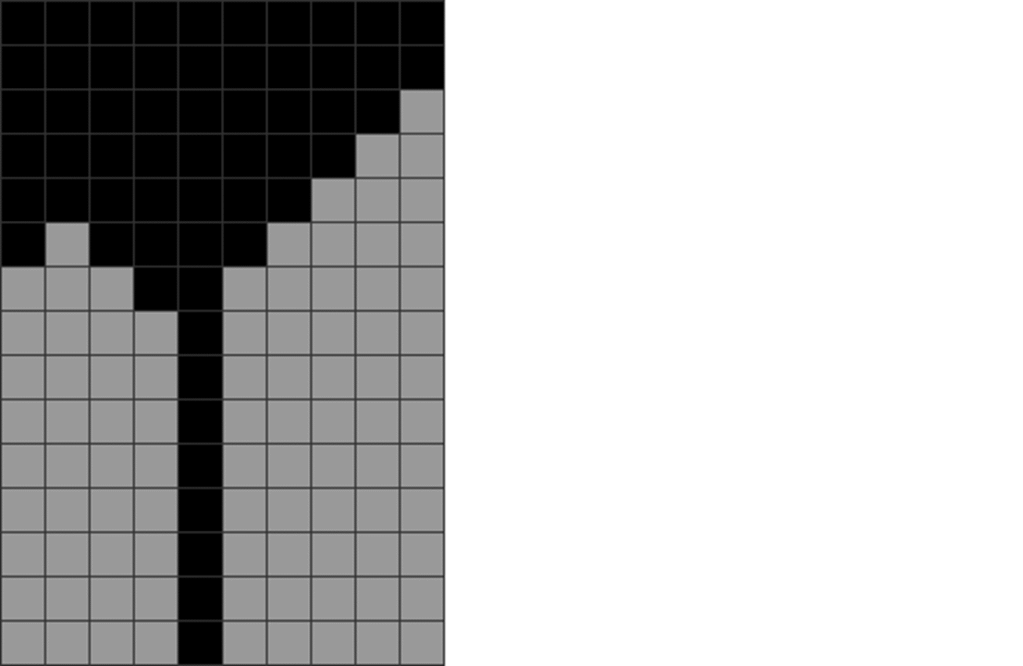
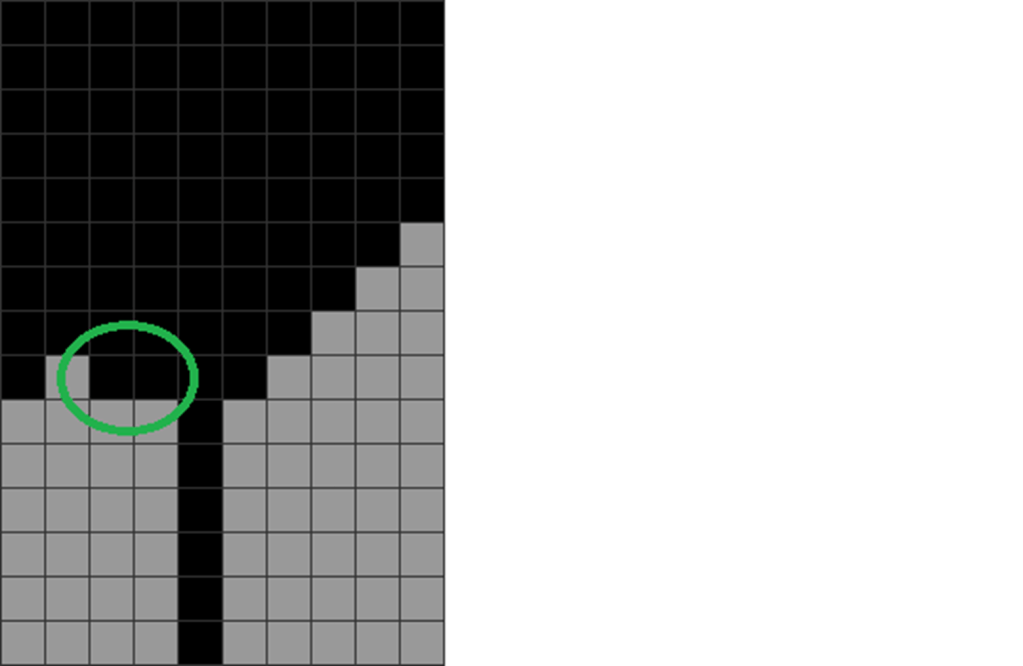
| Diagram Set 4-6 | |
| A | |
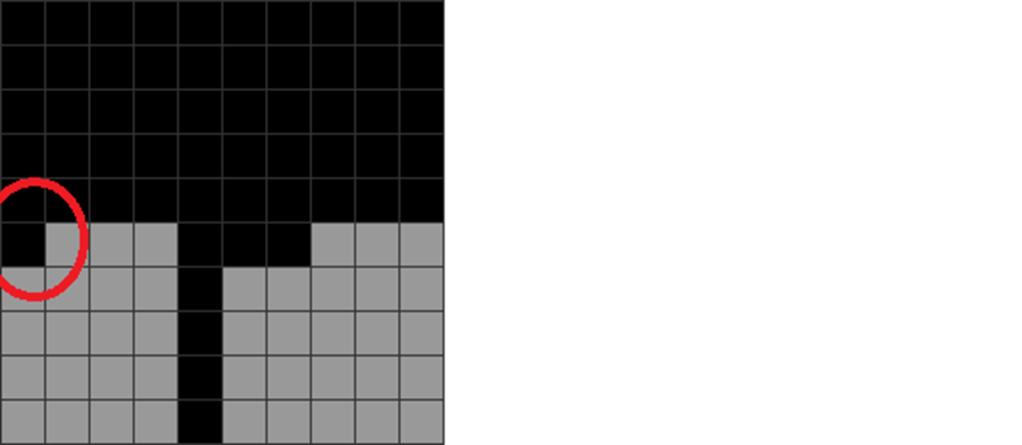
| While stacking, one often encounters corner cavities like these (in the red circle). |
Here is how to manage them:
| Diagram Set 4-7 | |
| Alt. A | Alt. B |
| The original pattern can be filled using L (J if mirrored) and I pieces. The most stable ones create a U-shape taper into the middle. |
Use horizontal placements of L, J, and T to fill the cavities flatly, reducing overstacking.
If this cannot be done, one can also place T pieces like this to create a well-like shape that tapers into a center:
| Diagram Set 4-8 | |
| A | |
| One can also fill the corner cavity with a T piece like this. This leads to a U-shape taper into the middle. |
Why is this habit essential? Let us consider what happens when we fill cavities with vertical placements of some tall pieces, like S and Z:
| Diagram Set 4-9 | |
| 1 | 2 |
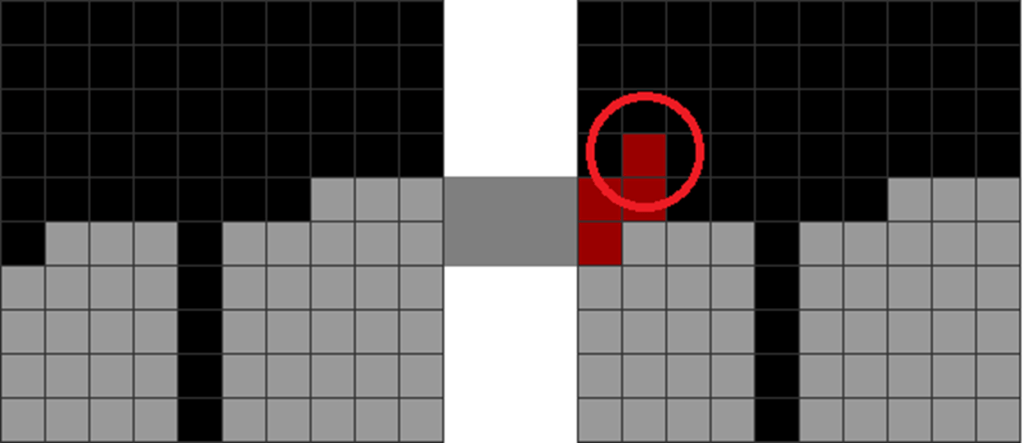
| Using a Z piece does not stabilize the stack, as it remains jagged and divided (red-circled area). |
Here, doing this leads to further overstacking. Jagged overstacking leads to more of such. When this happens, the field is overstacked and more difficult to skim off to stay low.
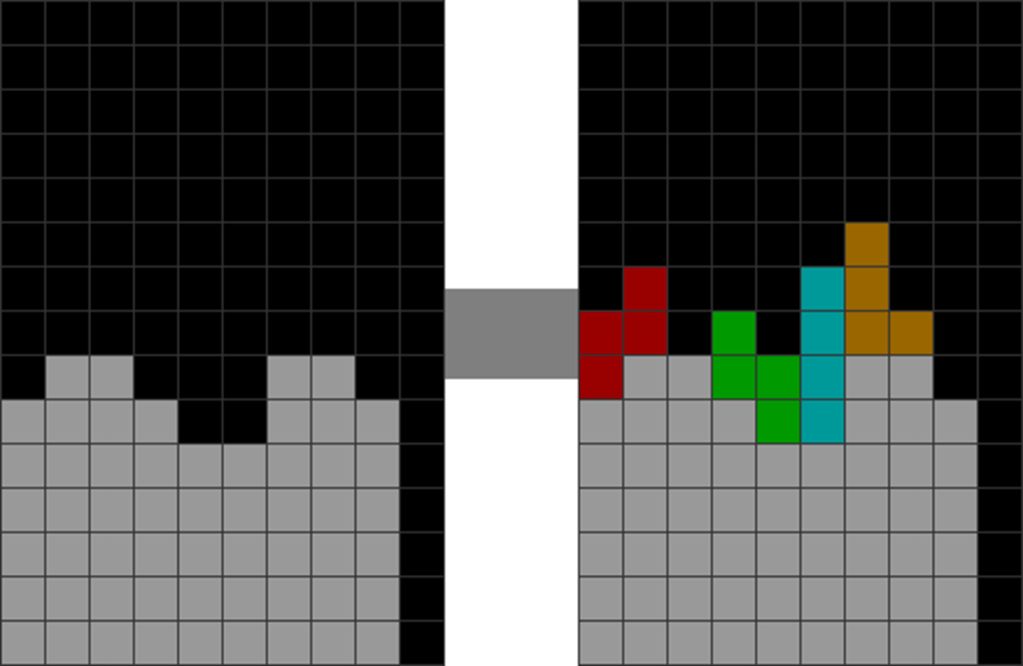
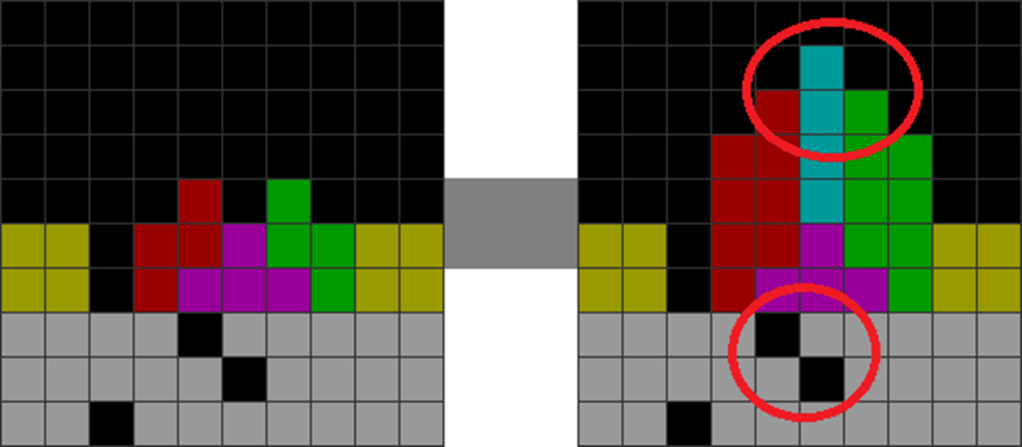
3. Resolve Jagged Areas
A critical mistake that most beginner Tetris players make is to never resolve jagged areas like these:
| Diagram Set 4-10 | |
| A | B |
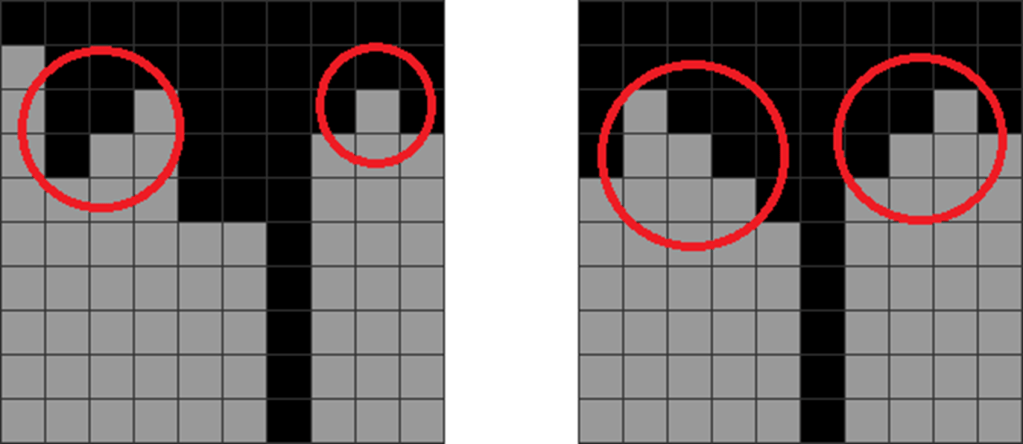
| Stacks with extremely jagged, stair-like patterns (red circles). |
Here, below, the player puts a T piece on the non-jagged side. The result is a field with 2 jagged areas:
| Diagram Set 4-11 | |
| 1 | 2 |
| The left stack is already jagged. | The player places a T on the right side. Now, there are 2 jagged areas (in red circles). |
When the field is super-jagged like this, you can only place vertical S, Z, T, or I pieces like this:
| Diagram Set 4-12 | |
| 1 | 2 |
| This field is jagged and divided. It has many bumpy areas. | This causes S, Z, and I to be placed vertically because it is the only way to stack. This leads to more vertically placed S, Z, and I pieces above them. One part of the stack is overstacked (top red circle), covering future garbage holes (bottom red circle). |
This also prevents flat placements of L, J, O, and I from being placed, which can lead to dirty stacking over holes:
| Diagram Set 4-13 | |
| 1 | 2 |
| Jaggedness can cause unclean stacking over holes. There is nowhere to place the L and O pieces flatly and cleanly. |
The trick to getting out of this is to simply place Ts in jagged areas like this:
| Diagram Set 4-14 | |
| 1 | 2 |
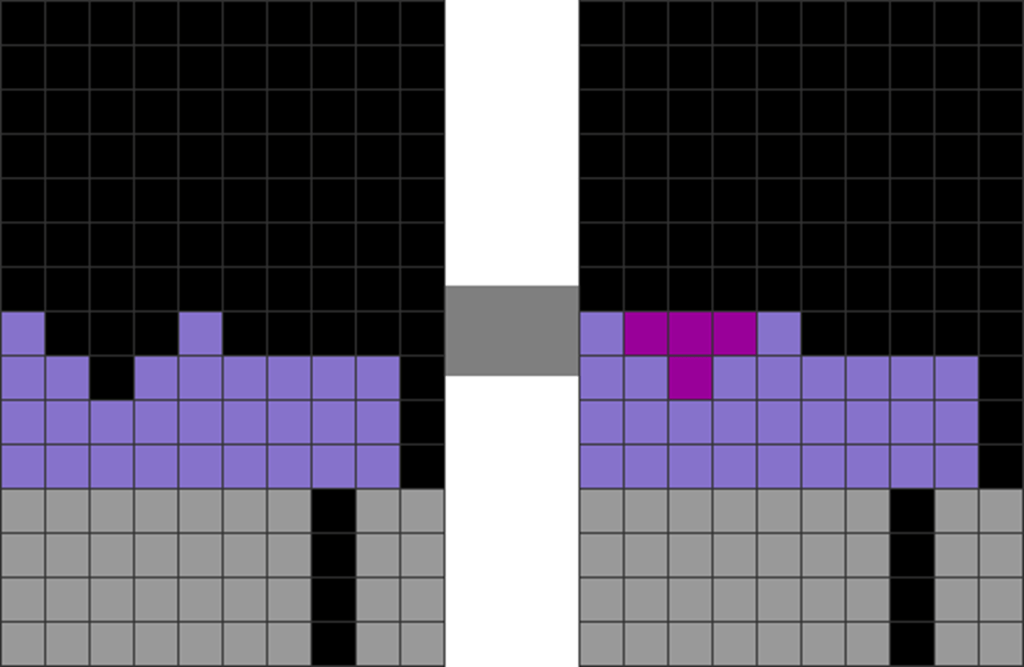
| There is a jagged area in this field. | A T is used to fix the jagged area by placing it directly there. |
Notice how much flatter the resultant field is now? With this, you can put horizontal placements of L, J, O, and I without getting into messy dead-ends!
However, please avoid creating new jagged areas like this:
| Alt. A |

| An inexperienced player places the T in a non-jagged area instead, creating 2 jagged areas (red circles). |
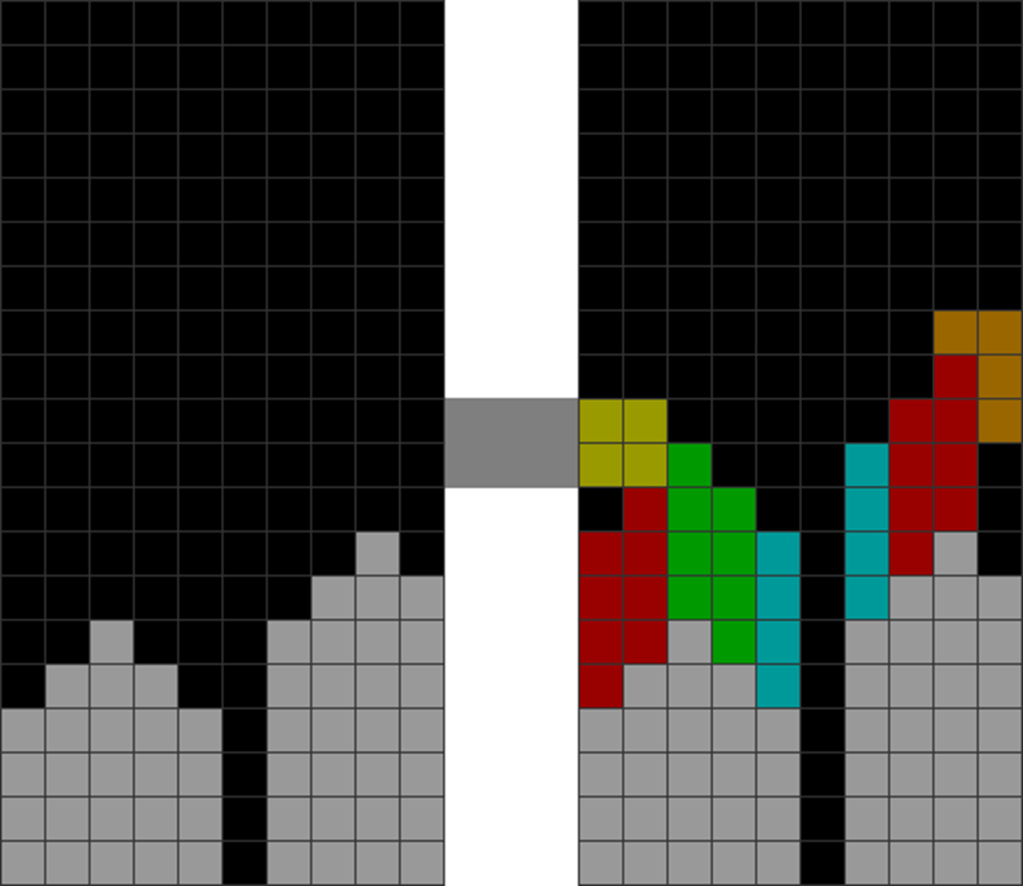
4. Skimming to Flatten Stacks
Sometimes, the field gets so jagged that you have no places to put pieces flatly. Horizontal placements of L, J, and O can cover holes dirtily:
| Diagram Set 4-15 | |
| A | |
| An overly jagged stack on both sides. |
There is an easy way out! You can simply skim the field like this to lower it and flatten some areas:
| Diagram Set 4-16 | |
| 1 | 2 |
| This super-jagged field prevents one from placing L, J, and O pieces flatly. | Hence, one can skim with an L piece like this. |
| 3 |
| The field now has a new, flat area to place L, J, and O pieces (in the green circle). |
This avoids overstacking and flattens the field, letting you put horizontal placements of L, J, O, and I pieces flatly and safely, avoiding dead-ends!
In a Nutshell
Stacking is the most important part of playing Tetris.
If there is one chapter that one should absolutely review when reading this book multiple times, it would be this one.
Remember: Stack flatter.
Without proper stacking, almost all other advanced setups will likely fail and become inconsistent.
| Summary |
| Join the stack as far as possible. Minimize divisions. Fill cavities flatly. Resolve jagged areas by inserting T pieces to flatten them. Skim to flatten the stack to enlarge the stacking area for safety if the field is too jagged. |
