Stacking well is the core foundational skill of Tetris. Without its proper mastery, you will make poor stacking decisions.
The golden rule in Tetris is to stack flatter as far as possible, as it opens up far more options. However, one should allow some jagged areas for placing S and Z pieces.
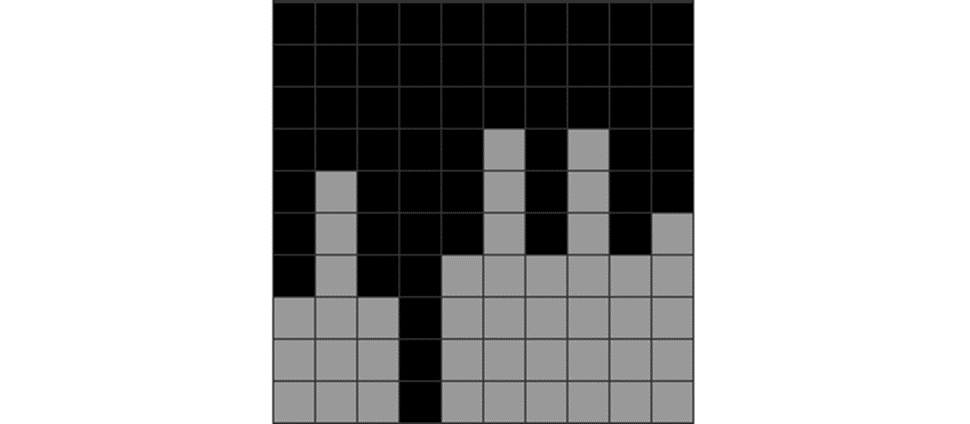
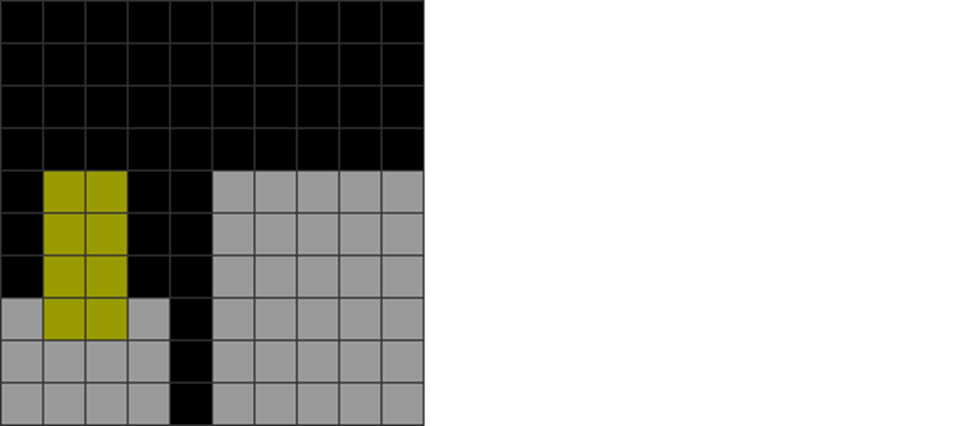
Here’s what happens if you don’t stack well:
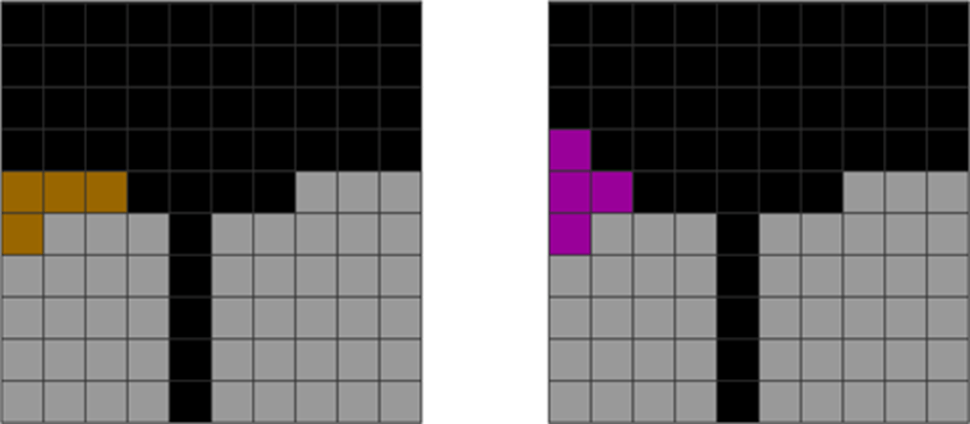
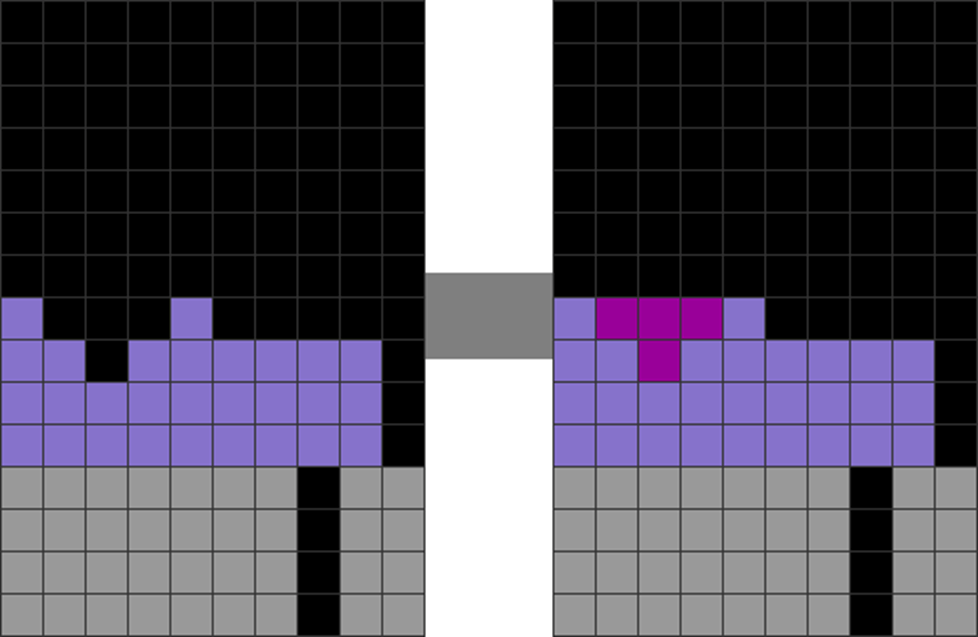
| Diagram Set 3-1 | |
| 1 | 2 |

| This stack has poor stacking as many divisions and jagged areas exist. | Because of the jaggedness, there is no room to flatly place L, J, or O. They cover holes. |
With poor stacking, you will get situations like these and top out. This happens typically because of excessive field division and jaggedness. This leads to an over-dependence on the S, Z, and I pieces being placed over the cavity.
It’s optimal to stack well before attempting advanced methods like T-spins. Once mastered, you become more consistent at stacking and follow-ups.
Before you place a piece, ask yourself:
- Does it lead to more jaggedness? If so, try another placement.
- Does it divide the field too much and lead to too many piece dependencies? If so, try another placement.
- Does the piece placement lead to dead-ends? If so, try some other placement.
A piece dependency is a scenario where a particular setup requires one or more specific pieces to fill, such as an I or T piece.
A) Minimizing Field Division
It’s best to avoid dividing the field too much. I recommend avoiding tall divisions or extreme, multiple piece dependencies.
| Diagram Set 3-2 |
| This example shows (i) multiple divisions and (ii) tall divisions. |
Players should learn to recognize such cases as they play Tetris to avoid them in the future. These two issues cause excessive piece dependencies.
In this scenario, they need L, J, or I pieces to fill the tall cavities. There’s no way to put S, Z, T, or O pieces in the cavities cleanly. If one has too many piece dependencies, you will likely not have the right pieces to fill the cavities without covering over holes. This makes them messy.
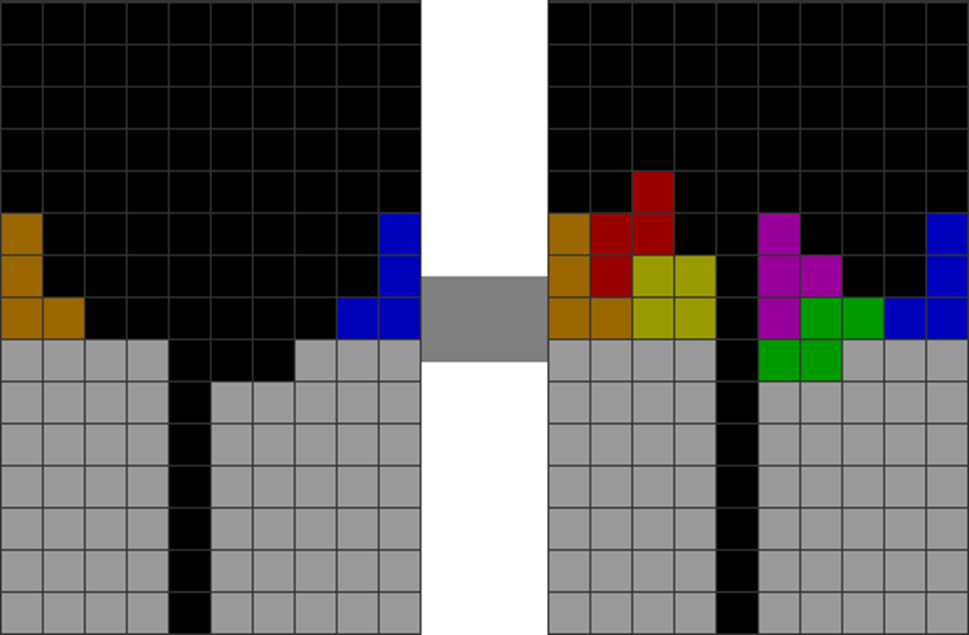
In fields with many field divisions, fill piece dependencies as soon as possible like this:
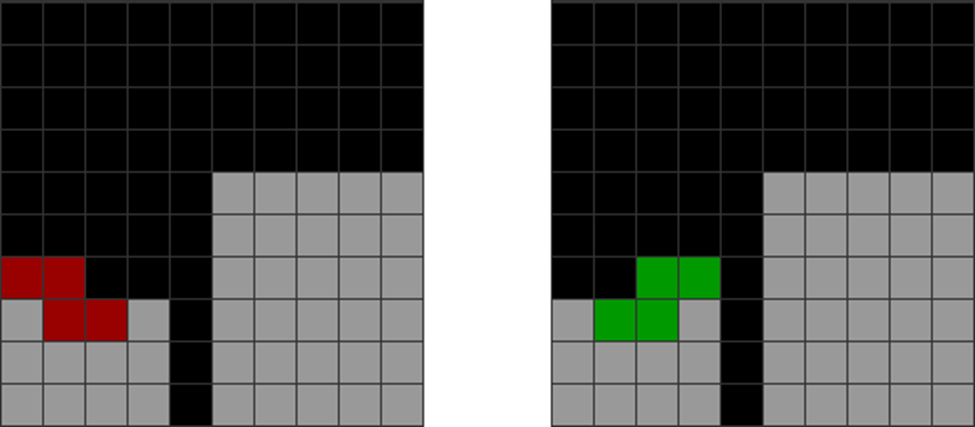
| Diagram Set 3-3 | |
| 1 | 2 |
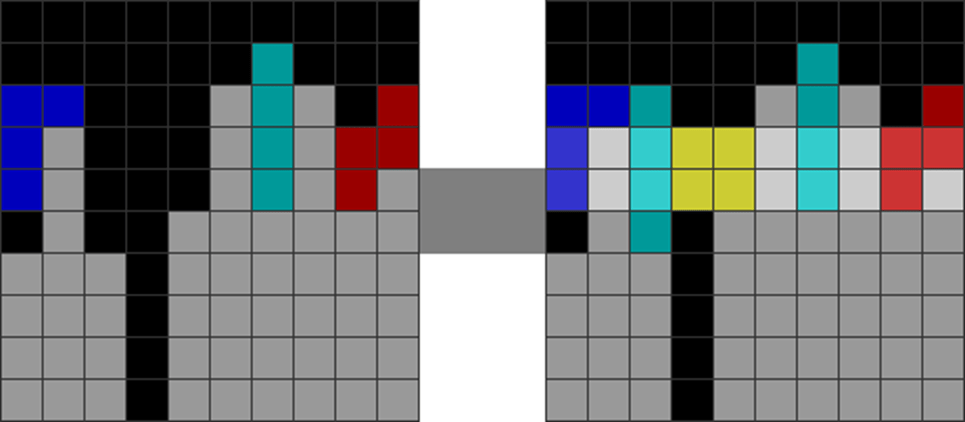
| This continues from the last diagram set. If you cannot fill piece dependencies, as shown in the dirty J piece in step 1, upstack over the hole and skim off the top layers as quickly as possible in step 2. |
This is ugly, but it is better than halting. Unless there is no other option, avoid these patterns below, as they lead to piece dependencies and field division:
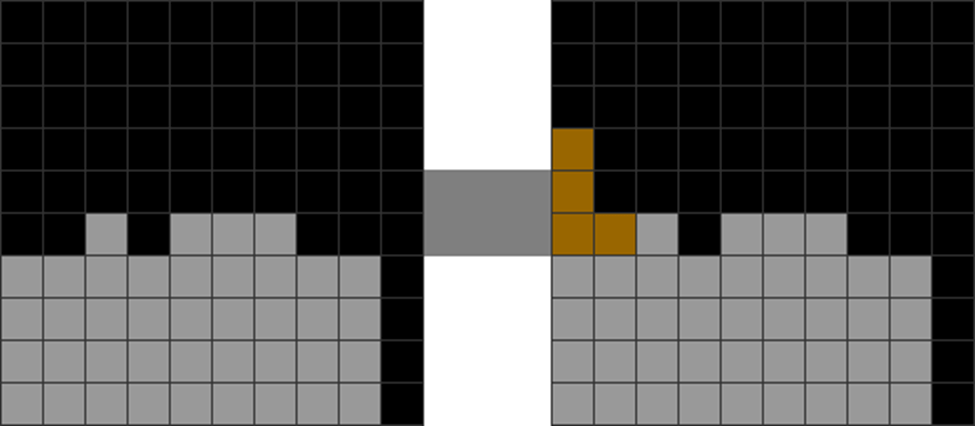
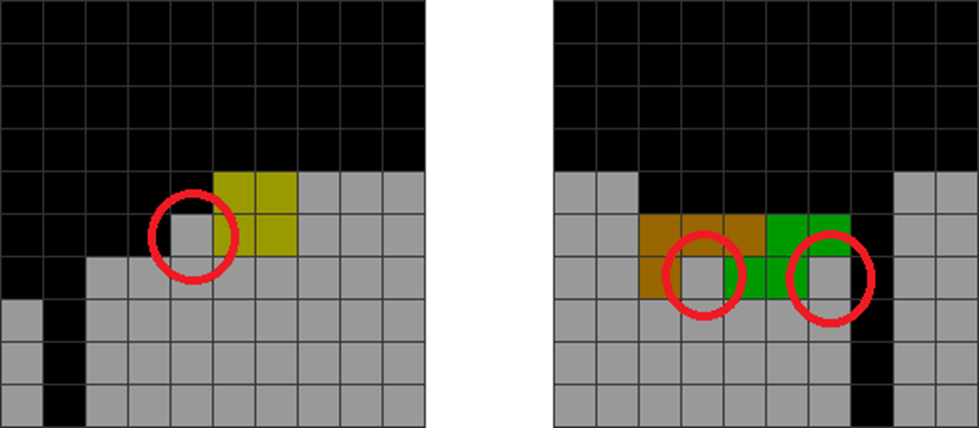
| Diagram Set 3-4 | |
| A | B |
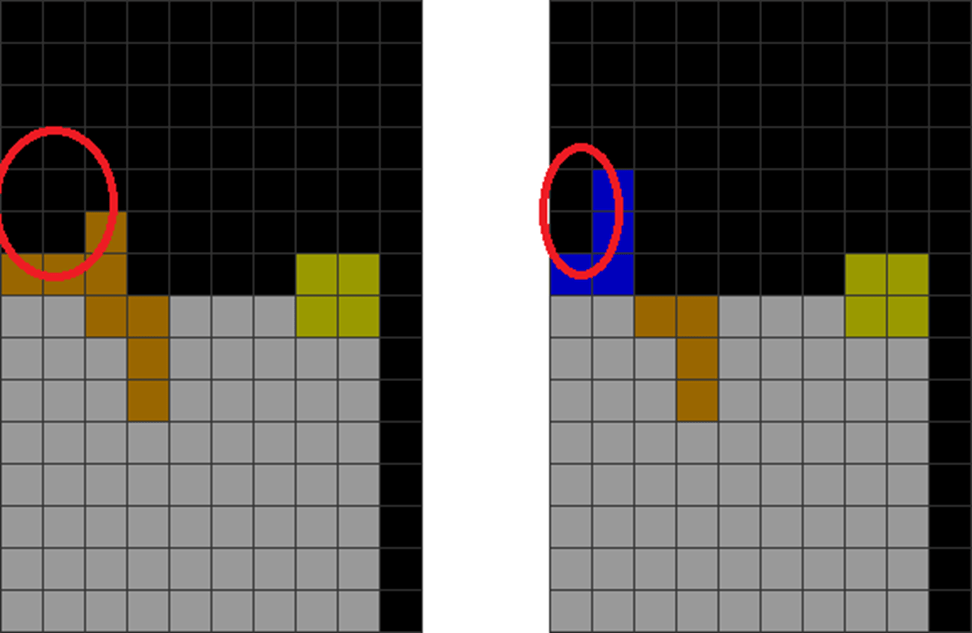
| C |

| Set: Only specific pieces can be placed in the red-circled areas. In the first, only O, L, and J can be placed. In the second, only an I or J can be placed. Only mostly the S, Z, and I pieces can be placed in the third diagram’s circled area. |
These three diagrams have sizable field divisions: many bumps and mounds separate many parts of a field.
Having too many field divisions causes your field to require very specific pieces to fill some areas. Your mind also has to plan more. Therefore, by reducing field divisions, your field has more stacking possibilities, so the brain doesn’t have to over-think.
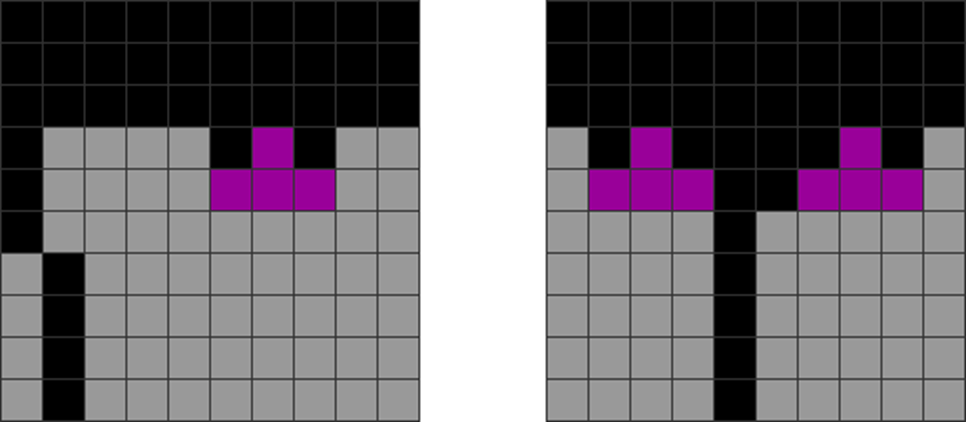
Another common mistake is here below:
| Diagram Set 3-5 | |
| 1 | 2 |
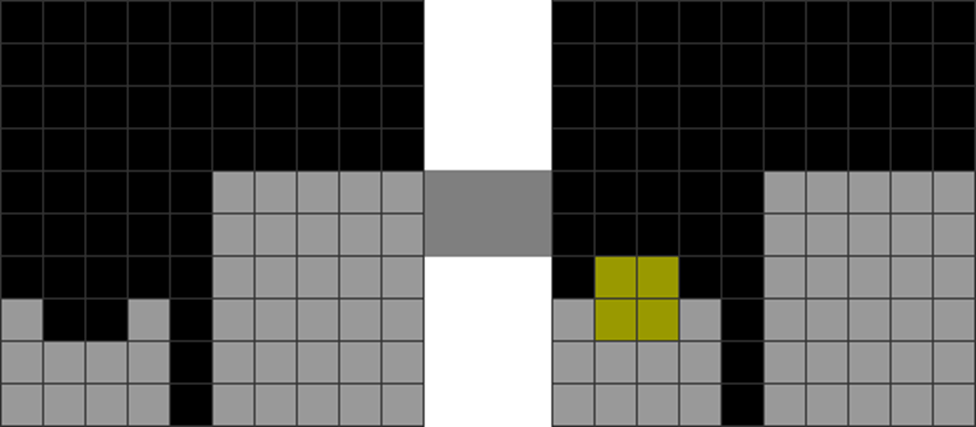
| This field initially has a partly divided stack. | The O is placed to lead to a mound-like pattern. |
| 3 |
| If another O comes, an inexperienced player may place the second O over the first, resulting in this mound-like pattern.Here, the field becomes divided. |
Patterns like these can lead to over-reliance on the S, Z, and I pieces, causing over-stacking.
Join Pieces Cleanly and Minimize Field Divisions
To minimize field division, join pieces as far as possible like this:
| Diagram Set 3-6 | |
| A | B |
| Horizontal S and Z placements create a flatter, slope-like pattern. |
From experience, this leads to more stacking continuations than divided stacks because there are fewer specific piece dependencies.
The general rule of thumb is to take placements that join the stack. Per my experience, this almost always leads to better stacking, downstacking, survival, and T-spinning continuations. Here are illustrated guides:
| Diagram Set 3-7 | |
| 1 | 2 |
| The initial stack is bumpy. To resolve this, one can put an L in step 2 to join the bump to a flatter stack. |
Here are more ways to do so:
| Diagram Set 3-8 |
.
| Note the red-circled jagged bump in all images. If they are allowed to jut out, they will disrupt stacking. |
Thus, the best way to place pieces, as suggested above, is to ‘touch’ them such that the stacking joins them to the rest of the stack flatly and undivided.
B) Minimizing Piece Dependencies and Maximizing Stacking Options
Piece dependencies are the bane of all players, especially beginners and intermediate ones. Let’s cover this in-depth.
Here’s a shortcut and ticket to Tetris heaven that many beginner players get themselves into:
| Diagram Set 3-9 | |
| 1 | 2 |
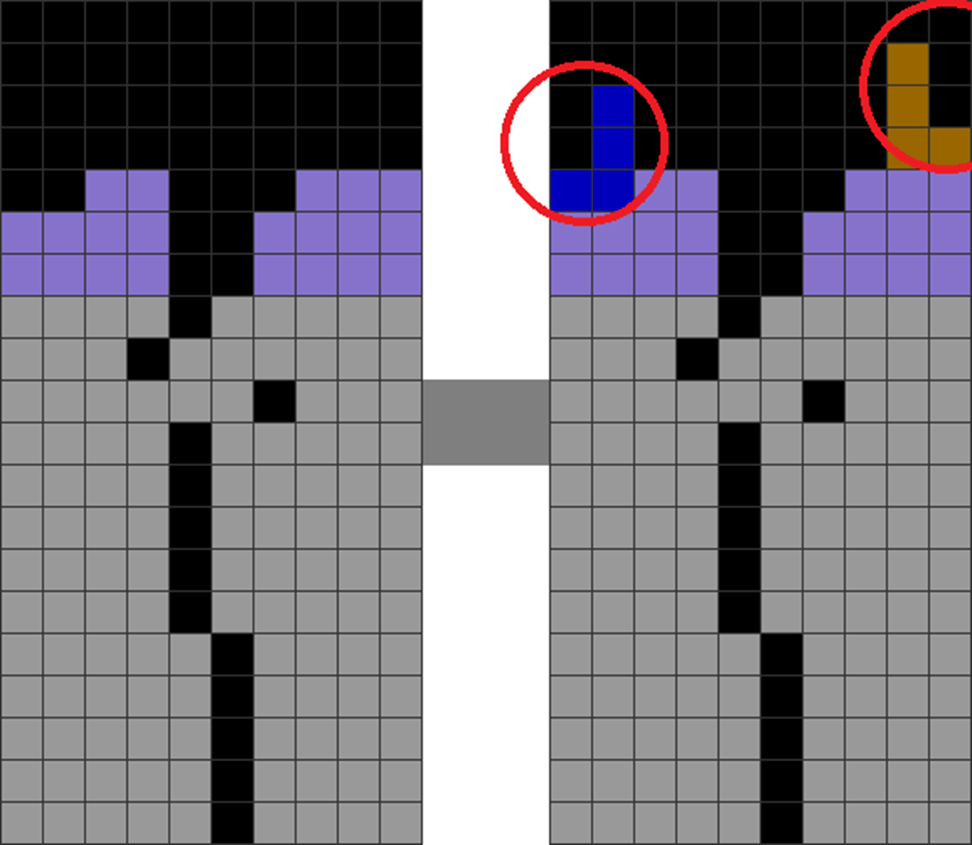
| This field is originally fairly clean. | The player puts vertical L and Js at the corners while stacking. This creates two piece dependencies in the red-circled areas. |
A player needs an L or I for the right red circle. One purposely created piece dependency is sometimes acceptable if you find a piece to fill the cavity in time, such as an I piece. However, the problem arises when players make two of such patterns on the extreme left and right sides in the diagram above.
Doing this is sometimes a death sentence for these players as they cannot get the pieces in time to fill them.
That’s why I recommend placements like these below instead to avoid extreme piece dependencies in the former scenario. This continues from set 3-9’s step 1.
| Diagram Set 3-10 | |
| A | |

| Putting the J and L this way enables many more pieces to be placed. The O, L, and J pieces can be placed in the left cavity; the S, Z, T, I, O, L, and J can be placed in the right area. |
This thus minimizes a player running into dead-ends, such as stacking over holes.
Never force setups that can’t be constructed from incoming available preview pieces.
One should stack in a way to maximize the number of stacking options. This is linked to minimizing piece dependencies.
C) Filling Important Cavities and Corners Fast
A cavity is an area with a depression that isn’t filled, often surrounded by taller surrounding stacks.
Cavities must be fixed quickly to prevent fishing for a piece, which may take up to 12 pieces to arrive.
Above all else, fix the lower-lying and more urgent cavity first. It is best to fix a cavity issue as soon as possible before making advanced setups. Stabilizing a stack with this method allows for easier continuations of all forms. Not doing so will lead to piece dependencies with deadly outcomes:
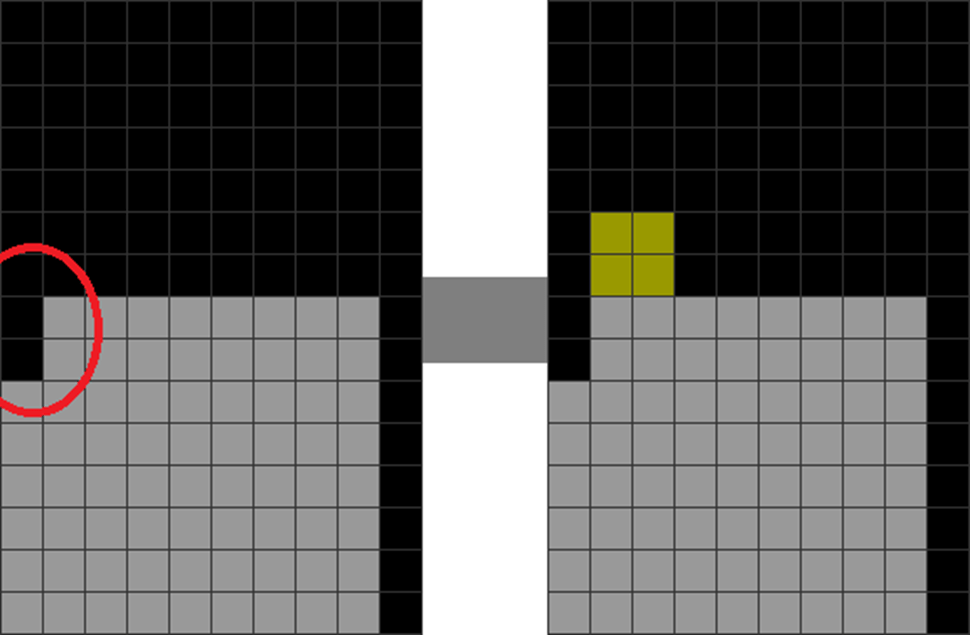
| Diagram Set 3-11 | |
| 1 | 2 |

| The player fails to fill the cavity in the red circle. Instead, he puts an O piece, resulting in an I dependency in column 1. |
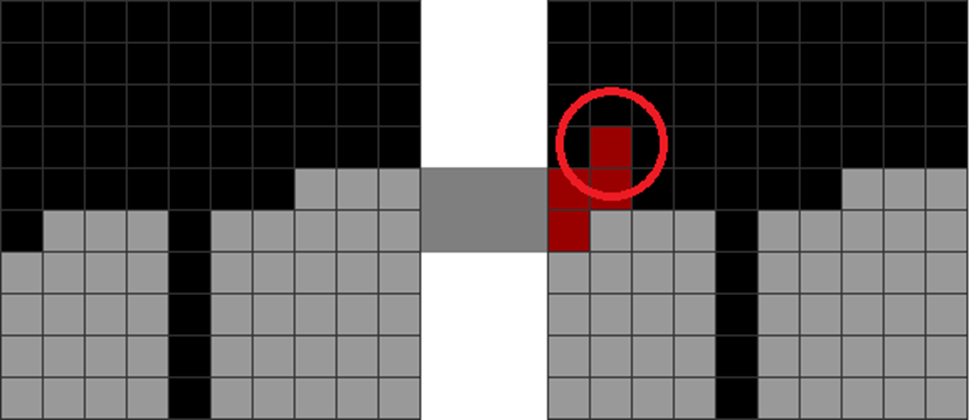
| Diagram Set 3-12 | |
| 1 | 2 |
| This is worse here,which does the same, leading to an I dependency in column 1. |
Both cases are not recommended if there are no incoming I pieces.
The extreme corners of each stack are best filled as soon as possible. Otherwise, it would lead to I dependencies and overstacking.
Here’s how to fill cavities:
| Diagram Set 3-13 | |
| 1 | 2 |
| Using a Z piece doesn’t stabilize the stack as it’s still jagged and divided (red-circled area). |
So, what can we do?
| Diagram Set 3-14 |
| Set: The original pattern can be filled with three stable ways. The most stable ones create a U-shape taper into the middle. These use the L, T, and I pieces, respectively. |
Horizontal L and J pieces are the best to fill cavities, as they minimize the risk of overstacking. The resulting flat surface of the L and J pieces is also desirable.
My rationale for this is simple: filling and stabilizing corner cavities quickly opens up more stacking options. Doing this also minimizes dead-ends. I believe it prevents the piece dependencies caused by a hole in a stack’s corner from worsening.
Stacking with a Tapering Well into the Middle
Besides filling cavities, I have learned one trick from experience that maximizes stacking smoothness and continuations. Instead of merely filling the cavity, one can fill it such that it leads to a well in the middle. There’s a rationale for such.
The following patterns have a critical flaw. What do you think it is?
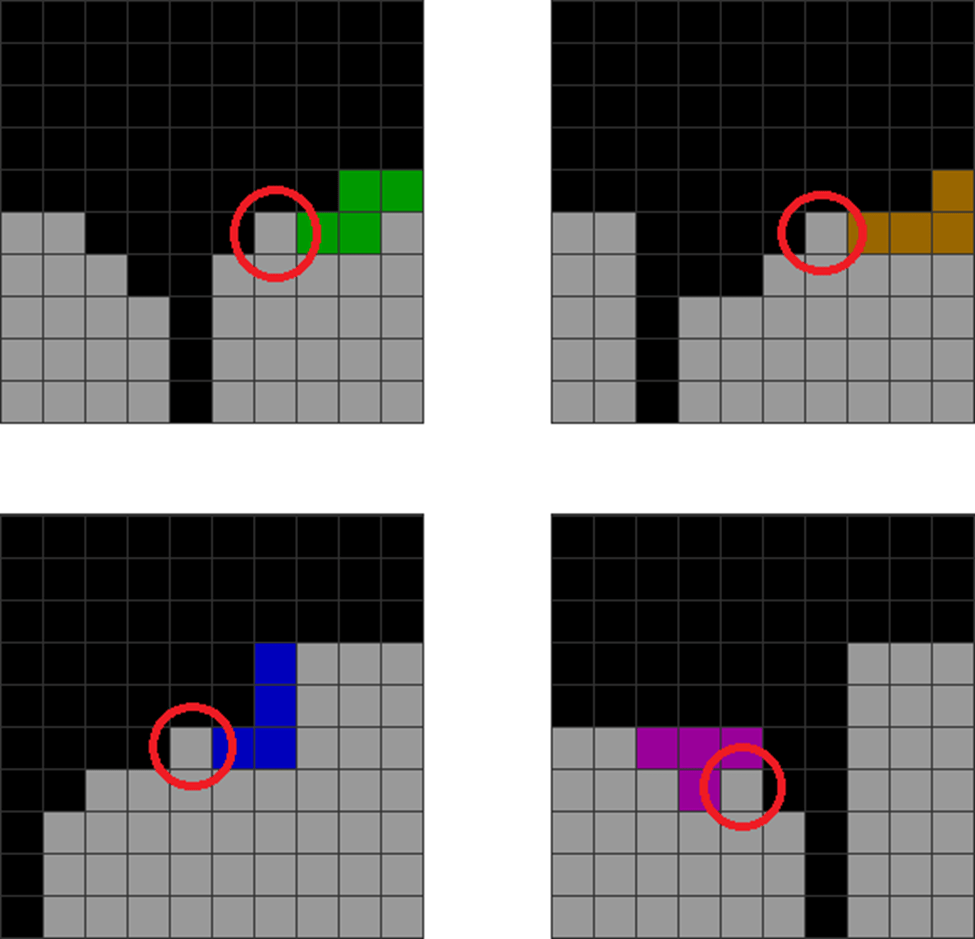
| Diagram Set 3-15 | |
| 1 | 2 |

| The L and J pieces are placed at the corner, leading to I and more L and J dependencies in columns 1 and 10. |
| Diagram Set 3-16 | |
| 1 | 2 |
| In step 1, the player puts the L and J pieces at the corners, creating a taper that leads into a middle well. In step 2,the player has more stacking opportunities that don’t lead to a dead-end. |
See what happens? Creating an open U-shaped well toward the center makes more stacking opportunities and avoids piece dependencies or dead-ends. By doing this, more piece combinations can stack over the field.
D) Stabilizing Stack Jaggedness
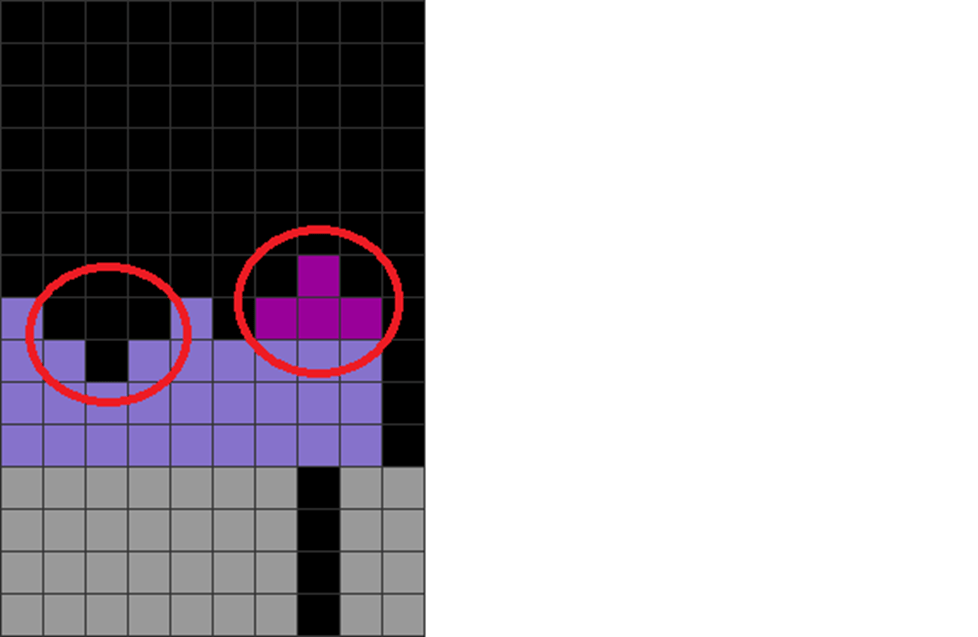
Many beginner players make poor piece placements such as:
| Diagram Set 3-17 | |
| A | B |
| These patterns lead to only placeable vertical S, Z, and I pieces over the jagged areas. |
To guide the player, the following real-life mid-game example illustrates this:
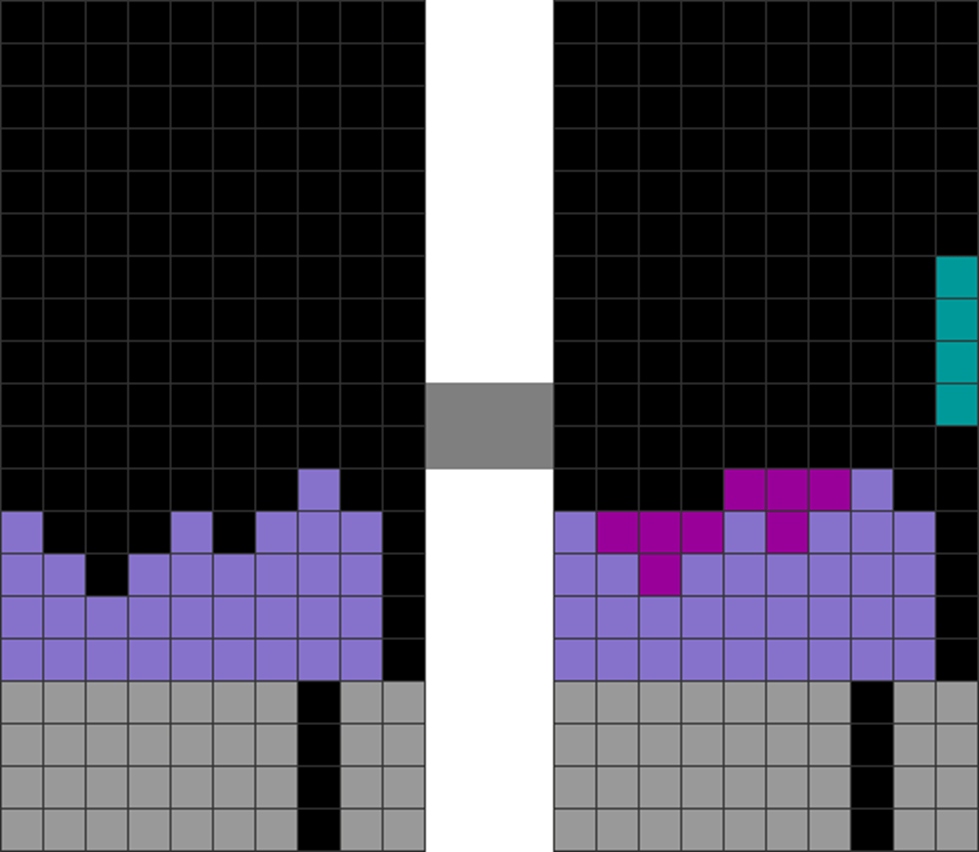
| Diagram Set 3-18 | |
| 1 | 2 |

| This field is jagged and divided. It has many bumpy areas. | This causes S, Z, and I to be placed vertically because it’s the only way to stack. This leads to more vertically-placed S, Z, and I pieces over them. One part of the stack is overstacked, covering future garbage holes. |
In short, not managing a jagged field well can lead to overstacking these forms.
Minimizing Creating More Jaggedness
When faced with a jagged area, I suggest using a T piece to resolve that area as soon as possible without creating additional issues:
| Diagram Set 3-19 | |
| 1 | 2 |
| There is a jagged area in this field. | T is used to fix the jagged area by placing the T directly in there. |
| Alt. A |
| An inexperienced player places the T in a non-jagged area instead, creating two jagged areas (red circles). |
Thus, if there are too many jagged areas, use Ts to fix them, then clean up with Tetrises.
Suppose you have a field that is too jagged and divided. In that case, it is better to stabilize the stack with T pieces then clean it up with a Tetris.
| Diagram Set 3-20 | |
| 1 | 2 |
| The player resolves jaggedness quickly by placing two Ts in the two jagged areas. He then cleans up with a Tetris. |
While this may not lead to the best situation, doing so leads to greater consistency since you can go for speed rather than slow down to overthink about T-spins that take too long to plan. Here’s the most common stacking mistake by beginners:
| Diagram Set 3-21 | |
| A | |
| Please avoid placing Ts like this, which causes its top bump to jut out, as this makes the stack jagged and divided. |
This is, by far, the worst possible stacking that many beginner players get into. It divides the stack and can only be resolved by placing another T vertically on top to resolve jaggedness.
Summary and Conclusion
Proper stacking is the bane of many beginner and intermediate players. While this chapter may seem challenging for many to master, here’s the streamlined summary.
You only have to do four main things to ensure better stacking:
- Place pieces in a way that joins a field
- Prioritize flatter placements
- Manage jaggedness well
- Balance your stacking
The rest is just practice.
| Concept | Summarized Rules-of-Thumb |
| Flow | Minimize piece dependencies. Fill important cavities and corners to reduce thinking time. |
| Form | Minimize field division. Join pieces as far as possible for a non-divided field. Stabilize jagged areas fast with T pieces or skims. |
| Balance | Minimize creating more jaggedness when trying to stabilize the stack. |
